
Size
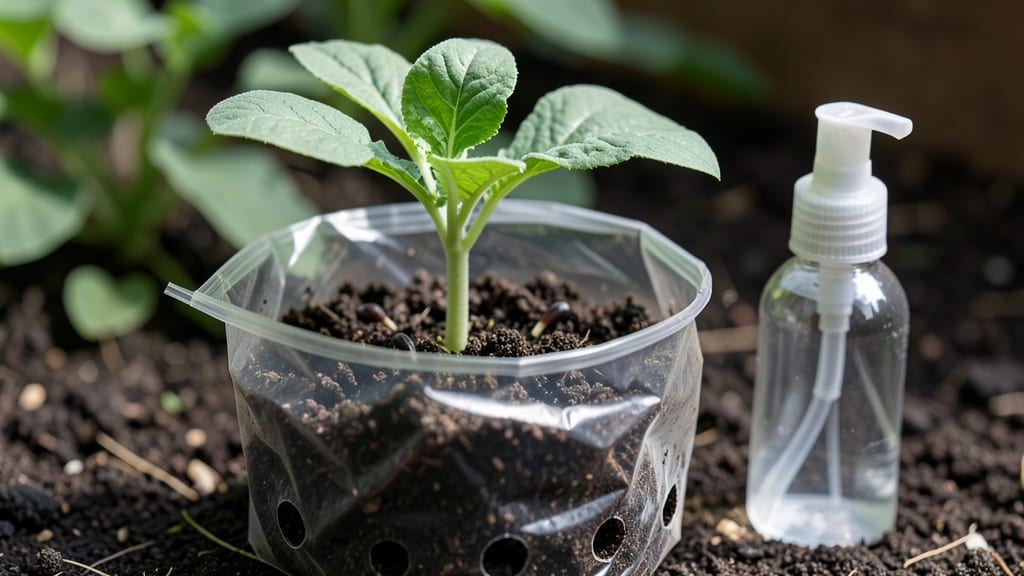
Growing seeds in a bag turns trash into a thriving garden—no mess, no fuss, just pure green potential. ✨ I’ve sprouted herbs and microgreens this way for years, and the simplicity of it never fails to impress.
You’ll need just a few supplies, a sunny spot, and a little patience to watch roots and shoots emerge within days.
The beauty of this method is its flexibility—use paper bags, plastic grocery bags, or even biodegradable ones. Fill with damp paper towels, a thin layer of soil, or just water for sprouts, then seal loosely.
Perfect for herbs like basil or cilantro, or fast-growing greens like radishes and peas. No dirt, no pots, just growth in a contained, portable system.
You’ll see tiny roots pushing through within 3-5 days, and tender shoots following close behind. The whole process stays tidy, with minimal watering and no transplant shock when you’re ready to move them outside.
It’s gardening for small spaces, busy schedules, or anyone who wants instant gratification from their seeds.
Works indoors or out, in apartments or on balconies—just adjust light exposure based on your space. Once the roots fill the bag, you can either transplant or snip fresh greens straight from the container. No waste, no clutter, just fresh food growing where you least expect it.
📚 In This Guide
- What you need
- Instructions
- Tips and common mistakes
- Wrapping up and next steps
What you need
- ● Seeds: Choose fast-sprouting varieties like alfalfa, lentils, mung beans, or radish (½ cup per bag).
- ● Ziplock bag: 1 gallon-sized (quart works for smaller batches).
- ● Water: ½ cup (room temperature or slightly warm).
- ● Paper towel or coffee filter: 1 sheet (cut to fit seeds comfortably).
- ○ Rubber band or twist tie: To secure the bag (optional but helpful).
- ● Spray bottle: For gentle hydration if seeds need extra moisture.
- ● Dark storage container: To block light during germination (e.g., a drawer or box).
- ● Mesh produce bag: For airflow if you prefer a breathable alternative.
- ● Notebook: To track sprouting progress (fun for kids or data lovers!).
Step-by-Step instructions for growing seeds in a bag
Here's how to grow fresh sprouts with zero mess using just a bag and a little patience.
🌱 Step 1: Choose and Prepare Your Seeds
Pick small seeds like alfalfa, radish, or broccoli—these grow best in bag sprouting. Rinse 1 tablespoon of seeds under cool water to remove debris, then drain thoroughly in a fine-mesh strainer. You want them damp but not soggy, like a wrung-out sponge. This step ensures clean, fast germination.
I like to spread the seeds on a paper towel to dry slightly before bagging. If they stay too wet, they'll mold before sprouting. For best results, use organic seeds—conventional seeds may carry wax coatings that slow growth.
🪴 Step 2: Set Up the Bag System
Take a quart-sized zip-top bag and cut a small hole (about ½ inch wide) in the bottom corner. This hole will let water drain while keeping seeds contained. Place the bag inside a bowl or sink to catch any drips—this prevents spills and makes cleanup effortless.
Add the rinsed seeds to the bag, then seal it three-quarters of the way (leave 2-3 inches open). Shake gently to distribute seeds evenly. The bag's air pocket will create the perfect humid environment for sprouting without needing a jar.
💧 Step 3: Hydrate and Position for Growth
Fill the bag with 1 cup of cool water, seal completely, and shake again to soak all seeds. Let it sit for 8-12 hours at room temperature (65-75°F). You'll see tiny sprouts forming within 24 hours—this is your signal to start the rinse cycle.
After soaking, unzip the bag and drain the water completely. Hold the bag over the sink and gently squeeze out excess moisture. Repeat this rinse-and-drain process 2-3 times daily for 3-5 days, depending on seed type. Keeping them damp (not wet) prevents mold while encouraging crisp growth.
⏰ Step 4: Harvest at Peak Freshness
When sprouts reach 1-2 inches long (usually 4-7 days), they're ready. Rinse one final time, then drain thoroughly. For best texture, harvest in the morning after a rinse—they'll be crunchier and more vibrant.
To use, simply open the bag and shake the sprouts into a bowl. Store any leftovers in the bag (resealed) in the fridge for 2-3 more days. The bag system keeps them fresh longer than any container I've tried—no wilting, no sliminess.
☀️ Step 5: Maintain for Continuous Sprouts
After harvesting, give the bag a final rinse, then store it upright in a cool, dark place (like your fridge). When you're ready for another batch, add 1 tablespoon of fresh seeds, reseal, and repeat the soaking process. This method lets you grow 4-5 batches from the same bag before it wears out.
Real talk: the first few times, you might forget to rinse often enough. If you see fuzzy white mold, toss the batch immediately—it's not safe to eat. But once you get the rhythm, you'll have fresh sprouts ready in under a week with almost no effort.
Tips & tricks for perfect bag sprouting
A few simple tricks will help you grow the freshest, crispest sprouts without the usual mess or hassle.
Seed Selection Tip: Not all seeds thrive in bag sprouting—stick with small, round seeds like alfalfa, radish, or broccoli. These germinate quickly and grow best in the confined space. Avoid larger seeds like sunflower or pumpkin; they need more room to develop properly. I've found that organic seeds sprout faster because they're free from chemical coatings that can inhibit growth.
Bag Setup Secret: The hole size in Step 2 matters more than you'd think. If it's too small, water pools inside and causes mold; too big, and seeds escape. Aim for that ½-inch hole—it's the Goldilocks zone for drainage. Pro tip: Use a clean, sharp pair of scissors to cut the hole precisely. Also, place the bag in a bowl or sink during the first soak to catch any drips—this prevents a soggy countertop disaster.
Temperature Matters: The instructions mention room temperature of 65-75°F, but here's the thing: if your kitchen runs cooler (like mine does in winter), your sprouts will take longer to grow. Move the bag to a warmer spot—near a sunny window or on top of the fridge—if you don't see sprouts forming within 24 hours. Warmth speeds up germination without risking mold.
Rinse Routine: The 2-3 times daily rinse in Step 3 is non-negotiable for crisp sprouts. I set a phone alarm every 8 hours to remind myself—consistency is key. After rinsing, give the bag a good squeeze to remove excess water. Too much moisture = mold; too little = dry, wilted sprouts. A damp paper towel pressed against the bag for 5 minutes after rinsing helps maintain humidity without over-saturating.
Pro Tips for Grow A Seed In A Bag
- A few simple tricks will help you grow the freshest, crispest sprouts without the usual mess or hassle.
- Seed Selection Tip: Not all seeds thrive in bag sprouting—stick with small, round seeds like alfalfa, radish, or broccoli.
- Bag Setup Secret: The hole size in Step 2 matters more than you'd think.
Frequently asked questions
about growing seeds in a bag—because we’ve got your curiosities covered! Whether you’re a first-timer or a seasoned sprouting pro, here are the answers you need to crush your zero-waste gardening game.How long does it take for seeds to sprout in a bag?
Sprouting time varies by seed type, but most seeds (like alfalfa or radish) sprout in 3–7 days with proper moisture and warmth. Check your bag daily—once you see tiny sprouts (about ½ inch tall), they’re ready to eat! Keep an eye out for mold (fuzzy spots) if they take longer than 10 days.
Do I need to rinse the seeds every day?
Yes! Rinse seeds 2–3 times daily with cool water to keep them fresh and prevent mold. Use a fine-mesh strainer or colander to drain excess water, then let them air-dry for 5–10 minutes before returning them to the bag. Think of it like giving your seeds a quick shower—no soggy surprises!
Can I use any seed in a sprouting bag?
Not all seeds are sprouting superstars! Stick to small, nutrient-dense seeds like alfalfa, radish, lentils, or broccoli. Avoid seeds with hard shells (like sunflower) or those prone to bitterness (like mustard). Always opt for organic, non-GMO seeds for the safest (and tastiest) results.
What if my sprouts smell bad or look moldy?
Mold (fuzzy white/green spots) or a funky smell means it’s time to toss the batch—don’t eat moldy sprouts! To prevent this, ensure proper airflow (shake the bag gently daily), rinse thoroughly, and store seeds in a cool, dark place when not sprouting. If seeds smell sour, they’ve over-fermented—start fresh!
How do I dispose of used sprouting bags?
Zero-waste hero mode activated! Toss the bag in your compost bin (if it’s food-safe) or recycle it if it’s plastic. For a fully compostable option, use a mesh bag—just bury it with kitchen scraps. No landfill waste here, just happy soil!
Wrapping up and next steps
Growing a seed in a bag is more than just a clever hack—it’s a simple, sustainable way to bring fresh greens to your table without the clutter. Whether you’re a beginner or a seasoned sprouting enthusiast, this method proves that zero-waste living doesn’t have to be complicated. 🌱✨
Now that you’re ready to dive in, why not start with one seed bag today? Try your hand at fast-growing seeds like radishes or lentils—they’re perfect for beginners!
Once you’ve mastered the basics, explore flavors, experiment with recipes, or even gift homemade sprouts to a friend. Every seed you grow is a step toward a greener, mess-free kitchen!