
Lawn
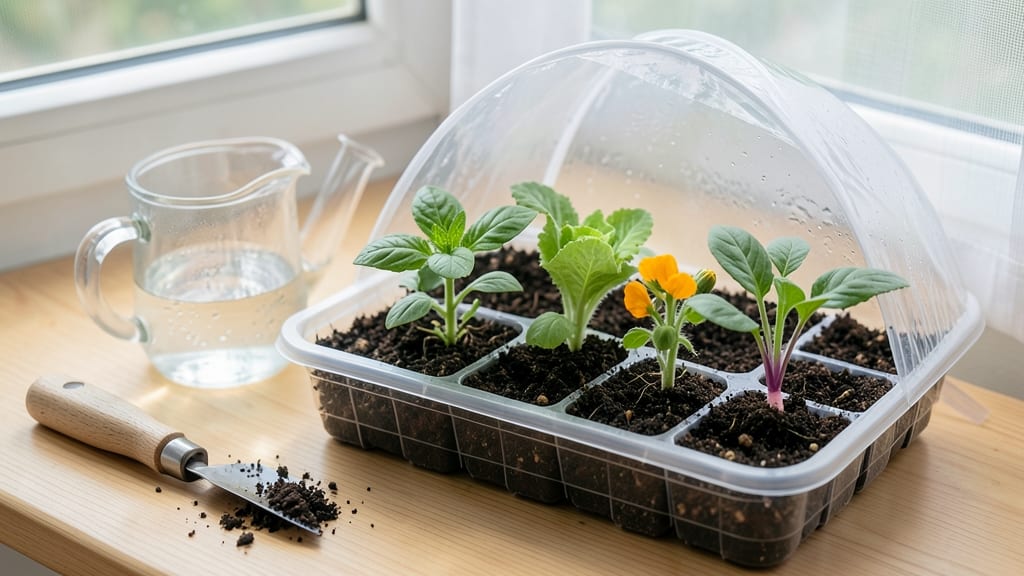
How to use a seed starter turns your kitchen counter into a nursery where every seed has a fighting chance. 🌱 The secret isn’t expensive equipment—it’s matching the right soil, containers, and light to what seeds actually need. I’ve lost count of the seedlings I’ve drowned or starved before I discovered this foolproof method that works for tomatoes, herbs, and even finicky flowers.
You’ll need just three things to get started: clean containers (yogurt cups work), a lightweight seed-starting mix, and a grow light or sunny windowsill. The soil should be damp but not soggy—think of it as a sponge that holds moisture without drowning roots.
Most problems (like leggy seedlings or damping off) come from either too much water or not enough light, so we’ll tackle those head-on.
By the time you’re ready to transplant, your seedlings will be sturdy, dark green, and packed with roots—exactly what you want to avoid the shock of moving them outside.
The best part? You’ll save money, access varieties that don’t sell as transplants, and get a head start on the growing season that makes all the difference.
Whether you’re a beginner or a pro looking to fine-tune your technique, this method scales to any space or budget. Let’s get those seeds sprouting right the first time—no black thumbs required.
📚 In This Guide
- What you need
- Instructions
- Tips and common mistakes
- Wrapping up and next steps
What you need
- ● Seed starter trays or pots: 2–4 inch deep cells or small pots (biodegradable options are eco-friendly!)
- ● Seed starting mix: Lightweight, sterile potting soil (avoid garden soil—it’s too dense!). Aim for 1–2 cubic feet per tray.
- ● Seeds: Choose high-quality, fresh seeds (check the packet for planting depth and spacing). Start with 2–3 seeds per cell for better germination rates.
- ● Watering can or spray bottle: A fine-mist setting prevents disturbing seeds or soil.
- ○ Clear plastic dome or plastic wrap: Helps retain moisture and warmth (optional but highly recommended for humidity-loving plants).
- ● Grow lights or sunny windowsill: 12–16 hours of light daily (grow lights are ideal for consistent growth).
- ● Labels and markers: Small sticks or plant labels + a permanent marker to track seed types.
- ● Heating mat: Speeds up germination for cool-weather crops (like peppers or tomatoes).
- ● Fertilizer (low-dose): A balanced, water-soluble fertilizer (e.g., 5-10-5) to use after sprouts appear.
- ● Humidity tray: A shallow tray filled with pebbles and water to boost moisture levels.
- ● Tweezers or small spoon: For delicate seed handling (especially tiny seeds like herbs).
- ● Timer: To automate grow light cycles if you’re using artificial lighting.
Step-by-Step guide to using a seed starter
Here's how to turn a simple seed starter into your secret weapon for faster, stronger seedlings.
🌱 Step 1: Prepare Your Seed Starter and Trays
Start by filling your seed starter trays with the sterile seed-starting mix—never garden soil. I like to fill each cell about ¾ full and then press down gently so the mix is firm but not compacted. This creates the perfect balance for roots to establish without struggling through air pockets.
Use a spray bottle to mist the mix until it feels evenly damp, like a wrung-out sponge. You want moisture without puddles—think "damp, not soggy." This ensures seeds won't rot before they sprout. If your starter has a humidity dome, place it on top now and set the whole thing in a warm spot, ideally between 70-75°F.
🌱 Step 2: Plant Your Seeds at the Right Depth
Check the seed packet for depth guidelines, but a good rule of thumb is to plant seeds at a depth twice their diameter. For tiny seeds like lettuce, that’s just a sprinkle on top; for larger ones like beans, go ½ inch deep. I use a toothpick to make a small hole—it’s precise and prevents over-deep planting.
Drop 1-2 seeds per cell (just in case one doesn’t sprout) and cover lightly with more mix. Press gently to ensure good seed-to-soil contact. If your seeds need light to germinate (like petunias), don’t cover them at all—just press them into the surface. Mist again with water until the soil looks uniformly damp.
💧 Step 3: Maintain Ideal Conditions for Germination
Keep the humidity dome in place until you see the first sprouts—usually 5-14 days, depending on the plant. Check daily for condensation inside the dome; if it’s foggy, you’re good. If it’s dry, mist the soil lightly. The goal is to keep the environment cozy but not swampy.
Once seedlings emerge, remove the dome immediately to prevent damping-off, a fungal disease that turns stems to mush overnight. Place the tray under grow lights or a sunny window (south-facing is best). Seedlings need 12-16 hours of light daily—without it, they’ll stretch toward the light and become weak.
☀️ Step 4: Care for Seedlings Until Transplanting
Water from the bottom by placing the tray in a shallow dish of water for 10-15 minutes. This encourages roots to grow downward instead of sitting in wet soil. After watering, let the tray drain completely—you’ll know it’s ready when the bottom feels dry to the touch.
When seedlings have 2-3 true leaves (not the first tiny cotyledons), it’s time to thin or transplant. Use scissors to snip unwanted seedlings at soil level—this avoids disturbing the roots of the ones you’re keeping. If your starter has individual cells, you can transplant whole cells into larger pots without disturbing roots.
✂️ Step 5: Harden Off Before Moving Outdoors
Start hardening off seedlings 1-2 weeks before your last frost date. Move the tray outside to a shaded, sheltered spot for 1 hour the first day, gradually increasing time each day. Watch for wilting—if it happens, they’re not ready yet. You’ll know they’re hardened off when they can handle a full day outside without stress.
Transplant on a cloudy day or in the evening to reduce shock. Water deeply after planting to help roots establish. With a seed starter, you’ll have robust, ready-to-grow plants that’ll thrive in your garden—no more weak, leggy seedlings!
Tips & tricks for perfect seedling success
These simple strategies will help you avoid common pitfalls and maximize your seed starter's potential every time.
Soil Consistency Matters: When filling your seed starter trays with sterile seed-starting mix, aim for a texture that's firm but not compacted—like a well-wrung sponge. This balance prevents air pockets that can stunt root growth. I like to press down gently with my fingers until the mix holds its shape but still feels light when lifted. This creates the ideal environment for roots to establish quickly without struggling.
Lighting is Everything: After removing the humidity dome in Step 3, place your seedlings under grow lights or a south-facing window immediately. Those crucial 12-16 hours of daily light prevent leggy seedlings by ensuring proper photosynthesis. If you notice seedlings stretching toward the light source, they're not getting enough—consider adding supplemental lighting or rotating the tray daily for even growth.
Watering Technique: The 10-15 minute bottom-watering method in Step 4 is a game-changer. Use a shallow dish with about ½ inch of water and let the tray soak up moisture from below. This encourages roots to grow downward rather than sitting in soggy surface soil. After watering, always let the tray drain completely—you'll know it's ready when the bottom feels dry to the touch, usually within 10-15 minutes.
Pro Tips for Use Seed Starter
- These simple strategies will help you avoid common pitfalls and maximize your seed starter's potential every time.
- Soil Consistency Matters: When filling your seed starter trays with sterile seed-starting mix, aim for a texture that...
- Lighting is Everything: After removing the humidity dome in Step 3, place your seedlings under grow lights or a south...
Frequently asked questions
Got questions about seed starters? You're not alone—every gardener starts somewhere! Here are answers to the most common concerns to help you grow with confidence.
What’s the best time to start seeds indoors with a seed starter?
Timing depends on your plants! For most vegetables (like tomatoes or peppers), start seeds 6–8 weeks before your last frost date. Check seed packets for specific guidelines—cool-season crops (e.g., lettuce) can go in earlier. Use a local frost calendar to plan!
Can I use a seed starter in cold weather or without grow lights?
Yes, but with adjustments! If temps drop below 50°F (10°C), move your starter to a sunny windowsill or under a basic LED bulb (12+ hours/day). For grow lights, even a cheap 4-foot fluorescent bulb works—just keep it 2–4 inches above seedlings. Cold-hardy seeds (e.g., spinach) may not need lights at all!
Why are my seedlings stretching tall and weak (a condition called "leggy")?
Leggy seedlings happen from too little light or overcrowding. Fix it by:
No need to panic—just give them more light ASAP! Get creative! Repurpose:
Just ensure proper drainage and sterilize containers with soapy water or boiling water. This is usually damping-off fungus, caused by overwatering or poor airflow. Act fast:
Prevention is key—water only at the soil level, not overhead!
What can I reuse as a DIY seed starter if I don’t have a kit?
My seedlings have black spots or mold—what’s wrong?
Wrapping up and next steps
Mastering how to use a seed starter is your ticket to a thriving garden—whether you're a beginner or a seasoned green thumb! 🌱 With the right setup, patience, and care, you’ll watch tiny seeds transform into lush, healthy plants ready for transplanting.
The key is consistency: monitor moisture, provide light, and stay patient as nature does its magic.
Now that you’ve got the know-how, roll up your sleeves and start sowing! 🌿 Try your hand at a few easy seeds like herbs or lettuce to build confidence, then expand to your dream veggies or flowers. Happy gardening—your future harvest is waiting!