
Lawn
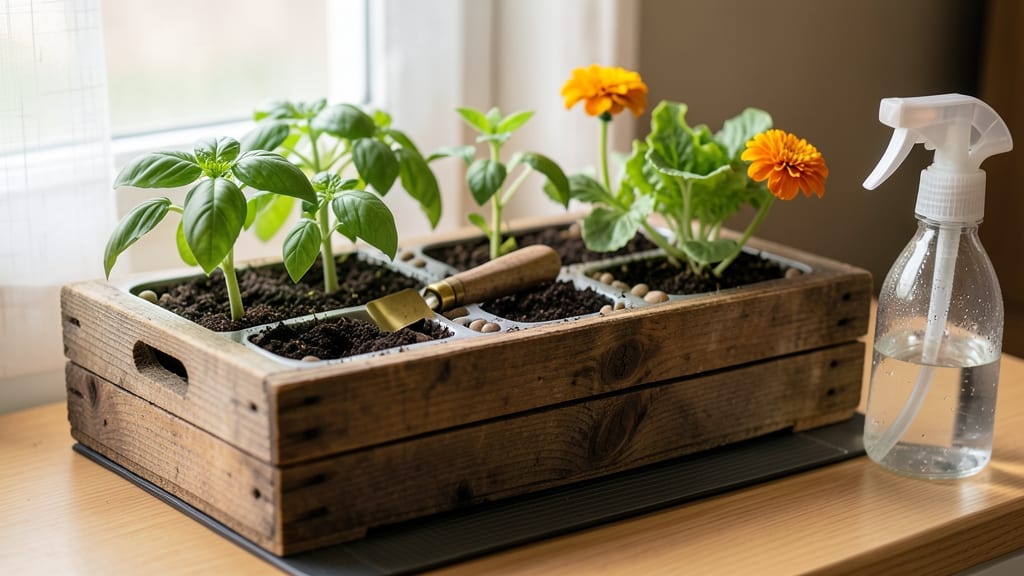
My first DIY seed starter tray cut seedling time in half—no more waiting weeks for roots to catch up. 🌱 The secret is stacking recycled containers into a self-watering nursery that keeps soil moist without drowning delicate sprouts, while the modular design lets you move everything to the sunniest spot as seedlings grow.
You’ll need just three supplies: shallow containers (egg cartons, plastic clamshells, or even old takeout trays), a drill or sharp knife, and a clear plastic dome or ziplock bag for humidity.
Sterilizing with a 10-minute boiling water bath prevents damping-off disease, and a simple soil mix of 60% seed starter, 30% perlite, and 10% compost gives roots the perfect head start.
By week three, you’ll see stocky seedlings with double the root mass of store-bought transplants—ready to handle transplant shock like pros. The stackable design saves space on counters or under grow lights, and you can adjust humidity by lifting the dome as leaves unfurl.
Works for everything from tiny lettuce seeds to 6-inch-tall tomato starts, and the same setup adapts for winter windowsill growing or summer greenhouse setups. Here’s how to build yours in under an hour.
📚 In This Guide
- What you need
- Instructions
- Tips and common mistakes
- Wrapping up and next steps
What you need
- ● Base Material: Wooden pallets (2-3), untreated and clean (e.g., cedar or pine)
- ● OR 1x6 or 1x8 pine boards (6-8 ft long, ½-inch thick)
- ● Fasteners: 1-inch deck screws (100-150, stainless steel or galvanized)
- ○ Wood glue (optional but recommended for extra strength)
- ● Cutting & Assembly: Miter saw or circular saw (for precise cuts)
- ● Drill/driver (with Phillips or square drive bit)
- ● Measuring tape and pencil
- ● Seed Starting Supplies: Seed starting mix (sterilized, peat-based or coconut coir blend)
- ● Small seeds (e.g., herbs, flowers, or veggies like basil or tomatoes)
- ● Spray bottle (for gentle watering)
- ● Sandpaper (80-120 grit) for smoothing rough edges
- ● Wood stain or paint (non-toxic, if desired for aesthetics)
- ● Clear plastic wrap (to create a mini greenhouse effect)
- ● Drainage holes template (pre-cut stencil for consistency)
- ● Label tags (for tracking seed varieties)
Step-by-Step instructions for building DIY seed starter trays
Here's how to create a stackable nursery that speeds up root growth and keeps seedlings organized.
🪴 Step 1: Gather Materials for a Sturdy Base
Start with a 4-inch deep wooden crate (unfinished pine works best) or a plastic storage bin with a lid. The key is a 12-inch by 24-inch footprint—this gives you enough space for 40+ seed cells while keeping the structure manageable. If using wood, sand all edges smooth to prevent splinters that could damage delicate seedlings. I like to line the bottom with landscape fabric to prevent soil from falling through gaps, especially if using recycled materials like pallet wood.
For drainage, drill ¼-inch holes along the bottom edge every 2 inches using a 1/16-inch drill bit. Space them evenly so water can escape freely but soil won’t wash out. Test your holes by filling the tray with water—if it drains within 30 seconds, you’re good. Too few holes mean soggy roots; too many mean poor moisture retention. Cover the holes with window screen stapled over them to keep soil in while allowing water to flow.
🌱 Step 2: Divide Into Cells for Individual Seedlings
Use cardboard egg cartons or biodegradable seedling trays to create removable cells. Cut the egg cartons into 2-inch squares for small seeds like lettuce, or 3-inch squares for larger seeds like tomatoes. Press the cells firmly into the tray, ensuring they sit flush with the top edge—this prevents soil from spilling into neighboring cells when watering. For a more permanent setup, use plastic dividers snapped into place along the tray’s interior edges.
Here’s the thing—if you’re using egg cartons, soak them in water for 10 minutes before assembling. This prevents them from absorbing moisture from the soil later, which can dry out your seedlings. For extra stability, glue the dividers to the tray with non-toxic wood glue if you’re building a long-term nursery. Label each cell with the seed variety and planting date on small flags inserted at the back—trust me, you’ll forget which is which after a week.
💧 Step 3: Fill and Moisten the Tray for Optimal Germination
Fill each cell with sterile seed-starting mix (never garden soil—it’s too dense and may harbor pathogens). Press the mix down gently but firmly so it holds shape but doesn’t compact. Leave ¼ inch of space at the top of each cell to accommodate watering without overflow. Moisten the mix until it feels like a wrung-out sponge—damp but not dripping. Overwatering now will cause the cells to collapse or rot.
For faster germination, place the tray in a humidity dome or cover it with clear plastic wrap secured with rubber bands. This traps warmth and moisture, which is critical for seeds like peppers and tomatoes that need 75-85°F to sprout. Check daily for condensation—if the plastic fogs up, the humidity is perfect. Once 50% of seeds have sprouted, remove the cover immediately to prevent damping-off disease, which turns seedlings to mush overnight.
☀️ Step 4: Position for Light and Monitor Growth
Move the tray to a south-facing window or under a grow light within 2-4 inches of the seedlings. Without enough light, seedlings stretch toward the source (called "legginess") and become weak. You’ll know your setup is right when seedlings have thick stems, dark green leaves, and compact spacing between leaves. Rotate the tray a quarter turn daily so plants grow straight instead of leaning.
Water from the bottom by placing the tray in a shallow tray of water for 10-15 minutes. This encourages roots to grow downward and strengthens the seedlings. Avoid wetting the leaves—damp foliage invites fungal diseases. After 3-4 weeks, when seedlings show 2-3 true leaves, they’re ready to transplant. Gently pop them out of the cells, keeping the root ball intact, and transfer to larger pots or the garden.
⏰ Step 5: Stack and Store for Future Use
Once emptied, clean the tray with a 10% bleach solution (1 part bleach to 9 parts water) to kill any remaining pathogens. Rinse thoroughly and let it dry completely in the sun. Stack empty trays with desiccant packets inside to absorb moisture and prevent mold. Store in a cool, dry place until your next planting session. For long-term use, apply a non-toxic wood sealant to the tray annually to extend its life—this keeps the wood from warping or cracking over time.
Real talk: Your first tray might not be perfect, and that’s okay. The goal is fast root growth and organized seedlings, not perfection. Adjust cell sizes based on what you’re growing, and don’t hesitate to repurpose materials like plastic containers or old baking trays if you’re in a pinch. The key is keeping it simple and ensuring your seedlings get the light, moisture, and space they need to thrive.
Tips & tricks for perfect DIY seed starter trays
Between us, these small adjustments can make all the difference in your seedlings' success rate—and save you from starting over.
Drainage Test: That 30-second water test in Step 1 is non-negotiable. I've seen trays with holes spaced too far apart leave soggy bottoms that invite root rot. If your water drains slower than 30 seconds, add one more hole every 2 inches until you hit that perfect balance. Too many holes? The soil will dry out too quickly, and your seedlings will struggle to establish roots.
Cell Size Matters: For Step 2, remember that cell size directly impacts root growth. The 2-inch squares work for lettuce, but if you're growing larger seeds like tomatoes, those 3-inch squares become essential. I once tried using uniform 2-inch cells for everything—my tomato seedlings became root-bound before they even sprouted properly. Adjust based on what you're planting!
Humidity Dome Hack: In Step 3, when you cover your tray with plastic wrap, don't just slap it on and forget it. Check for condensation daily—this is your humidity gauge. If the plastic stays dry, add a damp paper towel underneath the tray. If it fogs up completely, you're in the perfect 75-85°F zone. Remove the cover only when 50% of seeds sprout, or you risk damping-off disease that can wipe out your seedlings overnight.
Light Positioning: That 2-4 inch distance from grow lights in Step 4 is crucial but often misunderstood. Too close (under 2 inches) burns seedlings, while too far (over 4 inches) causes leggy growth. I use a simple ruler to measure and adjust my lights weekly as seedlings grow. And remember—rotate your tray daily! I've seen seedlings grow at crazy angles when trays aren't rotated, making them difficult to transplant later.
Pro Tips for Diy Seed Starter Tray
- Between us, these small adjustments can make all the difference in your seedlings' success rate—and save you from sta...
- Drainage Test: That 30-second water test in Step 1 is non-negotiable. I've seen trays with holes spaced too far apart...
- Cell Size Matters: For Step 2, remember that cell size directly impacts root growth. The 2-inch squares work for lett...
Frequently asked questions
Got questions about DIY seed starter trays?
Here are answers to the most common ones—whether you're a first-time gardener or a seasoned pro looking to optimize your setup.
What’s the best material for a DIY seed starter tray?
Recycled materials like egg cartons, plastic containers, or even toilet paper rolls work great for small seeds. For larger, stackable trays, opt for biodegradable peat pots or repurposed wooden crates with drainage holes. Avoid non-recyclable plastics if you plan to transplant seedlings—roots can get tangled!
How long does it take for seeds to germinate in a starter tray?
Germination time varies by plant: fast growers like radishes sprout in 4–7 days, while tomatoes or peppers may take 7–21 days. Keep trays in a warm spot (70–85°F) with consistent moisture. Use a humidity dome or plastic wrap to speed things up if your space is dry.
Can I reuse a DIY seed starter tray?
Yes! Clean trays thoroughly with soapy water and disinfect with a 1:9 bleach-water solution (rinse well). Sterilization prevents mold and disease. Avoid reusing soil—replace it with fresh, sterile potting mix each season for best results.
Why are my seedlings leggy or weak in the starter tray?
Leggy seedlings usually mean they’re stretching for light. Move trays to a sunny window or under grow lights (12–16 hours/day). If they’re top-heavy, bury them deeper or use a popsicle stick to prop them up. Avoid overcrowding—thin seedlings if they’re competing for space!
What’s a budget-friendly alternative to buying starter trays?
Try these zero-cost options:
- Egg cartons (cut into cups for tiny seeds)
- Plastic milk jugs (cut and poke drainage holes)
- Newspaper pots (roll into tubes, moisten, and plant directly)
- Muffin tins (line with coffee filters for easy transplanting)
Wrapping up and next steps
Creating your own DIY seed starter tray is a game-changer for gardeners—it’s budget-friendly, eco-conscious, and packed with benefits like faster root growth and stronger seedlings! 🌱 With just a few household materials, you’ve got a stackable nursery that maximizes space and efficiency.
Whether you’re a beginner or a green thumb, this project proves that big results start small.
Now that you’re ready to dive in, grab your supplies and start sowing! Watch your garden thrive with healthy, robust plants that’ll make your outdoor space the envy of the neighborhood. Happy planting! 🌿