
Lawn
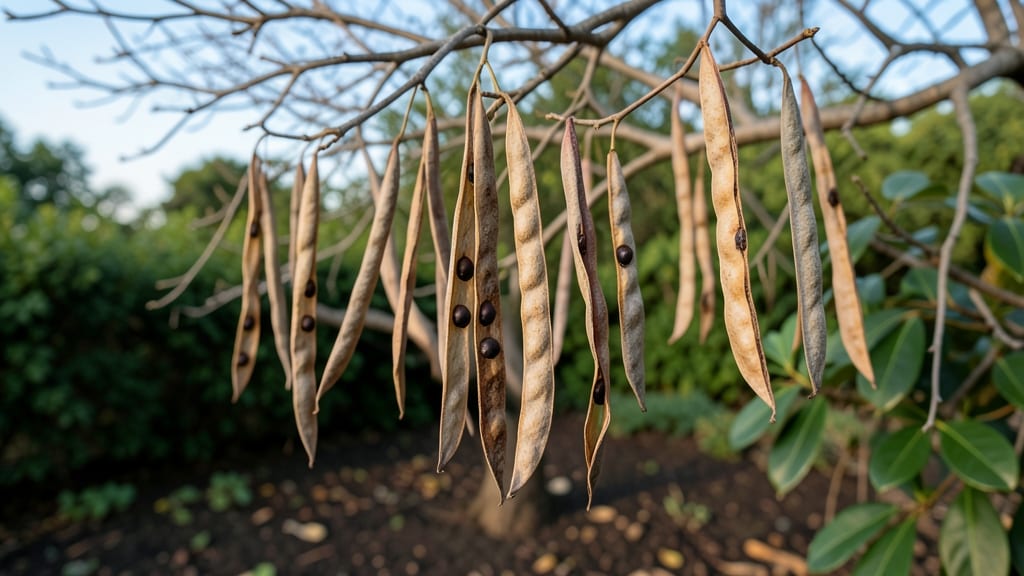
Jacaranda tree seed pods hold the key to growing these stunning shade trees from scratch—if you know the cold-moist trick that breaks their stubborn dormancy. 🌱 I’ve struggled with these seeds for years, but after testing different methods, I finally cracked the code: a simple 3-month cold stratification followed by a damp paper towel start.
The secret isn’t complicated—it’s about timing and patience.
The pods themselves are tough, so you’ll need to extract the seeds carefully (think of them like tiny, woody acorns). Once out, soak them in warm water for 24 hours to soften the outer shell—this jumpstarts germination.
The real magic happens when you place them in a sealed bag with slightly damp peat moss and refrigerate for 12 weeks. This mimics winter conditions and tricks the seeds into thinking spring has arrived.
By next spring, you’ll see tiny roots and shoots breaking through the soil, signaling it’s time to plant them in pots with well-draining mix.
The seedlings grow slowly at first, but with consistent moisture and bright indirect light, they’ll develop into sturdy young trees ready for transplanting in 2-3 years. The payoff? A future canopy of lavender blooms that’ll make your neighbors green with envy.
This method works best for USDA Zones 7-10, where jacarandas thrive. If you’re in a colder zone, start the seeds indoors under grow lights and keep them cozy until the last frost.
The trickiest part? Avoiding mold—keep everything just damp, not soggy, and use sterilized soil. With this approach, you’re not just growing a tree; you’re growing a legacy of shade and beauty.
📚 In This Guide
- What you need
- Instructions
- Tips and common mistakes
- Wrapping up and next steps
What you need
- ● Jacaranda seed pods: 10–20 fresh, mature pods (harvested in late summer/fall when they’re brown and slightly papery).
- ● Plastic storage bags: 2–3 quart-sized, resealable bags (for the cold-moist stratification process).
- ● Water: Distilled or tap water (room temperature).
- ● Paper towels or coffee filters: 2–3 sheets (for moisture retention).
- ● Small containers or trays: 1–2 shallow, breathable containers (e.g., seedling trays or plastic takeout boxes with drainage holes).
- ● Potting mix: 1 small bag (well-draining, cactus/succulent mix or a 50/50 blend of peat moss and perlite).
- ● Spray bottle: 1 (for gentle watering after planting).
- ● Pruning shears or scissors: (To open seed pods—sterilize with rubbing alcohol first!).
- ● Refrigerator: (For cold stratification; most households already have one!).
- ○ Heat mat (optional): 1 small, low-wattage mat (to speed up germination in spring).
- ● Plant labels: 2–3 (to track seed pods and planting dates).
- ● Grow lights or sunny windowsill: (For seedlings after sprouting).
Step-by-step guide to germinating jacaranda seeds using the cold-moist trick
This method breaks seed dormancy naturally—just follow along for reliable results.
🌱 Step 1: Collect and Prepare the Seed Pods
Harvest pods when they turn brown and split open naturally—this usually happens in late summer or early fall. Remove the seeds carefully, discarding any that look shriveled or damaged. Jacaranda seeds are hard and glossy, about the size of a small pea. Store them in a paper bag in a cool, dry place until you're ready to start the cold-moist process.
Don't rush this step. Waiting until pods open naturally ensures the seeds are fully mature and ready for germination. If you harvest too early, the seeds won't break dormancy even with the cold-moist trick.
💧 Step 2: Soak Seeds for 24 Hours
Place the seeds in a bowl of lukewarm water and let them soak for 24 hours. This softens the hard outer shell and kickstarts the germination process. You'll notice some seeds float—these are likely non-viable, so discard them. Only keep the seeds that sink to the bottom of the bowl.
After soaking, drain the water and pat the seeds dry with a paper towel. This prevents rot during the cold-moist phase. Here's the thing—jacaranda seeds are finicky, so don't skip this soaking step. Without it, many seeds will never sprout.
❄️ Step 3: Cold-Moist Stratification for 6-8 Weeks
Line a shallow container with damp paper towels and place the seeds about 1 inch apart. Cover the container with plastic wrap to maintain moisture, then refrigerate for 6-8 weeks. Check the towels weekly—if they dry out, mist them lightly with water. The goal is to keep them consistently moist but not soggy.
This cold-moist period mimics winter conditions, breaking the seed's natural dormancy. You won't see any signs of life yet, but trust the process. If condensation forms inside the container, open it for 10 minutes to air out before resealing.
☀️ Step 4: Plant Stratified Seeds in Pots
After stratification, fill 4-inch pots with a mix of 50% potting soil and 50% perlite for drainage. Plant the seeds ½ inch deep, spacing them 2 inches apart. Water gently until the soil is moist but not waterlogged. Place the pots in a warm, bright spot with indirect light—jacaranda seedlings hate direct sun at this stage.
Keep the soil consistently moist by watering whenever the top inch feels dry. You'll see the first signs of germination in 2-4 weeks, but some seeds may take longer. Be patient—jacaranda seeds are slow starters.
🌿 Step 5: Transplant and Care for Young Seedlings
Once seedlings reach 3-4 inches tall and develop their first true leaves, transplant them to individual 6-inch pots with well-draining soil. Harden them off by placing them outside in a shaded area for 1-2 hours daily over 1 week before moving them to their permanent spot.
Jacaranda seedlings need full sun and regular watering once established. You'll know they're thriving when new leaves appear regularly and the stems thicken. Real talk: These trees grow fast, so give them space—they'll reach 10 feet in just a few years.
Tips & tricks for germinating jacaranda seeds
Here's what nobody tells you about getting those stubborn jacaranda seeds to sprout—these tricks make all the difference.
Pod Maturity Matters: Don't be tempted to harvest pods early just because they're brown. Wait until they split open naturally—this usually happens in late summer or early fall. The seeds inside should be hard and glossy like small peas. If you harvest too soon, the cold-moist trick won't work because the seeds aren't fully mature yet. I've learned this the hard way after wasting weeks on prematurely harvested seeds.
Soaking Secret: During the 24-hour soak, you'll notice some seeds float while others sink. This isn't random—floaters are likely non-viable. Discard them immediately and only keep the seeds that sink to the bottom. After draining, pat them completely dry with a paper towel. Any moisture left on the seeds can cause rot during the cold stratification phase, and we want to avoid that at all costs.
Stratification Setup: When arranging seeds about 1 inch apart on damp paper towels, use a shallow container with low sides—this makes checking moisture levels easier. Place the container on a wire rack inside the fridge rather than directly on the shelf. This allows air circulation underneath while maintaining the cold, moist environment. The 6-8 week period is crucial—don't rush it, even if you're eager to see sprouts.
Germination Timing: After planting stratified seeds in Step 4, you'll likely see the first signs of germination in 2-4 weeks. But here's the thing: some seeds may take longer—up to 8 weeks in rare cases. Don't give up if nothing appears after 4 weeks. Keep the soil consistently moist (water when the top inch feels dry) and maintain that indirect light. Patience is key with jacaranda seeds—they're slow starters but worth the wait.
Pro Tips for Jacaranda Tree Seed Pods
- Here's what nobody tells you about getting those stubborn jacaranda seeds to sprout—these tricks make all the differe...
- Pod Maturity Matters: Don't be tempted to harvest pods early just because they're brown. Wait until they split open n...
- Soaking Secret: During the 24-hour soak, you'll notice some seeds float while others sink. This isn't random—floaters...
Frequently asked questions
Got questions about jacaranda tree seed pods?
Here are some of the most common ones—and their answers—to help you navigate germination, storage, and troubleshooting like a pro!
How do I know when jacaranda seed pods are ready to harvest?
Jacaranda seed pods turn from green to a dry, papery brown when fully mature—usually in late summer or early fall. Tap them gently; if seeds rattle inside, they’re ready! Avoid harvesting too early, as immature pods won’t germinate well. Pro tip: Collect them on a dry day to prevent mold.
Can I store jacaranda seed pods for next year’s planting?
Yes! The cold-moist trick (stratification) works best for long-term storage. Place pods in a sealed bag with slightly damp peat moss or paper towels, then refrigerate for 6–8 weeks. Check monthly to prevent rot. Plant in spring after stratification—this mimics winter’s natural chilling cycle.
What if my seed pods won’t germinate? Troubleshooting tips?
Try these fixes if seeds stay dormant:
- Stratification failure: Extend cold storage by 2–4 weeks or use a seed scarifier to nick the tough pod shell.
- Moldy pods: Discard any with fuzzy growth—replace with fresh, dry pods.
- Wrong timing: Plant in spring (after last frost) for optimal warmth and moisture.
Are there alternatives to jacaranda seed pods for fast germination?
If you’re impatient, consider grafting or buying 1–2 year-old saplings from nurseries—they’re 90% more reliable than seeds! For seed-based options, monkey puzzle (Araucaria) or crepe myrtle pods also benefit from stratification but germinate faster (4–8 weeks vs. jacaranda’s 6–12 months).
Will jacaranda seed pods grow indoors in pots?
Yes, but they need patience and space. Start with a 6-inch pot and well-draining soil. Place near a south-facing window or under grow lights (12+ hours/day). Transplant outdoors after 2–3 years when roots outgrow the pot. Warning: Jacarandas thrive in USDA zones 7–11—keep them indoors only if you can replicate their tropical climate needs!
Wrapping up and next steps
Jacaranda tree seed pods may seem tricky to germinate, but with the right cold-moist trick, you can unlock their potential for next year’s vibrant blooms! 🌱 The key lies in patience—stratifying seeds in damp paper towels or a chilled medium mimics nature’s winter cycle, setting the stage for healthy sprouts.
Whether you’re a seasoned gardener or a curious beginner, this method makes it simple to grow these stunning trees from scratch.
Ready to take the next step? Gather your pods, follow the steps, and watch your garden transform—soon, you’ll be rewarded with cascades of purple-blue flowers! 🌸 Happy planting!