
Propagation
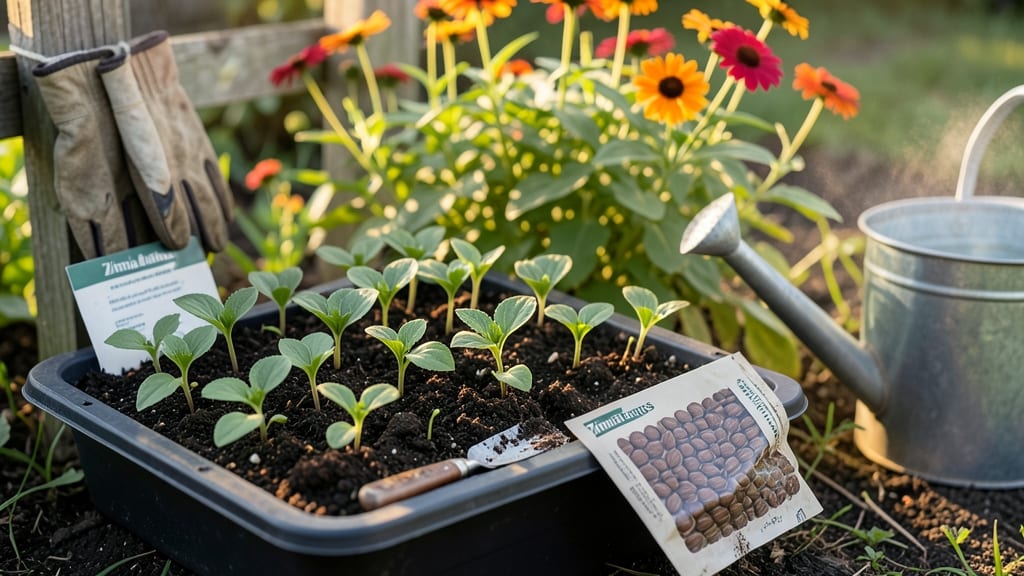
Growing zinnias from seed to flower is one of those gardening experiences that makes every morning watering feel like a celebration. 🌻 The first time you see those bright, papery blooms pop up just 60 days after planting, you'll understand why gardeners swear by them—especially the Sunburst variety with its bold, sunlit petals.
Unlike fussy annuals, zinnias thrive on neglect, making them perfect for beginners who want instant color without the fuss.
The secret starts with warm soil and patience—zinnias despise cold starts, so wait until after your last frost when nighttime temps stay above 50°F. Plant seeds just ¼-inch deep in well-draining soil, and keep them moist (not soggy) until those first green shoots appear in 7-14 days.
The real magic happens when you thin seedlings to 12 inches apart—this gives each plant room to grow into a bushy, bloom-covered powerhouse.
By week 8, you’ll be pinching back the tips of leggy seedlings to encourage bushier growth, and by week 10, the first buds will form. Deadhead spent blooms weekly to trigger nonstop reblooming, and watch your garden transform into a sunburst of color that lasts until frost.
The best part? Zinnias attract pollinators like crazy, turning your patch into a buzzing, blooming ecosystem.
Works in full sun (6+ hours daily) and even tolerates slightly dry soil once established—ideal for hot, dry climates. For extra insurance, try starting seeds indoors 4-6 weeks before transplanting if your growing season is short.
Either way, you’ll have cut flowers in under two months, and that’s a gardening win.
📚 In This Guide
- What you need
- Instructions
- Tips and common mistakes
- Wrapping up and next steps
What you need
- ● Zinnia seeds: Choose from varieties like Benary’s Giant, Profusion, or Crystal (1–2 packets, ~50–100 seeds per packet).
- ● Seed-starting mix: Lightweight, sterile potting soil (1–2 small pots or a seed tray).
- ● Containers: For indoor starts: 2–3 inch biodegradable pots or cell trays (1–2 per seed).
- ● For direct sowing: Well-draining garden beds or containers (6+ inches deep).
- ● Watering can or spray bottle: With a fine mist nozzle for gentle hydration.
- ○ Grow lights or sunny windowsill: 6–8 hours of light daily (optional for indoor starts).
- ○ Gloves (optional): To protect hands from soil or thorns (some varieties have prickly stems!).
- ● Plant labels: To track varieties and planting dates.
- ● Fertilizer: Balanced, water-soluble fertilizer (5-10-5 or 10-10-10, diluted to half-strength).
- ● Pruners or scissors: For deadheading spent blooms (encourages more flowers!).
- ○ Mulch (optional): Straw or shredded leaves to retain moisture and suppress weeds.
- ● A location with full sun (6+ hours daily)—zinnias love basking in warmth!
- ● Warm soil: Wait until nighttime temperatures stay above 50°F (10°C) (zinnias hate frost!).
- ● Patience: Germination takes 7–14 days; blooms appear in 60–75 days!
Step-by-step instructions for growing zinnias from seed to flower
Here's how to coax those vibrant Sunburst blooms from tiny seeds in just 60 days—no fancy equipment needed.
🌱 Step 1: Start Seeds Indoors 6-8 Weeks Before Last Frost
Fill small seed trays with a sterile seed-starting mix and moisten it until damp but not soggy. I like to press the mix down gently with my fingers so it's firm enough to hold seeds in place. Zinnia seeds are tiny, so I use a toothpick to place 1-2 seeds per cell at a depth of just ¼ inch—any deeper and they'll struggle to emerge.
Cover the tray with a clear plastic dome or plastic wrap to retain moisture and warmth. Place it in a warm spot, ideally 70-75°F, like on top of the fridge. Germination usually takes 7-14 days, but don't be surprised if some seeds take longer—zinnias are patient like that. Once the first true leaves appear, remove the dome immediately to prevent fungal issues.
☀️ Step 2: Provide Bright Light and Harden Off Seedlings
Zinnia seedlings need 14-16 hours of light daily to grow strong and compact. A south-facing window works, but I always supplement with a grow light to prevent leggy growth. Keep the light 2-3 inches above the seedlings and raise it as they grow. You'll know they're getting enough light when the leaves are dark green and the stems are thick rather than spindly.
About 10-14 days before transplanting, start hardening off the seedlings. Place them outside in a sheltered spot for 1-2 hours the first day, gradually increasing their time outdoors each day. This toughens them up so they don't get shocked when moved to the garden. Watch for any wilting—if you see that, they're not ready for the full sun yet.
🪴 Step 3: Transplant Seedlings to the Garden
Choose a sunny spot in your garden that gets full sun (6+ hours daily). Zinnias love warmth and thrive in well-draining soil. I dig small holes just slightly larger than the root ball of each seedling and space them 8-12 inches apart—closer for dwarf varieties, farther for taller types. Gently remove the seedlings from their trays, keeping the roots intact, and place them in the holes.
Fill the holes with soil and water deeply to settle everything in. I like to add a balanced fertilizer (10-10-10) to the soil at this stage to give the plants a strong start. Mulch around the base with 1-2 inches of straw or shredded leaves to keep the soil moist and suppress weeds. Avoid mulching too close to the stems—keep it 1-2 inches away to prevent rot.
💧 Step 4: Water and Fertilize for Continuous Blooms
Water zinnias at the base of the plant, keeping the soil consistently moist but not waterlogged. I usually water every 2-3 days, but adjust based on your climate—drought-tolerant zinnias will tell you when they're thirsty by drooping slightly in the afternoon. Once they perk up after a drink, you're good. Avoid wetting the leaves to prevent fungal diseases like powdery mildew.
Feed your zinnias every 2-3 weeks with a low-nitrogen fertilizer (5-10-10) to encourage flowering rather than leafy growth. I also deadhead spent blooms by pinching off the faded flowers with my fingers. This encourages the plant to produce more blooms and keeps them looking tidy. You'll see new buds forming within a week of deadheading—it's like magic!
✂️ Step 5: Enjoy and Extend the Blooming Season
Zinnias typically bloom 60-70 days after sowing, but with the right care, they'll keep producing flowers until the first frost. To extend the season, I cut back the plants by one-third after the first flush of blooms. This gives the plant a chance to regrow and produce another round of flowers. Just be sure to do this before the temperatures drop below 50°F at night.
Harvest flowers in the morning when they're fully open for the longest vase life. Cut the stems at an angle just above a leaf node, and place them in a bucket of water to keep them fresh. You'll love how these bright, cheerful blooms brighten up any garden or bouquet. And if you save the seeds from your best zinnias, you'll have an even better variety next year!
Tips & tricks for perfect zinnia cultivation
These simple strategies will help you transform tiny zinnia seeds into vibrant garden stars.
Germination Environment: The 70-75°F warmth recommendation isn't just ideal—it's critical. I've found that using a seedling heat mat set to 75°F speeds up germination from 7-14 days to just 5-7 days. Place your tray on this mat right after sowing, then remove it once sprouts appear. This consistent warmth mimics their natural tropical environment and prevents the uneven germination that can occur with fridge-top placement.
Lighting Technique: For the 14-16 hours of light requirement, I recommend using a LED grow light on a timer. Position it 2-3 inches above seedlings and set the timer for 14 hours on/10 hours off. The key is maintaining this distance—the closer the light, the faster seedlings grow but the more likely they'll become leggy. I adjust the height weekly as they grow, keeping the leaves just touching the light shade when fully extended. This prevents stretching while ensuring strong stems.
Transplanting Timing: When starting the 10-14 day hardening off process, I've learned to watch for specific signs rather than just days. Look for seedlings with 4-6 true leaves and stems that are ¼ inch thick at the base. These plants are ready for gradual outdoor exposure. Begin with just 1-2 hours in morning sun, then increase by 1 hour daily. If you notice wilting during this period, they're not ready—bring them back inside and try again the next day with slightly less time.
Season Extension: To maximize your blooming season, I recommend cutting back plants by one-third when nighttime temperatures stay above 50°F. This works best with varieties like Sunburst zinnias. After pruning, fertilize with 5-10-10 and increase watering to every 2 days for 2 weeks. You'll typically see new growth in 7-10 days, followed by another flush of blooms in 3-4 weeks. This technique can extend your harvest by 4-6 weeks in most climates.
Pro Tips for Zinnia From Seed To Flower
- These simple strategies will help you transform tiny zinnia seeds into vibrant garden stars.
- Germination Environment: The 70-75°F warmth recommendation isn't just ideal—it's critical. I've found that using a se...
- Lighting Technique: For the 14-16 hours of light requirement, I recommend using a LED grow light on a timer. Position...
Frequently asked questions
Got questions about growing zinnias from seed? You’re not alone!
Here are answers to the most common queries—from timing to troubleshooting—so your sunburst blooms thrive from start to finish.
How long does it take for zinnia seeds to sprout?
Zinnia seeds typically sprout in 5–14 days after planting, depending on soil warmth and moisture. Keep the soil consistently moist (but not soggy) and place seeds in a sunny spot or under grow lights. If germination takes longer than 2 weeks, check for fresh seeds or soil temperature (ideal: 70–75°F).
Why aren’t my zinnia seedlings growing fast enough?
Slow growth often stems from cool soil, lack of sunlight, or overcrowding. Thin seedlings to 12–18 inches apart (for tall varieties) and ensure they get 6+ hours of direct sun daily. If temps dip below 50°F, use a cloche or row cover to protect young plants.
Can I grow zinnias indoors before transplanting outdoors?
Yes! Start seeds indoors 4–6 weeks before your last frost using a sunny windowsill or grow lights. Use biodegradable pots to avoid root disturbance when transplanting. Harden off seedlings 1 week before moving outdoors by gradually exposing them to outdoor conditions (start with 1–2 hours/day).
What should I do if my zinnias develop holes or chewed leaves?
Holes or ragged leaves usually mean insect pests like aphids, Japanese beetles, or spider mites. Spray plants with neem oil or insecticidal soap for mild infestations. For severe damage, handpick beetles early in the morning or use row covers to protect blooms. Healthy plants with good airflow resist pests better!
How do I encourage zinnias to rebloom after the first flush of flowers?
Deadhead spent blooms by snipping stems just above a set of leaves to redirect energy to new growth. Fertilize lightly with a balanced, water-soluble fertilizer (10-10-10) every 3–4 weeks. Regular watering (1–2 inches per week) and pruning leggy stems also boost reblooming. Most zinnias thrive in warm weather and may slow down in extreme heat—provide afternoon shade if needed.
Wrapping up and next steps
Growing zinnias from seed to vibrant bloom is a rewarding journey that brings bursts of color to your garden in just 60 days! With the right mix of sunlight, soil, and care, you’ll enjoy stunning flowers that attract pollinators and brighten any space.
Whether you’re a beginner or a seasoned gardener, these cheerful blooms are a perfect project to spark joy and confidence in your green thumb.
Ready to dive deeper? Experiment with varieties—try double blooms, dwarf types, or heat-tolerant hybrids—and share your progress with fellow gardeners! 🌸 Next, explore how to extend your blooming season or plan your next seasonal garden project.