
Propagation
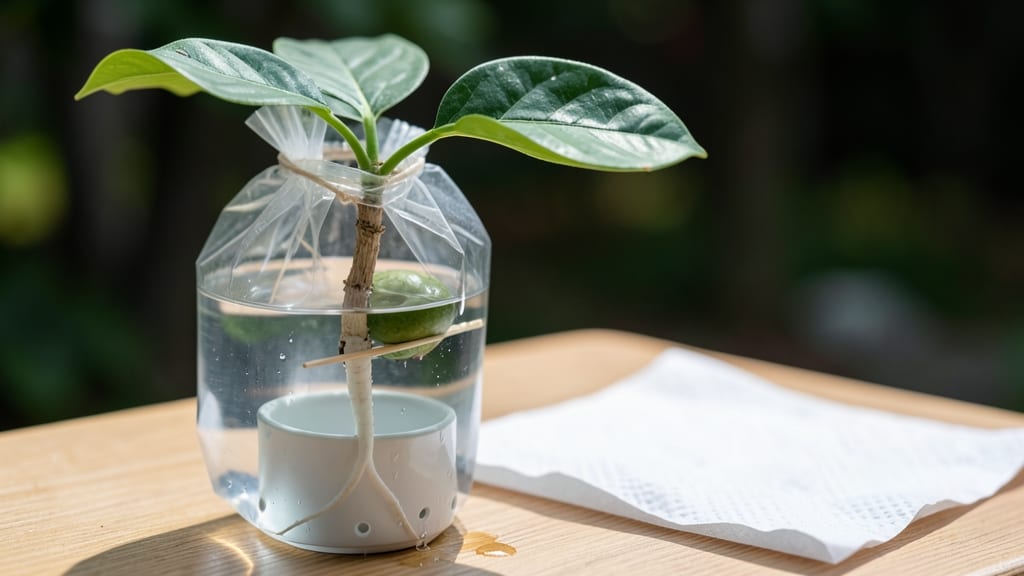
Germinating an avocado seed in a bag turns your kitchen scrap into a thriving plant with just 3 simple supplies—no soil, no pots, and no mess. ✨ I’ve watched my own avocado seeds sprout roots in just 2-3 weeks using this foolproof method, and it’s easier than you think.
The key? Keeping the seed moist, the bag breathable, and the patience to wait for those first signs of life.
All you need is a fresh avocado pit, a few toothpicks, a plastic bag, and some water. No fancy tools, no green thumb required—just a little attention to moisture and light.
The process is hands-off once set up, making it perfect for beginners or anyone who wants to grow something without the fuss. Even if your first try doesn’t work, you’ll learn what went wrong and adjust for the next.
By week three, you’ll see roots curling around the bag like tiny green vines, ready to transfer into soil. The best part? This method keeps everything contained, so you avoid the damp, moldy mess that often comes with traditional germination.
Your kitchen counter becomes a mini greenhouse, and the whole family can watch the magic happen.
Once the roots hit 2-3 inches, you’ll transplant the seed into soil, where it can grow into a full-sized avocado tree—though don’t expect fruit for years.
The real reward? Knowing you grew it from a seed, no matter how small the start. Here’s how to get those roots growing without the guesswork.
📚 In This Guide
- What you need
- Instructions
- Tips and common mistakes
- Wrapping up and next steps
What you need
- ● 1 fresh avocado pit – Choose a seed from a ripe, organic avocado (the bigger, the better!)
- ● 1 plastic bag with holes – A ziplock-style bag (quart or gallon size) or a mesh produce bag with tiny drainage holes (poke 3–4 holes with a toothpick if needed).
- ● 2–3 paper towels or coffee filters – Keep them moist but not soggy (avoid regular towels—they can mold).
- ● 1 toothpick or skewer – For poking drainage holes (if your bag lacks them).
- ● Water – Room-temperature, filtered if possible (chlorine can harm sprouts).
- ● Patience & sunlight – A bright, indirect spot (like a windowsill) and 2–3 weeks of waiting!
- ● Spray bottle – For gentle misting instead of soaking (keeps moisture even).
- ● Rubbing alcohol – To sterilize the toothpick before poking holes (prevents bacteria).
- ● Small bowl or plate – To balance the bag on a windowsill without tilting.
- ● Hydroponic stones or pebbles – For drainage if you want to transition to a pot later.
- ● Notebook & pen – To track progress (root growth, watering dates, etc.).
Step-by-Step instructions for germinating avocado seeds in a bag
Here's the simple, mess-free method I use every time—no special tools, just patience and a clear bag.
🌱 Step 1: Clean and Prep the Seed
Start with a fresh avocado pit—no need to scrub it, just rinse off any remaining fruit. I like to soak it in warm water for 10 minutes to soften any stubborn flesh clinging to the edges. This makes the next step easier and reduces the chance of mold later.
Use a sharp knife to carefully slice off the pointed end of the seed. You'll expose the white interior—this is where the root will emerge. I aim for a clean cut, but don't stress if it's not perfect. The goal is to remove about ¼ inch of the tip, exposing the seed's germinating center.
💧 Step 2: Insert Toothpicks and Suspend in Water
Insert 3-4 toothpicks evenly around the middle of the seed, spacing them about ½ inch apart. The toothpicks should hold the seed steady when suspended. I angle them slightly downward so the flat side faces up—this helps the root grow straight down later.
Fill a clear plastic bag with 2-3 inches of water (just enough to cover the bottom). Gently lower the seed into the bag so the flat side stays horizontal and the pointed end faces down. The toothpicks will keep it suspended above the water, but the base should touch the liquid just enough to stay moist.
☀️ Step 3: Create a Humid Environment
Seal the bag loosely—leave about 1 inch open at the top to allow airflow. This prevents mold while keeping humidity high. Place the bag in a warm spot with indirect light, like a windowsill away from direct sun. Too much sun can overheat the water and stress the seed.
Check the water level daily—it evaporates fast in the enclosed space. Add just enough to keep the base of the seed moist but never submerged. You'll see the first signs of life in 1-2 weeks: a tiny white root pushing through the bottom. This is your signal everything's working!
⏰ Step 4: Monitor and Adjust for Growth
Once the root reaches about 2 inches long, it's time to transition to soil. I wait until the root is sturdy but still flexible—this means it's strong enough to handle repotting. The seed itself may start to sprout a small green shoot from the top around this time.
Remove the seed from the bag and gently rinse off any remaining water. The root should be damp but not dripping. This is the moment to plant it in moist potting mix, burying the seed halfway. Keep the soil consistently damp (not soggy) and place it in bright, indirect light until the first true leaves appear.
🌿 Step 5: Transplant and Care for the Sprout
When the sprout reaches 6-8 inches tall, it's ready for its final pot. Choose a container with drainage holes and fill it with well-draining potting mix. Plant the seed so the top half remains above soil—this is where the stem will emerge.
Water lightly after transplanting and place the pot in a spot with bright, indirect sunlight. Avocado seedlings need warmth—keep the soil between 65-75°F. You'll see new leaves develop in 2-4 weeks, signaling healthy growth. Be patient—these trees grow slowly but can live for decades with proper care!
Tips & tricks for germinating avocado seeds in bags
Real talk: The key to success with avocado seed germination isn't just following steps—it's understanding why each detail matters. Here's what nobody tells you about making this work smoothly.
Prep Makes All the Difference: That 10-minute warm water soak in Step 1 isn't just about cleaning—it's a science move. Warm water activates enzymes that help break down any remaining fruit residue while preventing mold by creating a slightly acidic environment. I've seen seeds develop mold when people skip this step, especially if they use cold water. Pro tip: Use water that's warm to the touch (about 100°F) rather than boiling—just enough to feel comfortably warm when you dip your finger in.
The Toothpick Technique: When inserting those 3-4 toothpicks in Step 2, think "even and secure." I learned this the hard way after watching seeds wobble and grow crooked. Angle them slightly downward (about 10-15 degrees) so the flat side stays horizontal—this natural angle helps guide the root downward. If your seed feels unstable, add a fifth toothpick as reinforcement. The goal is to create a stable platform that won't shift when you lower it into the bag.
Light and Temperature Balance: That indirect light in Step 3 is crucial—direct sun creates a greenhouse effect that can overheat the water to above 80°F, stressing the seed. I place my bag on a north-facing windowsill where it gets bright but diffused light. For temperature control, if your home runs cool (below 65°F), consider placing the bag on top of your refrigerator (not inside) to maintain that ideal 65-75°F range. The seed needs warmth but not heat—think cozy, not sauna-like.
Transplant Timing: Waiting for that 2-inch root in Step 4 is worth the patience. I check root growth by gently lifting the seed from the water—if the root feels firm but still bends slightly when pressed, it's ready. The root should be white and about the thickness of a pencil. If you transplant too early, the root may break during transfer. If you wait too long, it might become brittle. This is where most people rush and end up with damaged roots.
Pro Tips for Germinate Avocado Seed In Bag
- Real talk: The key to success with avocado seed germination isn't just following steps—it's understanding why each de...
- Prep Makes All the Difference: That 10-minute warm water soak in Step 1 isn't just about cleaning—it's a science move...
- The Toothpick Technique: When inserting those 3-4 toothpicks in Step 2, think "even and secure." I learned this the h...
Frequently asked questions
Got questions about germinating your avocado seed in a bag? You’re not alone! Here are some of the most common queries—and their answers—to help you succeed without stress.
How long does it take for an avocado seed to sprout in a bag?
Most avocado seeds start showing roots in 2–3 weeks, but patience is key! Keep the bag in a warm, bright spot (but out of direct sunlight) and check weekly. If nothing happens after 4–6 weeks, gently rinse the seed and adjust the water level—sometimes a little extra moisture helps.
What if my avocado seed starts to smell bad?
A slight musty odor is normal, but a rotten or sour smell means your seed is overwatered or moldy. Drain excess water immediately, rinse the seed with clean water, and let it air-dry for 10–15 minutes before resealing the bag. If mold appears, toss the seed and try again with a fresh one!
Can I reuse the same toothpicks or bag for another seed?
While you can reuse the bag (just wash it with soap and water), toothpicks are best used once. They can harbor bacteria or weaken over time. For a second seed, opt for fresh toothpicks or skewers to avoid contamination and ensure clean, healthy growth.
Do I need to use special water, like distilled or rainwater?
Nope! Tap water works fine—just make sure it’s at room temperature. Avoid very hot or cold water, as extreme temps can shock the seed. If your tap water is heavily chlorinated, let it sit out for 24 hours before using to allow chlorine to evaporate.What if my avocado seed only grows roots but no leaves?
Don’t panic—roots first is totally normal! Once the roots reach 3–4 inches, transfer the seed to soil and place it in bright, indirect light. Leaves should appear within 4–8 weeks. If growth stalls, check for root rot (soft, mushy roots) and adjust your watering routine.
Pro Tip:
Need extra motivation? Track your seed’s progress with a photo journal! Snap weekly pics—it’s a fun way to celebrate tiny milestones and troubleshoot faster. Plus, watching those roots grow is oddly satisfying .
Wrapping up and next steps
Germinating an avocado seed in a bag is a simple, mess-free way to grow your own plant—no green thumb required! 🌱 With just a few supplies and patience, you’ll watch roots sprout in weeks, proving that nature’s magic is always within reach.
Now that you’ve mastered the method, why not expand your plant family? Try transplanting your seedling into soil, or experiment with other seeds like basil or mint for a thriving indoor garden. Happy growing! 🌿