
Planting
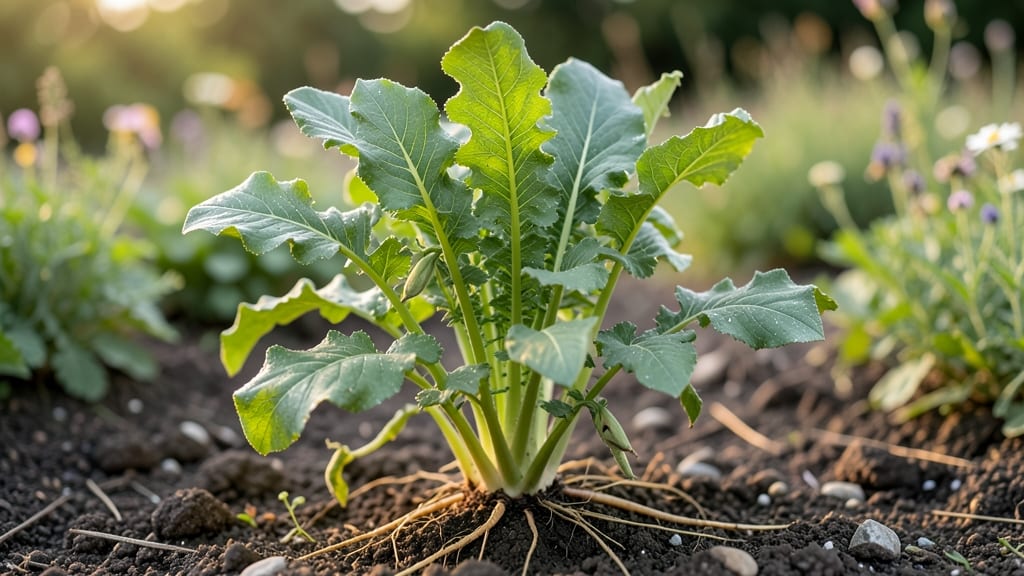
Harvesting radish plant seed pods turns last year's scraps into next season's harvest. 🌱 The pods that form after your radishes bolt are packed with tiny seeds that'll grow into fresh, homegrown radishes—if you know how to handle them right.
Most gardeners skip this step, but saving seeds is easier than you think. You'll need patience (the pods take weeks to mature) and a dry spot to store them, but the payoff is seeds that grow true to type—no store-bought mix needed.
My garden-grown seeds always outperform anything I buy, and they're free once you learn the process. The key is timing: wait until pods turn brown and papery before harvesting. Then dry them completely before storing in an airtight container.
Properly stored seeds stay viable for years, ready to plant whenever you want fresh radishes. Store-bought radishes won't work for seeds—they're bred to be sterile. But with garden-grown pods, you'll have a steady supply of seeds that grow just like their parents, year after year.
📚 In This Guide
- What you need
- Instructions
- Tips and common mistakes
- Wrapping up and next steps
What you need
- ● Radish Seeds: Choose open-pollinated varieties (e.g., 'Cherry Belle,' 'French Breakfast,' or 'Daikon') for viable seeds. Quantity: 1–2 seed packets (or saved seeds from your garden).
- ● Growing Containers or Garden Beds: Containers: 6–12" deep pots with drainage holes (3–5 plants per 12" pot). Quantity: 2–4 containers.
- ● Garden Beds: Well-draining soil in a sunny spot (6+ hours of sunlight daily). Space plants 12–18 inches apart.
- ● Potting Soil: High-quality, sterile seed-starting mix (avoid garden soil to prevent disease). Quantity: 1–2 bags (1–2 cubic feet each).
- ● Watering Can or Spray Bottle: For gentle, even watering (avoid oversaturation).
- ○ Fertilizer (Optional but Helpful): Balanced 5-10-5 or 10-10-10 fertilizer (½ tsp per plant at planting).
- ● OR Compost (1 cup mixed into soil per plant).
- ● Hand Trowel: For transplanting or soil prep.
- ● Pruning Shears or Scissors: To harvest seed pods cleanly.
- ● Paper Towels or Seed Envelopes: For drying and storing seeds.
- ● Labels & Markers: To track radish varieties and harvest dates.
- ● Sunlight & Warmth: Radishes thrive in 60–75°F temps; extend the season with a cold frame if needed.
- ● Patience! 😉 Seed pods take 45–60 days to mature post-bloom.
- ● Grow lights (if starting indoors before the last frost).
- ● Row covers (to protect from pests like flea beetles).
- ● Seed-saving guidebook (for advanced techniques like winter sowing).
- ● Humidity dome (to retain moisture during germination).
How to harvest radish seed pods for next year’s plants
Here’s the simple method I use to save radish seeds—no fancy tools, just patience and timing.
🌱 Step 1: Let Plants Mature Fully Before Harvesting
Wait until radishes produce long, dry seed pods that turn from green to tan and rattle when shaken. Harvesting too early means immature seeds that won’t sprout. I check pods daily after flowering—once they’re crisp and hollow-sounding, they’re ready.
Cut pods from the plant with clean scissors, leaving stems attached. Avoid pulling roots or damaging neighboring plants. Store pods in a paper bag for 1-2 weeks at room temperature to finish drying completely. This extra drying step prevents mold and ensures seed viability.
🌿 Step 2: Extract Seeds from Dry Pods
Once pods are fully dry, crush them gently between your fingers over a clean sheet of paper. The seeds will spill out cleanly—no need for tools. I spread the seeds on the paper in a single layer to air-dry for another 24 hours before storing.
Discard any shriveled or discolored seeds—they won’t grow. Healthy seeds should be small, round, and uniform in color. If you’re saving seeds from heirloom varieties, label the paper with the variety name to avoid confusion later.
⏰ Step 3: Store Seeds Properly for Long-Term Viability
Transfer dried seeds into a small envelope or airtight container with a moisture absorber packet (like those that come with electronics). Store in a cool, dark place—your refrigerator’s crisper drawer works perfectly. Radish seeds stay viable for 3-5 years under these conditions.
Write the harvest year on the container so you know how old the seeds are. I also jot down growing notes like “fast-maturing” or “resistant to cracking” to remind myself of the plant’s strengths. Check seeds annually for freshness—discard any that smell musty or look dry and brittle.
☀️ Step 4: Test a Few Seeds Before Planting Next Year
Before committing to your entire seed stash, plant 3-5 seeds in a small pot indoors. Germination should happen within 7-10 days if seeds are viable. If they sprout weakly or not at all, your seeds may need to be replaced.
Strong seedlings will have thick stems and vibrant green leaves. If they look leggy or pale, your saved seeds might be past their prime. Save the best-performing seeds for your main planting—this ensures next year’s radishes grow just as well as the originals.
Tips & tricks for harvesting radish seed pods
Saving radish seeds is simpler than you think—these tricks ensure you get the best possible seeds for next season.
Timing is Everything: I can't stress enough how critical the 1-2 week drying period is after harvesting those tan, crisp pods. Place them in a paper bag in a warm, dry spot like a sunny windowsill—just avoid direct sunlight, which can overheat them. The extra week ensures complete dryness and prevents mold. If you're in a humid climate, add a small silica gel packet to the bag to absorb excess moisture.
Seed Selection Matters: When crushing the pods to release seeds, use a clean sheet of white paper to make it easy to spot any discolored or shriveled seeds. Healthy seeds should be uniform in size and color, with a slightly glossy finish. I always do a quick "float test" by placing seeds in a bowl of water—any that sink are good, while floaters are likely empty or damaged. This simple trick saves me from planting low-quality seeds later.
Storage Wisdom: That moisture absorber packet in your storage container isn't just a suggestion—it's essential for maintaining seed viability. I've learned the hard way that even a slightly damp container can cause mold within months. Label your containers with the harvest year and variety name using a permanent marker. I also add a small piece of paper with notes about the plant's characteristics—this helps me remember why I liked that particular radish variety so much!
Testing Seeds Before Planting: The 7-10 day germination test is your quality control step. Use small pots with well-draining soil mix and keep them in a warm spot. If you're impatient, place the pots on top of your refrigerator to create a mini greenhouse effect. This test gives you peace of mind before committing to your entire seed stash. I always plant 3-5 seeds from each variety to ensure I have enough viable ones for next season's garden.
Pro Tips for Radish Plant Seed Pods
- Saving radish seeds is simpler than you think—these tricks ensure you get the best possible seeds for next season.
- Timing is Everything: I can't stress enough how critical the 1-2 week drying period is after harvesting those tan, cr...
- Seed Selection Matters: When crushing the pods to release seeds, use a clean sheet of white paper to make it easy to ...
Frequently asked questions
about radish plant seed pods—because even the greenest thumbs need a little guidance!How do I know when radish pods are ready for seed harvesting?
Wait until the radish plants bolt (send up flowering stalks) and the seed pods turn brown and papery. Gently twist them off—if they’re dry and crumble slightly, they’re ready! Harvest on a dry day to prevent mold. Overripe pods may burst, so act fast.
Can I save seeds from store-bought radishes?
Unfortunately, no—most grocery-store radishes are hybrid varieties and won’t produce true-to-type seeds. Opt for heirloom or open-pollinated radish varieties labeled "seed-saving friendly" (like 'French Breakfast' or 'Cherry Belle') for reliable seed pods.
What’s the best way to dry radish seed pods before storage?
Spread pods in a single layer on a mesh screen or paper towel in a cool, dark, well-ventilated spot (60–70°F). Stir them daily for 1–2 weeks until fully dry. Avoid direct sunlight or heat sources—moisture is the enemy! Store seeds in airtight containers (like envelopes) for up to 3 years.
Do radishes need cross-pollination for seed production?
Most radishes are self-pollinating, but some varieties (like daikon) may benefit from hand-pollination if bees are scarce. Use a soft brush to transfer pollen between flowers. Isolate seed-saving radishes from other brassicas (like cabbage) by 20+ feet to prevent unwanted cross-contamination.
What can I do if my radish plants bolt too early?
Bolting often happens in heat or drought. To delay it, plant radishes in early spring or fall, keep soil consistently moist, and use shade cloth if temps exceed 75°F. For seed-saving, embrace bolting—it’s the plant’s way of telling you, "Time to harvest!"
Wrapping up and next steps
Growing radish plant seed pods is a rewarding way to save seeds and ensure a steady supply for future harvests! With the right timing, patience, and a few simple steps, you can easily collect viable seeds to replant next season.
Whether you're a seasoned gardener or just starting out, every seed you save is a step toward self-sufficiency—and that’s something to celebrate! 🌱
Ready to take the next step? Start small:
- Pick 1-2 radish varieties to experiment with.
- Label your seed pods clearly for organization.
- Share your newfound knowledge with fellow gardeners!