
Picking
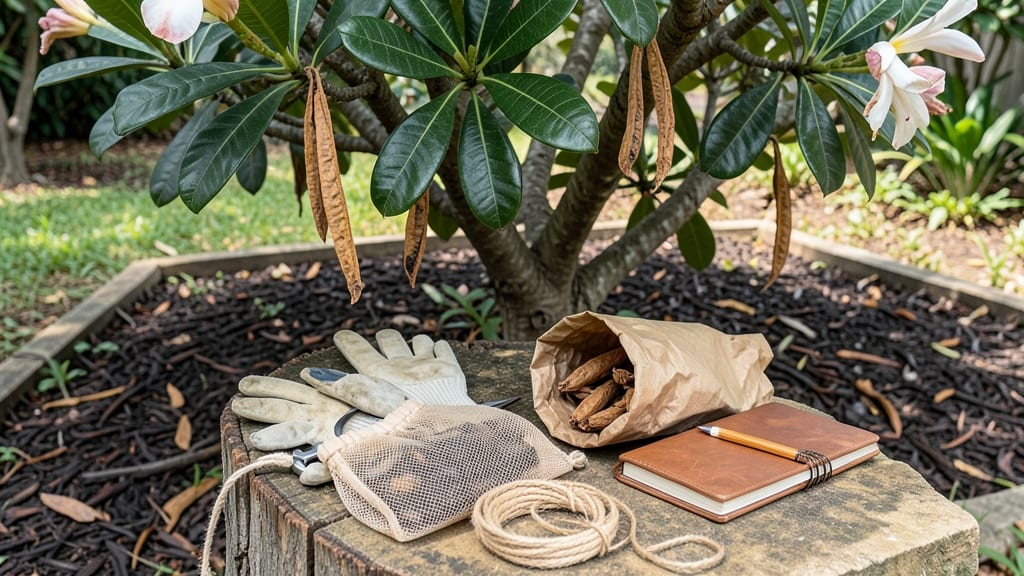
Harvesting plumeria seed pods is the secret to growing these fragrant tropical beauties from scratch—without the high cost of nursery plants. 🌿 The moment those fat green pods turn dry and papery brown, they're ready, but twist them too hard and you'll crush the seeds inside.
I've cracked the gentle extraction method that preserves viability, and it starts with the right timing and tools.
You'll need just three things: a pair of sharp pruning shears, a small bowl, and a bit of patience. The pods are tougher than they look—don't try to pry them open like a stubborn jar lid.
Instead, let them dry completely on the plant or indoors for a few days first. Once they're crispy to the touch, they'll open with minimal force, revealing rows of flat, dark seeds waiting for their next adventure.
What you end up with is a collection of seeds that can sprout into your own plumeria trees, their waxy leaves and sweet fragrance filling your garden in just a few seasons. The key is storing them in a cool, dry place until planting—humidity is their enemy.
With the right technique, you'll see germination rates climb from frustratingly low to surprisingly high, turning those brown pods into the start of something truly special.
This method works year-round in warm climates, but if you're in a cooler zone, harvest pods indoors under grow lights. The process is simple enough for beginners but yields results that even experienced growers admire—plumeria trees that carry your garden's unique story from seed to bloom.
📚 In This Guide
- What you need
- Instructions
- Tips and common mistakes
- Wrapping up and next steps
What you need
- ● Mature plumeria seed pods: Choose fully brown, dry pods (🌿 they should crack open easily when gently squeezed). Aim for 3–10 pods depending on your planting goals.
- ● Sharp, clean pruning shears or scissors: Sterilized (70% isopropyl alcohol wipe) to avoid contamination. A bypass pruner (4–6" blade) works best.
- ○ Disposable gloves (optional but recommended): Latex or nitrile to protect hands from sap and potential irritants.
- ● Paper towels or newspaper: For drying seeds and cleaning pods. Use 2–3 sheets per pod to avoid mess.
- ● Small bowls or containers: 2–3 shallow dishes (6" diameter) for sorting seeds by size/viability.
- ○ Fine-mesh strainer or sieve (optional but helpful): #10–#20 mesh to separate seeds from chaff (e.g., 3–4" diameter).
- ● Labeling markers & tags: Waterproof labels for marking seed containers (e.g., plumeria variety + harvest date).
- ● Spray bottle with water: For lightly misting pods/seeds if they’re overly dry (avoid soaking).
- ● Hair dryer (cool setting): Speeds up drying if pods/seeds are damp (never use heat).
- ● Seed viability test kit: (e.g., float test—sinkers are viable!) or a germination paper roll.
- ● Humidity dome or plastic bag: For short-term seed storage (3–5 days max to prevent mold).
- ● Camera or phone: Snap photos of pods before harvesting to track varieties!
- ● Horticultural oil (neem oil): 1 tsp diluted in 1 quart water for post-harvest pod treatment (fungus prevention).
Step-by-Step instructions for harvesting plumeria seed pods
Plumeria pods hold the future of your garden—handle them carefully to collect seeds that’ll grow into stunning tropical bloomers.
🌿 Step 1: Identify and Locate Mature Seed Pods
Plumeria seed pods develop after flowers bloom and fade. Look for pods that are dry, papery, and brown—they’ll rattle slightly when shaken. Avoid green or unripe pods; they won’t contain viable seeds. I check my plants every 2-3 weeks in late summer or early fall when pods are most likely to mature.
Gently shake the pod—if seeds inside clink together, it’s ready. If it’s still green or soft, wait another week. The key is patience; forcing a pod too soon ruins the seeds inside. I wear gloves to avoid sticky sap, which can irritate skin.
✂️ Step 2: Harvest Pods Without Damaging the Plant
Use clean, sharp pruning shears to snip the pod from the stem at a 45-degree angle, leaving about ½ inch of stem attached. This prevents sap from bleeding excessively and helps the plant heal faster. Avoid twisting or yanking—plumerias are delicate, and rough handling can stress the plant.
Place harvested pods in a paper bag (not plastic) to allow airflow. I label each bag with the harvest date and variety, since some plumerias cross-pollinate. Store them in a dry, shaded spot until you’re ready to extract seeds—usually within 1-2 weeks.
🌱 Step 3: Extract Seeds Safely from the Pods
Open the pod carefully by slicing it lengthwise with a small knife or your fingers. Avoid crushing the seeds—plumeria seeds are flat and winged, like tiny brown feathers. I lay the pod on a clean cutting board and gently pry it open with my thumbs, then tap the sides to release seeds into a bowl.
Discard any seeds that are shriveled, discolored, or broken. Viable seeds should be plump, brown, and intact. If moisture has caused mold, air-dry the seeds for 24 hours before storing. I keep them in an envelope with a silica gel packet to prevent future dampness.
⏰ Step 4: Store Seeds for Future Planting
Plumeria seeds lose viability quickly, so plant them within 2-4 weeks of extraction. If you must store them, place seeds in a sealed container with a moist paper towel (not soaked) and refrigerate. Check weekly—seeds should remain slightly damp but not soggy.
For immediate planting, soak seeds in warm water for 24 hours to soften the outer shell. This speeds up germination, which can take 2-4 weeks in warm conditions. I use a small glass jar with a lid to keep seeds submerged until they’re ready to plant.
☀️ Step 5: Prepare for Germination
Fill a seed tray with well-draining cactus or succulent mix—plumerias hate soggy roots. Plant seeds ¼ inch deep, spacing them 1 inch apart. Mist the soil lightly with water, then cover the tray with plastic wrap to retain humidity. Place in a warm spot with bright, indirect light.
Keep the soil consistently moist but never waterlogged. You’ll see tiny sprouts in 2-4 weeks—they’ll look like miniature leaves emerging from the soil. Once seedlings have 2-3 true leaves, transplant them into individual pots. This is where the magic happens: your future plumeria trees start right here.
Tips & tricks for perfect plumeria seed pod harvesting
A few simple tricks will help you collect healthy plumeria seeds without damaging your plants or the precious pods.
Timing is Everything: The 2-3 week check interval in Step 1 is your best friend. I’ve learned that pods mature fastest in warm, dry conditions—if you’re in a humid climate, check weekly instead. The key is that rattling sound when you shake them; that’s your cue they’re ready. If you harvest too early, seeds won’t be viable, and if you wait too long, they might shatter when you try to open them.
Harvest Technique Matters: That 45-degree angle cut in Step 2 isn’t just about aesthetics—it’s about the plant’s health. The angled cut prevents sap from pooling and dripping down the stem, which can cause rot. I always sterilize my pruning shears with rubbing alcohol between cuts to prevent spreading any potential diseases between pods. And never twist! That’s how you get those ugly tears in the bark that take forever to heal.
Seed Extraction Safety: When you’re gently prying open those pods in Step 3, think of them like delicate eggshells. I use a butter knife instead of my fingers because it gives me more control. Once you’ve tapped out the seeds, spread them on a paper towel to air dry for 10 minutes before sorting—this helps prevent any accidental mold growth from the pod’s natural moisture. The seeds should feel dry to the touch but not brittle.
Storage Wisdom: That moist paper towel in Step 4 isn’t just a suggestion—it’s critical for maintaining seed viability. I use a small plastic container with ventilation holes (poke them with a nail if needed) to keep the humidity balanced. If you’re storing seeds longer than 2 weeks, check them weekly: if they start to smell musty or develop fuzzy spots, that’s your signal to plant them immediately or they’ll lose their potential.
Pro Tips for Harvest Plumeria Seed Pods
- A few simple tricks will help you collect healthy plumeria seeds without damaging your plants or the precious pods.
- Timing is Everything: The 2-3 week check interval in Step 1 is your best friend. I’ve learned that pods mature fastes...
- Harvest Technique Matters: That 45-degree angle cut in Step 2 isn’t just about aesthetics—it’s about the plant’s heal...
Frequently asked questions
Got questions about harvesting plumeria seed pods?
You’re not alone! Here are some of the most common concerns—and their simple solutions—to help you succeed without stress.
When is the best time to harvest plumeria seed pods?
Harvest seed pods when they’re fully brown, dry, and papery—usually 3–6 weeks after flowering. Avoid harvesting too early (green pods = unripe seeds) or too late (overly dry pods may crack open prematurely). Morning is ideal for gentle handling and better seed viability.
What if the pod won’t open naturally? How do I extract seeds without damaging them?
If the pod resists, place it in a paper bag and store it in a warm, dry spot for 1–2 weeks. The natural heat and movement often coaxes it open. Never force it—twisting or cutting risks crushing seeds. If needed, use a sterilized knife to make a tiny slit along the seam, but avoid excessive pressure.
Can I harvest seeds from store-bought plumerias?
Yes, but check the plant’s origin first! Hybrid or grafted plumerias (common in nurseries) may not produce true-to-type seeds. For reliable results, harvest from seed-grown plumerias or plants labeled as “open-pollinated.” If unsure, ask the seller—or grow from cuttings instead!
How long do harvested plumeria seeds stay viable?
Freshly extracted seeds germinate best within 1–2 weeks of harvest. Store them in a cool, dry place (like a sealed envelope with silica gel) for up to 6 months. After that, viability drops sharply—so prioritize planting or refrigeration if delaying germination.
Why aren’t my seeds germinating? Troubleshooting tips!
Common culprits:
- Old seeds: Past their prime? Try soaking in warm water for 24 hours to revive them.
- Poor moisture: Plumeria seeds need constant humidity—cover trays with plastic wrap or use a humidity dome.
- Temperature stress: Ideal germination temps are 75–85°F (24–29°C). Use a seedling heat mat if your climate is cool.
- Fungal risk: Sterilize soil with hydrogen peroxide (3%) before planting to prevent mold.
Patience is key—some seeds take 4–8 weeks to sprout!
Wrapping up and next steps
Harvesting plumeria seed pods is a rewarding process that unlocks the potential to grow your own fragrant blooms—just remember, patience and gentleness are key! By following these steps, you’ll maximize seed viability and set yourself up for success.
Now that you’re armed with the know-how, why not share your newfound skills? Try propagating a few seeds, or gift them to fellow plant enthusiasts to spread the joy of plumeria cultivation. Happy growing! 🌱✨