
Lawn
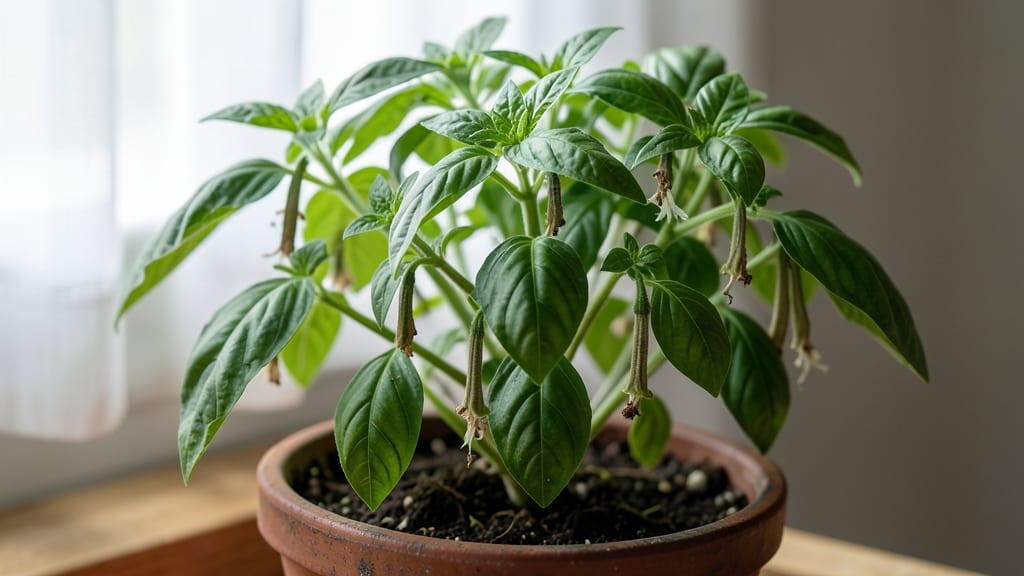
Harvesting basil seed pods saves you money and guarantees heirloom quality for next year’s garden. 🌱 I’ve learned the hard way that waiting too long means wasted seeds, while harvesting too early means poor germination—so timing is everything when those little pods turn from green to brown.
The secret to success lies in patience and proper drying: snip pods when they’ve fully matured but before they split open, then spread them on a screen in a dry, dark place for 1-2 weeks.
Too much moisture? Mold. Too little? Seeds won’t break dormancy. The right balance gives you seeds that’ll sprout reliably in spring.
Once dried, store them in a cool, dark spot—like a sealed jar in your pantry—for up to 2 years. When you’re ready to plant, scatter them on top of soil (no need to bury) and keep them moist.
You’ll see those familiar basil leaves popping up in just 10-14 days, proving last year’s harvest was worth the effort.
This method works for any basil variety—Genovese, Thai, or purple—and scales from windowsill pots to full garden beds. The key? Don’t rush the drying process, and always test a few seeds first to check viability. Trust me, your future pesto will thank you.
📚 In This Guide
- What you need
- Instructions
- Tips and common mistakes
- Wrapping up and next steps
What you need
- ● Fresh basil seed pods: 10–20 mature, fully dried pods (harvest when they turn brown and papery). Pro tip: 💡 Avoid pods with visible mold or pests!
- ● Brown paper bags or breathable envelopes: 2–3 (for drying and storage). Use unbleached, acid-free paper to prevent moisture buildup.
- ○ Small mesh bags or organza pouches: 1–2 (optional but ideal for airflow during storage).
- ● Desiccant packets: 1–2 (silica gel or food-safe options) to absorb excess moisture.
- ● Permanent marker: 1 (to label pods with the harvest date and variety).
- ● Air-tight container: 1 small jar or resealable bag (for long-term storage).
- ● Hair dryer (cool setting): To speed-dry pods if humidity is high.
- ● Food dehydrator: For even drying at low temps (95°F or below).
- ● Humidity indicator card: To monitor storage conditions (ideal: <30% humidity).
- ● Notebook: To track viability tests and germination rates over time.
How to harvest and store basil seed pods for next year’s plants
Here’s how I save basil seeds through winter—no fancy tools, just a little patience and timing.
🌿 Step 1: Identify and Harvest Mature Seed Pods
Wait until your basil plants flower and develop brown, dried seed pods—these are ready for harvest. I check plants every 3-4 days in late summer and pinch off pods as soon as they turn brown. Green pods won’t dry properly, so don’t rush.
Use clean scissors to snip the pods from the stem, leaving a tiny bit of stem attached. This helps prevent moisture loss during drying. Place them in a single layer on a paper towel or mesh screen—crowding causes uneven drying and mold.
☀️ Step 2: Dry the Seed Pods Completely
Spread the pods in a warm, dry, well-ventilated spot (like a sunny windowsill or open pantry shelf). They need 1-2 weeks to dry fully—you’ll know they’re ready when the pods are brittle and crumble easily when squeezed.
I like to stir them gently every 2-3 days to ensure even drying. Avoid direct sunlight, which can overheat and scorch the pods. If humidity’s high, add a small fan to speed up the process safely.
🪴 Step 3: Extract and Store the Seeds
Once dry, crush the pods between your fingers over a clean sheet of paper. The seeds will fall out, while the pod debris stays behind. I use a fine-mesh strainer to separate any remaining chaff—this ensures pure seeds for planting next year.
Store the seeds in a paper envelope or small glass jar labeled with the variety and harvest date. Keep them in a cool, dark place (like a pantry or fridge) where they’ll stay viable for 2-3 years. Avoid plastic bags—they trap moisture and encourage mold.
⏰ Step 4: Cold-Stress for Better Germination (Optional but Recommended)
For stronger seedlings next year, place the dried seeds in a sealed bag with a damp paper towel. Refrigerate for 2-4 weeks—this mimics winter conditions and breaks dormancy. I set a reminder so I don’t forget them in the fridge!
After cold-stressing, let the seeds warm up to room temperature for 24 hours before planting. This trick boosts germination rates and gives you a head start on the growing season. Just don’t skip it if you’re impatient—it’s worth the wait.
🌱 Step 5: Test Germination Before Spring Planting
Before planting, test a few seeds by pressing them into damp paper towels. Seal in a plastic bag and place in a warm spot. If 50%+ sprout within 7-10 days, your batch is viable. If not, try a fresh batch or buy new seeds.
Real talk: Sometimes seeds don’t make it through storage. If that happens, don’t stress—basil is cheap to buy, and you’ll still have fresh plants by summer. Just save pods from multiple plants to increase your chances!
Tips & tricks for perfect basil seed pod preservation
These little tricks will help you save every last seed from your basil plants for next year's garden.
Harvest Timing: The 3-4 day check is critical—harvest when pods are fully brown and dry to the touch, not when they're just starting to turn. I've learned the hard way that harvesting too early means seeds won't mature properly, and you'll end up with poor germination rates. Use a small notepad to track when you last checked your plants—it's easy to forget in the busy garden season.
Drying Strategy: For those 1-2 weeks of drying, I've found that a simple paper towel works better than mesh screens because it absorbs any excess moisture that might cause mold. Place a small fan nearby (about 6 inches away) if your kitchen tends to be humid—this creates gentle airflow without disturbing the pods. The goal is to dry them evenly without creating hot spots that could scorch the seeds.
Seed Extraction Hack: When crushing the pods, I recommend using a clean white paper plate instead of a sheet—it makes the seeds much easier to see against the dark pod debris. You can also use a small sieve to shake out the seeds if you're worried about missing any. This step is where most people lose seeds, so take your time and be thorough. I've saved enough seeds over the years to know it's worth the extra effort.
Storage Wisdom: That 2-3 year viability window is only true if you store seeds properly. I've had seeds last 4 years in my coolest pantry, but they were stored in a glass jar with a tight lid and a small silica gel packet. The key is keeping them completely dry—any moisture will trigger mold growth. Label your containers with the harvest date so you can track how long they've been stored.
Pro Tips for Basil Seed Pods
- These little tricks will help you save every last seed from your basil plants for next year's garden.
- Harvest Timing: The 3-4 day check is critical—harvest when pods are fully brown and dry to the touch, not when they'r...
- Drying Strategy: For those 1-2 weeks of drying, I've found that a simple paper towel works better than mesh screens b...
Frequently asked questions
Got questions about basil seed pods and their cold-stressed viability? You’re not alone!
Here are some of the most common queries—plus straightforward answers—to help you prep for next year’s garden blooms.
What does “cold-stressing” basil seed pods really mean?
Cold-stressing basil seed pods (like Ocimum basilicum) mimics winter conditions to break seed dormancy. By exposing pods to 40–50°F (4–10°C) for 2–4 weeks, you trick them into germinating earlier in spring. Think of it as a “wake-up call” for seeds that might otherwise wait too long!
When should I harvest basil seed pods for cold-stressing?
Harvest pods after the basil flowers fade but before they turn brown (usually late summer to early fall). Look for plump, green pods—they’ll yield the most viable seeds. If left too long, pods dry out and seeds lose viability. Pro tip: Harvest on a dry day to avoid mold!
Can I cold-stress basil seed pods in my fridge?
Your fridge’s crisper drawer (35–40°F / 2–4°C) works perfectly. Place pods in a paper bag with a damp towel (not soggy!) for 2–4 weeks. Check weekly—if they sprout, move them to room temp. No freezer needed! Just avoid frost-heave temps below 32°F (0°C).
What if my cold-stressed pods don’t germinate?
Don’t panic! Try these fixes:
- Check moisture: Pods need consistent dampness (not wet). Adjust your towel’s dampness.
- Verify timing: Some seeds need 3–4 weeks of cold stress. Be patient!
- Test viability: Soak a few seeds in water for 24 hours—if they sink, they’re likely good.
- Alternative method: Scarify seeds (lightly nick the shell) to help them break open.
Are there alternatives to cold-stressing for basil seeds?
Yes! If you skip cold-stressing, try:
- Soaking seeds: Soak in warm water for 12–24 hours to soften the shell.
- Heat treatment: Place pods in a 120°F (49°C) oven for 10 minutes to mimic summer heat.
- Direct sowing: Plant pods outdoors in spring after last frost—they may germinate slower but still work!
Wrapping up and next steps
Basil seed pods are a gardener’s hidden treasure—packed with nutritional benefits and versatile uses, from culinary delights to vibrant blooms. By understanding their cold-stressed viability, you can plan ahead for next year’s thriving garden with confidence. 🌱
Ready to harvest, store, and replant like a pro? Start by gathering your seed pods this season, then share your success with fellow green thumbs—your garden’s future blooms will thank you!
- 📅 Next step: Mark your calendar for seed collection after the first frost!
- 🌿 Pro tip: Label your pods to track varieties for optimal replanting.