
Size
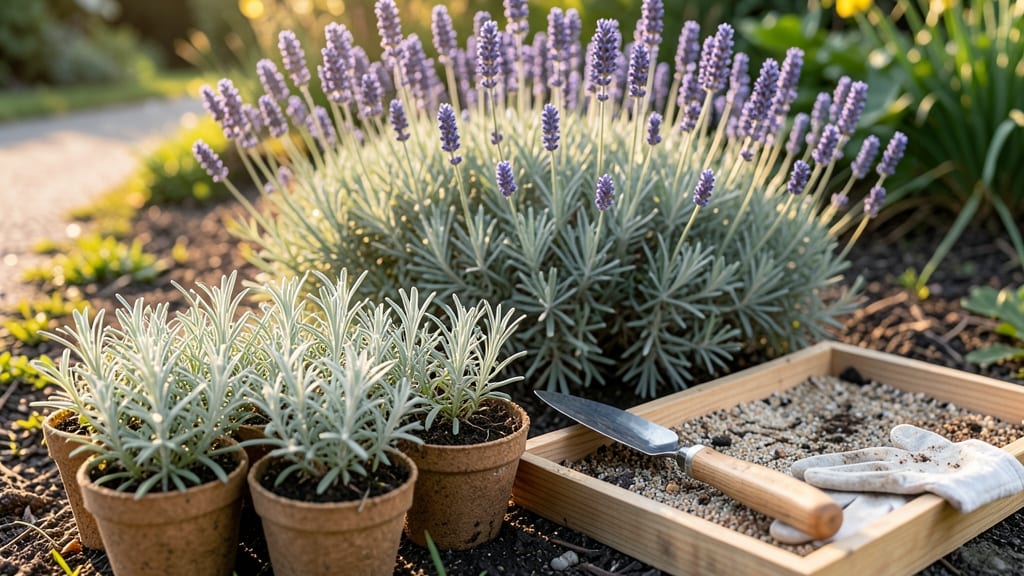
Growing lavender from seed means your garden will smell like a Provençal summer by next year. 🌿 The key is patience—lavender seeds take their time, but once they sprout, they reward you with drought-tolerant plants that thrive with almost no fuss.
I’ve grown mine from seed three times, and every batch has turned into fragrant, bee-loving bushes that last for years.
Start with fresh seeds—older ones germinate poorly—and plant them in well-draining soil under bright light. A sunny windowsill or grow light works for seedlings, but they’ll outgrow that fast.
Lavender hates soggy roots, so use a mix of potting soil and perlite, and water just enough to keep the top inch damp. Most seeds sprout in 2-4 weeks, though some stubborn ones take months.
Once seedlings hit 2-3 inches tall, transplant them into the garden with 18-24 inches between plants. They love poor soil and full sun, so don’t overthink the amendments—just make sure water drains fast.
By year two, you’ll harvest those iconic purple spikes, and the bees will thank you for the nectar. The best part? Pods release new seeds naturally, so your lavender patch keeps growing on its own.
If germination feels slow, don’t panic—lavender seeds need cold stratification to break dormancy. Try chilling them in the fridge for 2-4 weeks before planting. And if your seedlings stretch too tall?
That’s a sign they need more light. With the right setup, you’ll have a fragrant, low-maintenance garden that smells amazing and attracts pollinators all season.
📚 In This Guide
- What you need
- Instructions
- Tips and common mistakes
- Wrapping up and next steps
What you need
- ● Lavender seeds: 1–2 packets (about 500–1,000 seeds). Choose English lavender (Lavandula angustifolia) or French lavender (Lavandula dentata) for best results.
- ● Seed-starting mix: 1–2 gallons of sterile, well-draining potting soil (avoid garden soil—it’s too dense!).
- ● Containers: 4–6 small pots (3–4 inches deep) or seed trays with drainage holes. Plastic or biodegradable pots work great!
- ● Drainage trays or saucers: To catch excess water and prevent root rot.
- ● Spray bottle: For gentle watering (a 16–32 oz. misting bottle is ideal).
- ○ Grow lights or sunny windowsill: A full-spectrum LED grow light (optional but helpful if natural light is limited).
- ● Gloves: Lightweight gardening gloves to protect your hands from soil and prickly lavender stems.
- ● Tweezers: For carefully placing tiny seeds (a small pair with fine tips is perfect).
- ● Fertilizer: A balanced, water-soluble fertilizer (5-10-5 ratio) for seedlings (use sparingly!).
- ● Pruning shears: For trimming established plants (a sharp, small pair works best).
- ● Mulch: Gravel or pebbles to retain moisture and improve drainage in outdoor beds.
- ● Outdoor space: A sunny spot with at least 6–8 hours of direct sunlight daily (lavender loves the heat!).
Step-by-step instructions for growing lavender from seed
Here's how to cultivate fragrant lavender from seed—no stress, just steady progress.
🌱 Step 1: Prepare Seeds and Planting Mix
Lavender seeds need a special trick to germinate. First, soak them in warm water for 24 hours to soften the tough outer shell. This ensures they break through the soil faster. After soaking, mix 1 part perlite with 3 parts sterile potting mix in your shallow tray. Perlite keeps the mix light and prevents damping-off, which is deadly for young seedlings.
Fill your tray to within ½ inch of the rim, then gently press the surface until it's firm but not compacted. You'll see tiny seeds after soaking—sow them ¼ inch deep and ½ inch apart. Don't worry if they look sparse; lavender seeds are small and take time to establish. Cover lightly with a sprinkle of additional mix, then mist the surface with a spray bottle until evenly damp.
💧 Step 2: Create Ideal Germination Conditions
Place the tray in a warm, dark spot (around 70-75°F) to encourage germination. A seedling heat mat helps maintain consistent warmth without overheating. Keep the soil evenly moist—not soggy—by checking daily. If the surface feels dry to the touch, mist again lightly. Germination can take 3-6 weeks, so patience is key.
Once the first true leaves appear (not the initial cotyledons), move the tray to bright, indirect light. Avoid direct sun at this stage—young lavender seedlings are tender and can scorch easily. If using a grow light, position it 4-6 inches above the tray and provide 12-14 hours of light daily. You'll notice seedlings stretch toward the light; this is normal and correctable with proper spacing.
☀️ Step 3: Harden Off and Transplant Seedlings
After 6-8 weeks, when seedlings have 3-4 sets of true leaves, it's time to harden them off. Start by placing them outside in a sheltered, shaded spot for 1-2 hours the first day. Gradually increase their outdoor time over 10-14 days, slowly introducing more sun and wind. Lavender thrives in full sun, so this step prepares them for their permanent home.
Choose a well-draining spot with 6+ hours of direct sun daily. Lavender hates wet feet, so amend the soil with sand or gravel if your garden soil is heavy. Transplant seedlings 12-18 inches apart to allow room for growth. Water deeply after planting, then let the soil dry out completely before watering again—this mimics their natural drought-tolerant habits.
✂️ Step 4: Maintain and Encourage Flowering
Once established, lavender needs minimal care. Water only when the top 2 inches of soil feel dry—overwatering is the fastest way to kill these drought-loving plants. Prune lightly in early spring to shape the plant and encourage bushiness. Cut back ⅓ of the previous year's growth just above a leaf node. Avoid heavy pruning in fall, as this can stimulate tender new growth that won't survive winter.
Watch for flower buds in late spring or early summer. When the stems turn woody and the flowers fade, trim them back to maintain shape. The natural pod release you’ll read about in the title happens after flowering—let some pods dry on the plant for seed collection, but remove others to keep the plant tidy. Harvest flowers in the morning after the dew has dried for the strongest fragrance.
Tips & tricks for growing lavender from seed
Real talk: Lavender from seed is a patience game—but these little tricks will help you skip the common pitfalls and end up with thriving, fragrant plants.
Soaking Secret: That 24-hour soak isn't just about softening the shell—it's also your chance to check for viability. Place your seeds in a small bowl of warm water and discard any that float (they're empty). The good ones will sink. I also add a tiny pinch of sea salt to the soak water—just enough to help prevent damping-off later. After soaking, give your seeds a quick rinse before planting to remove any excess salt.
Lighting Strategy: When you move your seedlings to bright indirect light after germination, position them near an east-facing window if possible. Morning sun is gentler than afternoon heat, which can scorch tender leaves. If using grow lights, alternate between 12-14 hours of light and 10-12 hours of darkness—lavender needs this light cycle to develop properly. I've seen seedlings stretch dramatically when they don't get enough darkness at night.
Hardening Off Hack: Don't rush the 10-14 day hardening off period—this is where most seedlings fail. Start with just 1-2 hours in shade, then increase by 30 minutes each day. Watch for signs of stress like wilting or yellowing leaves. If you notice this, move them back to shelter for a day and try again. I like to harden off seedlings in the early morning when temperatures are cooler, which gives them a better chance to acclimate.
Transplanting Wisdom: When choosing your planting spot, dig a hole twice as wide as the root ball but only as deep as the container's base. This prevents burying the crown too deep, which can cause rot. After transplanting, give your lavender a good drink of water, then let the soil dry completely before watering again. This mimics their Mediterranean habitat and prevents root rot. I've found that transplanting in late afternoon gives plants a better chance to settle in before evening temperatures drop.
Pro Tips for Lavender Seed Grow A Garden
- Real talk: Lavender from seed is a patience game—but these little tricks will help you skip the common pitfalls and e...
- Soaking Secret: That 24-hour soak isn't just about softening the shell—it's also your chance to check for viability. ...
- Lighting Strategy: When you move your seedlings to bright indirect light after germination, position them near an eas...
Frequently asked questions
Got questions about growing lavender from seed? You’re not alone!
Here are some of the most common concerns—and their simple solutions—to help you cultivate a fragrant, thriving garden with ease.
Can lavender really be grown from seed, or should I just buy plants?
While lavender seeds can grow into plants, they’re notoriously slow to mature—often taking 1-2 years to bloom compared to cuttings or nursery plants (which flower in a season). If you’re patient and want unique varieties, seeds work! For faster results, opt for rooted cuttings or young plants from a trusted grower.
How long does it take for lavender seeds to germinate?
Lavender seeds are slow germinators, typically taking 2-4 weeks (or even up to 3 months!) in optimal conditions. Keep soil consistently moist (not soggy) and maintain temperatures between 60–70°F (15–21°C). Patience is key—cover seeds lightly with soil to prevent drying.
What’s the best climate for growing lavender from seed?
Lavender thrives in USDA Zones 5–9 with full sun (6+ hours daily) and well-draining soil. Avoid humid climates—lavender hates soggy roots! If you live in a rainy area, plant in raised beds or amend soil with sand/perlite. Drought-tolerant once established, but young seedlings need consistent moisture.
Why aren’t my lavender seedlings sprouting? Troubleshooting tips.
If seeds aren’t germinating, check these common issues:
- Cold shock: Lavender seeds need a stratification period (4–6 weeks in the fridge) to break dormancy. Skip this, and germination drops dramatically.
- Too wet/dry: Soil should stay moist but not waterlogged. Use a spray bottle to avoid disturbing seeds.
- Poor soil: Mix seeds with sandy, gritty soil (or a cactus/succulent mix) to mimic their natural habitat.
- Light needs: Seeds need bright light to germinate—place trays near a sunny window or under grow lights.
Can I grow lavender indoors from seed?
Indoor lavender is possible but challenging. You’ll need:
- A south-facing window or grow lights (12+ hours/day).
- Small pots (4–6 inches deep) with drainage holes.
- Dwarf varieties like ‘Hidcote’ or ‘Munstead’ (compact growth).
Wrapping up and next steps
Growing lavender from seed is a rewarding journey that blends patience with the joy of nurturing fragrant beauty. By following these simple steps—from selecting the right pods to harvesting with care—you’ll soon enjoy a thriving garden filled with calming blooms. 🌿✨
Now that you’re equipped with the know-how, take the next step: start small with a few pods, experiment with different varieties, or even share your newfound skills with fellow gardening enthusiasts! Your lavender garden isn’t just a project—it’s a peaceful retreat waiting to unfold.