
Lawn
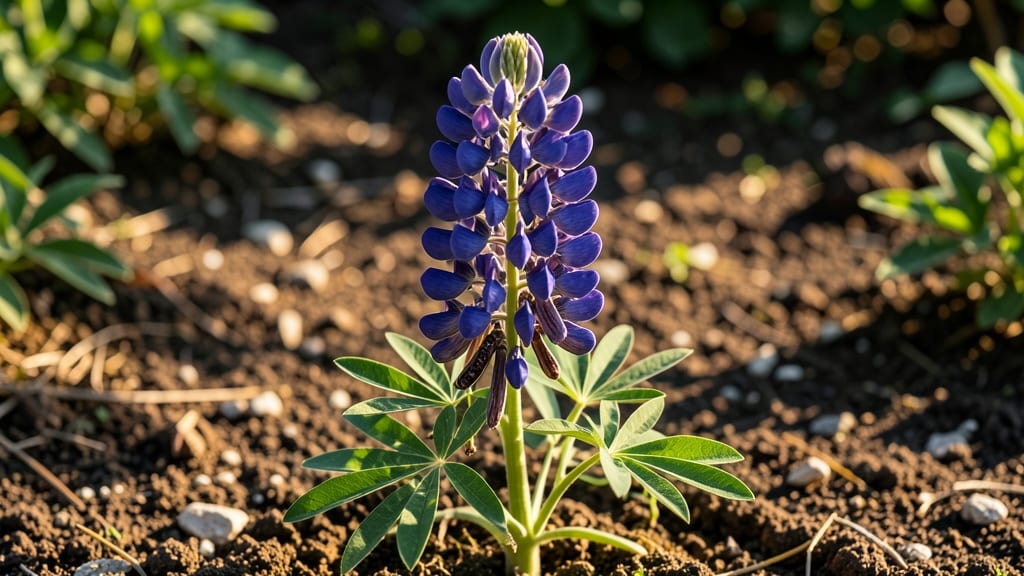
Saving flower seed pods from this year’s garden means next year’s blooms will arrive earlier and stronger—but only if you handle them right. 🌸 I’ve learned the hard way that drying them too fast or storing them wrong turns viable seeds into dust.
The secret to reliable germination starts with proper drying and a little cold-moist prep that mimics nature’s timing.
Start by harvesting pods when they’re fully mature but before they split open—usually when they turn brown and papery. Marigolds, zinnias, and cosmos are perfect candidates. Lay them out in a dry, well-ventilated spot for 2-3 weeks (no heat or direct sun) to prevent mold.
Once completely dry, gently crack open the pods to release seeds, then store them in labeled envelopes in a cool, dark place.
The cold-moist trick is what separates good germination from great: after storing seeds for 4-6 weeks, soak them in water for 12 hours before planting. This breaks dormancy and ensures faster sprouting.
You’ll see seedlings emerge in 7-14 days instead of waiting weeks, and the plants will be hardier from the start.
This method works for almost any annual flower, even in small spaces. The key is patience—rushing the drying or skipping the cold-moist step means weaker starts. Trust the process, and you’ll have a head start on next year’s garden before most neighbors even think about seeds.
📚 In This Guide
- What you need
- Instructions
- Tips and common mistakes
- Wrapping up and next steps
What you need
- ● Flower seed pods: Collect clean, dry pods from healthy plants (avoid moldy or damaged ones). Aim for at least 10–20 pods per variety for reliable germination.
- ● Stratification medium: Option 1: Moistened peat moss or coconut coir (2–3 cups per batch). Keep it damp but not soggy.
- ● Option 2: Vermiculite or perlite (1 part) mixed with 1 part sand (for drainage).
- ● Storage containers: Small resealable plastic bags (quart-sized) or paper towels wrapped in plastic wrap. Poke a few holes for airflow if using bags.
- ● Labeling supplies: Waterproof labels or masking tape + marker to track pod types and prep dates.
- ● Scissors or pruners: For trimming pods from stems (sterilize with rubbing alcohol).
- ● Spray bottle: For misting mediums to maintain moisture.
- ○ Fine-mesh bag: Optional for dry storage (e.g., burlap sacks) if pods need to air-dry first.
- ● Refrigerator or cold frame: A consistent 34–40°F (1–4°C) space for stratification (e.g., fridge crisper drawer).
- ● Garden journal: To log pod sources, prep methods, and germination progress.
Step-by-Step guide to cold-moist stratification for flower seed pods
Here's how I guarantee reliable germination next year by mimicking nature's winter cycle.
🌱 Step 1: Harvest and Clean the Seed Pods
Wait until the seed pods are fully mature but still slightly green—this ensures they haven't dried out completely. Gently twist or cut them from the stem and place them in a paper bag. Store the bag in a warm, dry place for 1-2 weeks until the pods open naturally and release seeds. This drying process prevents rot during stratification.
Once the seeds are out, remove any remaining plant debris or chaff by hand. I like to spread them on a clean towel and gently shake—any empty or shriveled seeds will fall away. Keep only the plump, firm seeds for stratification. Real talk: Skipping this cleaning step leads to moldy messes during the cold-moist process.
💧 Step 2: Prepare the Moist Stratification Medium
Line a shallow container (like a plastic takeout tray) with a damp paper towel or coffee filter. The medium should feel like a wrung-out sponge—moist but not dripping. I use distilled water to avoid introducing minerals that could harm germination. Place the container in a sealed plastic bag to retain humidity.
Spread the seeds in a single layer across the damp medium, spacing them about 1 inch apart. This prevents them from clumping together during the cold treatment. If your seeds are tiny, like those from poppies, sprinkle them lightly over the surface instead. The goal is even moisture exposure without crowding.
❄️ Step 3: Cold Stratify for the Required Duration
Place the sealed container in your refrigerator's vegetable crisper, where temperatures stay consistently between 35-45°F. Most flower seeds need 4-12 weeks of cold treatment—check your seed packet for specifics. I mark the start date on the bag with a permanent marker so I don't forget.
Check the seeds every 2-3 weeks to ensure the medium remains moist but not soggy. If it dries out, mist lightly with water and reseal. You'll know stratification is working when tiny roots or sprouts appear—this is your cue to move them to warmer conditions. Don't rush this step; proper cold treatment breaks dormancy and ensures strong germination.
☀️ Step 4: Transition to Warm Germination
Once the required cold period ends, remove the seeds from the refrigerator and place them in a warm, bright location. I use a seedling heat mat set to 70°F for the first week, then move them under a grow light. Keep the medium moist but not wet—seeds should germinate within 7-21 days, depending on the species.
Watch for the first signs of life: a tiny root or a curled seed coat. This is your signal that germination has begun. Thin seedlings to 1 inch apart once they have their first true leaves to prevent competition. Here's the thing—some seeds may take longer, so be patient and avoid overwatering during this phase.
Tips & tricks for perfect flower seed pod stratification
Took me a while to figure these out, so here goes—your secret weapon for foolproof germination.
Timing Secret: The 1-2 week drying period in Step 1 is crucial—it's not just about waiting, it's about letting the pods dry just enough. If you rush this, you'll risk mold during stratification. I've found that placing the bag near a sunny window speeds up the process while preventing over-drying. The moment the pods naturally split open is your cue to proceed.
Moisture Control: In Step 2, the damp paper towel should resemble a wrung-out sponge—if you squeeze it and water drips out, it's too wet. Overly moist conditions create anaerobic environments that promote mold growth. I like to use a spray bottle for gentle misting if the edges dry out during the cold treatment. The sealed plastic bag helps maintain humidity without over-saturating the medium.
Temperature Matters: While the 35-45°F range in Step 3 is ideal, some refrigerators have hot or cold spots. I place my container on the middle shelf where temps are most consistent. If your fridge runs hotter, try the bottom shelf—just monitor closely. The goal is to mimic natural winter conditions without creating stress on the seeds.
Germination Check: When transitioning to warm germination in Step 4, watch for the first sign of life: a tiny white root emerging. This is your signal to move seeds to warmer conditions. I've seen some seeds take up to 3 weeks to germinate—patience is key! If you're using a heat mat, keep it set to 70°F for the first week, then reduce to room temperature once sprouts appear.
Pro Tips for Flower Seed Pods
- Took me a while to figure these out, so here goes—your secret weapon for foolproof germination.
- Timing Secret: The 1-2 week drying period in Step 1 is crucial—it's not just about waiting, it's about letting the po...
- Moisture Control: In Step 2, the damp paper towel should resemble a wrung-out sponge—if you squeeze it and water drip...
Frequently asked questions
Got questions about flower seed pods?
You’re not alone! Here are some of the most common queries—plus simple, actionable answers to help you prep those pods like a pro for next year’s garden.
How do I know when flower seed pods are ready to harvest?
Harvest pods when they’re fully mature but before they split open or dry out completely. For most flowers, this means the pods turn brown or papery and feel dry to the touch. Snap them off gently—if they resist, wait a few more days. Store them in a cool, dry place to prevent premature sprouting.
Can I plant flower seed pods directly from the garden?
Yes! Many seed pods (like those from poppies, cosmos, or snapdragons) can be sown straight into the soil after harvesting. However, some—like delphiniums or lupines—need a cold-moist stratification period (mimicking winter) to germinate. For these, mix pods with damp sand and refrigerate for 4–8 weeks before planting.
What if my seed pods won’t open or release seeds?
Some pods are stubborn! Try these tricks:
- Freeze them: Place pods in a sealed bag with damp paper towels and freeze for 24 hours. Thaw and check for seeds.
- Soak them: Submerge pods in warm water for 1–2 hours to soften the casing.
- Gently crush: Use a hammer (outside!) to tap pods—seeds will often spill out.
Do seed pods need special storage conditions?
Store pods in a cool (35–45°F), dry place (like a paper bag or envelope) away from direct sunlight. Avoid plastic—it traps moisture and can cause mold. Label them with the plant name and harvest date! Most stay viable for 1–2 years, though some (like morning glories) last only a season.
Are there any flower seed pods I should avoid saving?
Skip pods from hybrid or F1 plants (marked with “F1” on seed packets)—they won’t grow true to type. Also avoid pods from invasive species (like mint or bindweed) or diseased plants. When in doubt, buy fresh seeds for reliable results!
Wrapping up and next steps
Growing flower seed pods is a rewarding way to bring vibrant blooms back year after year—especially when you master the cold-moist prep trick! By following these steps, you’ll boost germination rates and enjoy healthier, hardier plants.
Whether you’re a seasoned gardener or just starting out, your efforts will pay off with stunning results.
Ready to take the next step? Start small—try a few seed pods this season, experiment with different varieties, and refine your technique. Soon, you’ll be sharing your green thumb success with friends (or even selling starts!). Happy gardening! 🌱✨