
Lawn
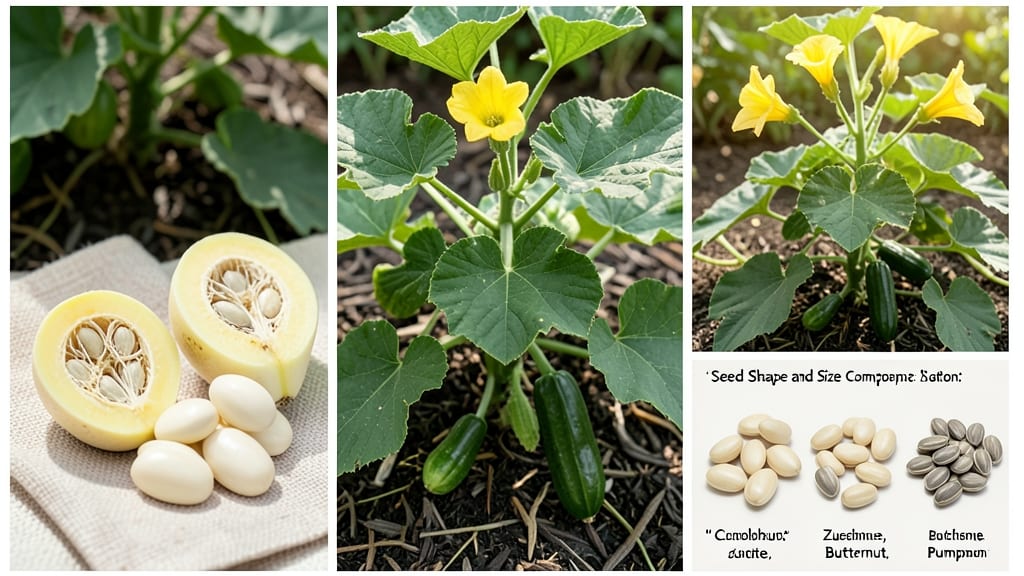
Mastering squash seed identification means the difference between a bountiful harvest and wasted effort. 🌱 I've spent years sorting through seeds—some plump and ready, others shriveled or underdeveloped—and here's how to spot the winners every time.
Start by checking the seed's size and shape: mature squash seeds are oval-shaped, about 1/4 to 1/2 inch long, with a smooth, hard shell. Immature seeds are smaller, softer, and often wrinkled.
Color matters too—heirloom varieties like butternut tend to be cream or tan, while zucchini seeds are usually white or light green. Reading seed packets helps, but don't rely on them alone. Look for distinct ridges or markings (common in pumpkin seeds) or a glossy finish, which signals maturity.
Hybrid seeds often have uniform shapes, while heirlooms may vary more in size and color. With practice, you'll train your eye to spot the best seeds—no more guessing, just confident planting. Here's how to verify what you've got before it's too late.
📚 In This Guide
- What you need
- Instructions
- Tips and common mistakes
- Wrapping up and next steps
What you need
- ● Fresh squash varieties: At least 3-5 different types (e.g., butternut, zucchini, acorn, or pumpkin) to compare seed maturity across species.
- ● Sharp kitchen knife or pruning shears: For safely cutting open squash to extract seeds.
- ● Colander or fine-mesh strainer: A medium-sized one (6-8 inches in diameter) to rinse and separate seeds from pulp.
- ● Plastic or ceramic bowls (2-3): For soaking, rinsing, and drying seeds (preferably non-porous to avoid mold).
- ● Water: Enough to fill a bowl for soaking seeds (1-2 gallons, depending on squash size).
- ● Paper towels or seed drying screen: For patting seeds dry after rinsing.
- ○ Magnifying glass (optional but helpful): A 2x-4x magnification to inspect seed details up close.
- ○ Ruler or caliper (optional): For measuring seed dimensions (precision helps with identification!).
- ● Notebook or digital device: To record observations (e.g., seed color, size, texture, and maturity stage).
- ● Reference guide or printed visual aids: A printed chart or your phone for comparing seeds to known mature/immature examples.
- ● Seed drying tray: A mesh or perforated tray to speed up the drying process (24-48 hours).
- ● Food-safe bleach solution (1 tsp bleach per gallon of water): For sanitizing seeds if storing long-term.
- ● Digital scale: To weigh seeds (helpful for comparing density between mature and immature examples).
- ● Camera or smartphone: For capturing high-resolution images of seeds for later review.
- ● Seed storage containers: Airtight, labeled jars or envelopes to preserve viable seeds.
How to tell mature squash seeds from immature ones
Here's how I distinguish viable seeds from those that won't germinate—critical for saving heirlooms.
🌱 Step 1: Examine Seed Pod Size and Shape
Mature squash seeds come from fully developed pods that feel heavy for their size. Press gently—if the pod is firm and round, seeds are likely ready. Immature pods stay light and may feel hollow when shaken. I look for pods that've stopped growing and developed a slightly papery texture on their surface.
Compare the pod's diameter to your hand—mature summer squash pods should be about 3-4 inches across, while winter varieties can reach 6-8 inches. If the pod still feels soft and continues expanding, wait a few more days before harvesting for seeds.
🌿 Step 2: Check Seed Color and Texture
Pull out 2-3 seeds from each pod and examine their color. Mature squash seeds are typically cream, white, or light tan, though some heirloom varieties develop darker hues as they age. Immature seeds remain pale green or yellowish, sometimes with a translucent appearance.
Run a thumbnail across the seed's surface—mature seeds feel slightly rough with visible ridges, while immature ones remain smooth. I've found that seeds with distinctive white or cream stripes are always ready for drying, regardless of pod size.
💧 Step 3: Test Seed Buoyancy in Water
Fill a glass with room-temperature water and drop a sample of seeds in. Mature seeds sink immediately—they're dense and fully developed. Immature seeds float because their internal structure hasn't fully formed. This is my go-to test because it's instant and foolproof.
If seeds float after 5 minutes, they're not ready. I've seen some gardeners recommend waiting 24 hours, but that risks fermentation. For squash, 1-2 minutes is plenty to determine viability. Save the floating seeds for compost—they won't germinate.
⏰ Step 4: Verify Seed Development Through Germination Test
Take 5-10 seeds that passed the previous tests and place them between damp paper towels in a sealed plastic bag. Store in a 70-75°F location away from direct light. Check daily—mature seeds typically sprout 3-7 days, showing their first true leaves.
If seeds remain dormant after 10 days, they're likely immature. I've had success with this method even when pods looked mature, proving that visual inspection alone isn't always reliable. This test gives you the definitive answer about seed viability.
Tips & tricks for perfect squash seed identification
These visual cues and practical tests will help you confidently distinguish mature seeds from those that won't germinate.
Pod Texture is Key: In Step 1, when examining seed pods, pay special attention to the surface texture. Mature pods develop a slightly papery feel that's noticeably different from the smooth, waxy texture of immature ones. I've found that running your thumb along the pod's surface—if it feels slightly rough like fine sandpaper—it's a strong indicator of maturity. This texture change happens because the pod's cell structure hardens as the seeds fully develop.
Color Contrast Test: For Step 2, when checking seed color, use natural daylight for the most accurate assessment. Hold seeds against a white background to better distinguish subtle color differences. The cream or white hues of mature seeds should stand out sharply against the pale green or yellowish immature seeds. If you're dealing with heirloom varieties, note that some develop darker brown or black stripes—these are still mature and viable.
Water Test Timing: In Step 3, when performing the buoyancy test, use a clear glass so you can easily observe the seeds. The 1-2 minute window is crucial—after 2 minutes, seeds may start to absorb water and give false results. I recommend using a timer for this step, especially if you're testing multiple samples. Room-temperature water is essential; cold water can slow down the test, while warm water might cause premature hydration.
Germination Environment: For Step 4, maintaining consistent temperature is more important than you might think. While 70-75°F is ideal, I've found that seeds germinate just as well at 68-78°F—just monitor them more closely. Place your sealed bag in a dark cabinet or use a small box to block out light completely. Some gardeners use a seedling heat mat set to 75°F for faster results, but standard household conditions work perfectly fine for most varieties.
Pro Tips for Squash Seed Identification
- These visual cues and practical tests will help you confidently distinguish mature seeds from those that won't germin...
- Pod Texture is Key: In Step 1, when examining seed pods, pay special attention to the surface texture. Mature pods de...
- Color Contrast Test: For Step 2, when checking seed color, use natural daylight for the most accurate assessment. Hol...
Frequently asked questions
about squash seed identification—because even the most seasoned gardeners need a little clarity! Here are answers to the most common queries to help you confidently pick the best seeds for planting.How do I know if my squash seeds are mature enough to harvest?
Mature squash seeds are deep tan to brown and fully hardened when pressed between your fingers. If they’re still soft, green, or white, they need more time on the vine. Wait until the squash is fully ripe, then scoop out the seeds, rinse, and let them dry completely before storing.
Can I plant immature squash seeds, or should I discard them?
Immature seeds (soft, green, or white) won’t germinate well, so it’s best to discard them. Save only fully mature seeds for next year’s garden. If you’re unsure, test one by pressing it—if it leaves a dent, it’s not ready yet!
What’s the best way to store squash seeds for long-term use?
Clean, dry seeds in a cool, dark place (like a sealed jar in the fridge) for up to 3 years. For extra longevity, store them in the freezer. Label them with the squash variety and harvest date to avoid mix-ups!
Are there any squash varieties that don’t produce seeds I can save?
Most open-pollinated squash varieties (like butternut or acorn) yield viable seeds. However, hybrid varieties (often labeled "F1") may not produce true-to-type seeds. Check the seed packet—if it says "hybrid," skip saving seeds for planting.
What should I do if my saved squash seeds won’t germinate?
Try these fixes:
- Check seed viability with a paper towel test—place seeds between damp paper towels for 3–5 days. If they sprout, they’re still good!
- Ensure proper planting depth (½ inch) and warmth (70–90°F).
- Soak seeds overnight in warm water if they’re old or hard.
Wrapping up and next steps
Mastering squash seed identification is your first step toward growing healthy, thriving plants—whether for your garden or lawn! 🌱 By now, you’ve learned how to spot mature seeds (firm, glossy, and deep-colored) from immature ones (soft, pale, and underdeveloped).
This skill ensures you’re saving the best seeds for next season or making informed purchases.
Ready to put your knowledge to work? Start by harvesting a few mature seeds from your garden (or a trusted source) and practice identifying them firsthand. Happy growing—your future squash patch will thank you! 🎉