
Planting
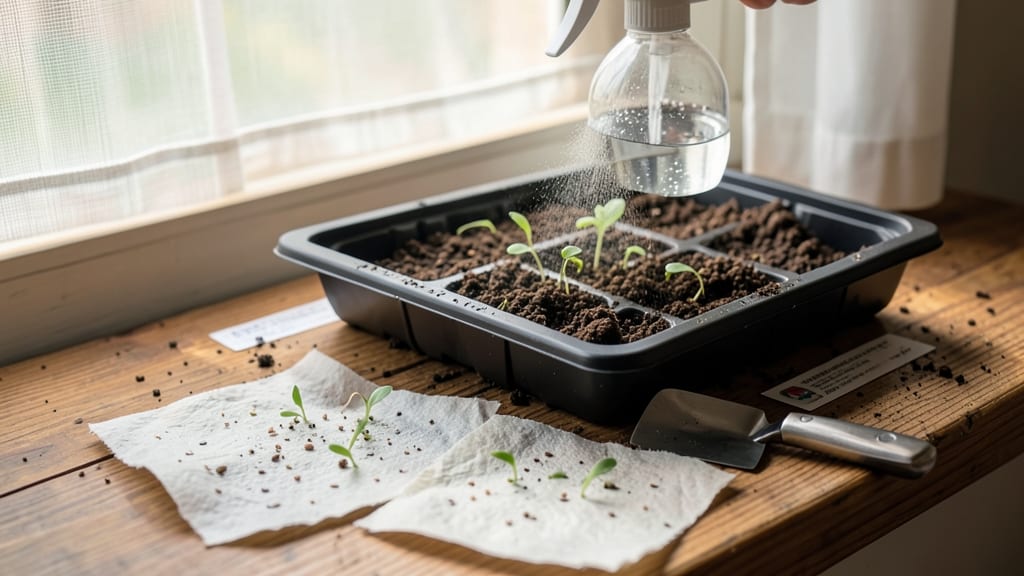
Planting seed paper is like tucking tiny wildflowers into a biodegradable hug—just drop it in soil and watch magic unfold. 🌱 The trick lies in those three layers of paper, soil, and seeds that work together to create blooms without the fuss of traditional planting.
My first attempt with cosmos and forget-me-nots sprouted in under a week, proving how simple this eco-friendly method can be when you follow the right steps. You’ll need moist soil, a sunny spot (or bright indoor light), and a gentle hand—no digging required.
The paper dissolves naturally, leaving seeds perfectly positioned to germinate. For best results, plant in early spring or late summer when temperatures stay mild, and keep the soil consistently damp until you see those first green shoots peeking through.
Once planted, you’ll enjoy low-maintenance blooms that attract pollinators and add color to gardens, containers, or even gifts. The paper breaks down completely, leaving no trace behind—just vibrant flowers where you planted them. Perfect for wildflower meadows, educational projects, or adding a personal touch to handmade gifts.
Here’s the secret to success: avoid overwatering, which can drown seeds, and protect young sprouts from strong winds or pests. If some seeds take longer to sprout, don’t worry—uneven germination is normal.
For indoor planting, a sunny windowsill or grow light works wonders, while outdoor spots benefit from partial shade during hot afternoons.
📚 In This Guide
- What you need
- Instructions
- Tips and common mistakes
- Wrapping up and next steps
What you need
- ● Seed paper (pre-made): 1-2 sheets (check for wildflower or herb seeds; brands like Wildflower Seed Paper work great).
- ● OR DIY ingredients (if making your own): 1 cup recycled paper (shredded, like junk mail or printer paper—no glossy coatings!)
- ● 1 tbsp wildflower or herb seeds (e.g., marigolds, basil, or clover; organic, untreated seeds preferred).
- ● 1 tbsp natural glue (e.g., flour + water paste or cornstarch glue).
- ● 1 tsp water (for mixing).
- ● Water (for soaking or misting).
- ● Small tray or container (for soaking seed paper, ~6" x 8" size).
- ● Spray bottle (to keep paper moist while planting).
- ● Garden soil or potting mix (well-draining, seed-starting mix recommended).
- ● Scissors (for cutting pre-made seed paper to size).
- ● Blender (to pulp paper for DIY seed paper—food-grade only!).
- ● Mesh screen or colander (for straining pulp).
- ● Plastic wrap (to cover the tray and retain humidity).
- ● Plant labels (to track seed types).
- ● Gloves (if seeds irritate your skin).
Step-by-Step instructions for planting seed paper
Here's how to plant seed paper in just three simple layers—no soil prep required.
🌱 Step 1: Soak the Seed Paper for 10 Minutes
Place your seed paper in a shallow tray or bowl and cover it with 1-2 inches of lukewarm water. Let it soak until the edges start to curl slightly—this tells you the paper is absorbing moisture and the seeds are activating. I like to use a timer so I don’t forget, as over-soaking can wash away the seeds.
Gently press down on the paper to help it absorb water evenly. You’ll notice tiny air bubbles rising to the surface as the paper softens. This is normal and means the seeds are ready to sprout. Once the edges curl, it’s time to move to the next step—don’t let it soak longer than 15 minutes total.
💧 Step 2: Lay the Paper in Moist Soil or a Container
Choose a spot with at least 4-6 hours of sunlight daily—seed paper thrives in partial to full sun. If planting directly in the ground, press the soaked paper gently into a shallow trench or directly onto the soil surface. For containers, place it on top of 1-2 inches of damp potting mix.
Lightly mist the top of the paper with water to keep it moist, but don’t oversaturate—you want the soil beneath to hold moisture while the paper stays slightly damp. If you’re planting in a pot, use a container with drainage holes to prevent waterlogging, which can rot the paper before seeds sprout.
☀️ Step 3: Keep Soil Moist and Watch for Sprouts
Water the area lightly every 1-2 days until you see the first green sprouts pushing through the paper, usually within 7-14 days. You’ll notice tiny shoots emerging along the edges first—this is your cue that germination is underway. Once sprouts reach about 1 inch tall, you can stop using the paper as mulch and let the plants grow freely.
Seed paper breaks down naturally, so don’t worry about removing it. Instead, let it decompose into the soil, enriching it as your plants grow. If you’re in a dry climate, consider placing a thin layer of mulch around the edges to retain moisture until the roots establish.
🌿 Step 4: Thin and Care for Established Plants
Once your seedlings are about 2-3 inches tall, gently thin them to give each plant enough space to grow. Seed paper often contains multiple seeds, so you’ll likely need to remove some to avoid overcrowding. Use a small pair of scissors or your fingers to carefully snip or pull excess seedlings at the base.
Continue watering at the soil level to avoid disturbing the roots. Most seed paper plants, like wildflowers or herbs, require minimal care once established. Fertilize lightly with a balanced organic fertilizer every 4-6 weeks to encourage healthy growth, but avoid over-fertilizing—seed paper plants often thrive in lean soil.
Tips & tricks for planting seed paper
Common pitfalls—and how to sidestep every one when planting seed paper.
Timing Secret: That 10-minute soak in Step 1 is your sweet spot—any longer risks washing away seeds, but less than 10 minutes may not fully activate them. I set a timer and watch for those telltale curled edges as my cue to move on. If you're impatient, check at 8 minutes, but don't rush it! The paper should feel pliable but not soggy when you handle it.
Sunlight Strategy: The "at least 4-6 hours of sunlight daily" in Step 2 is non-negotiable for most seed paper varieties. If your spot gets less light, choose shade-tolerant varieties like ferns or parsley. For containers, place them where they'll get morning sun and afternoon shade if needed—just rotate them occasionally so all sides receive equal light exposure.
Watering Wisdom: In Step 3, when watering every 1-2 days, focus on the soil beneath the paper—not the paper itself. The paper should stay slightly damp but not wet. Think of it like a sponge: it needs to hold moisture for the seeds, but too much water can suffocate them. I use a spray bottle for gentle misting, especially in dry climates where evaporation happens fast.
Thinning Technique: When thinning those 2-3 inch seedlings in Step 4, use a pair of small scissors to snip at the base rather than pulling. This prevents disturbing the roots of neighboring plants. I like to thin in the morning when the soil is moist—it's easier to see what you're doing, and the plants recover faster from the stress of being handled.
Pro Tips for Plant Seed Paper
- Common pitfalls—and how to sidestep every one when planting seed paper.
- Timing Secret: That 10-minute soak in Step 1 is your sweet spot—any longer risks washing away seeds, but less than 10...
- Sunlight Strategy: The "at least 4-6 hours of sunlight daily" in Step 2 is non-negotiable for most seed paper varieti...
Frequently asked questions
Got questions about planting seed paper? You’re not alone! Here are some of the most common queries—and their easy answers—to help you grow your eco-friendly garden with confidence.
How long does it take for seed paper to sprout?
Most seed paper blooms in 7–21 days, depending on the plant type, moisture, and sunlight. Keep it damp (like a damp sponge) and place it in indirect light until sprouts appear. Patience is key—some delicate varieties (like forget-me-nots) may take longer than hearty flowers (like marigolds).
Can I plant seed paper directly in soil?
Seed paper is designed for direct planting—no need to remove seeds. Moisten the paper, press it into soil (or a pot), and cover lightly with a thin layer of compost or mulch. The paper will decompose naturally, nourishing the soil as your plants grow. Pro tip: Use a spray bottle to keep it hydrated until germination.
What if my seed paper doesn’t sprout?
Don’t worry—try these fixes:
- Check moisture: Seed paper needs consistent dampness (like a wrung-out sponge). If it dries out, spritz it with water.
- Light levels: Place it in bright, indirect light (e.g., a windowsill). Avoid direct sun until sprouts emerge.
- Viability: Some seeds (like wildflowers) have shorter lifespans. Store unused paper in a cool, dry place to extend freshness.
Can I use seed paper for indoor plants?
Yes! Seed paper works beautifully indoors for low-light plants like herbs (basil, mint), succulents, or shade-tolerant flowers (e.g., African violets). Use a shallow tray or pot with drainage, keep it moist, and place it near a sunny window. For herbs, you can even plant it in a hanging planter or repurpose it into a mini vertical garden.
Where can I buy seed paper, and how much does it cost?
Seed paper is available at eco-friendly stores, Etsy, Amazon, or specialty garden shops. Prices vary:
- Single sheets: $3–$10 (great for gifts or small projects).
- Bulk packs: $15–$30 (ideal for large gardens or events).
- DIY kits: Some brands sell seed blends + paper-making supplies for custom designs.
What are some creative ways to use seed paper?
Beyond planting, seed paper is a versatile eco-art tool! Try:
- Wedding invitations or thank-you cards that grow into wildflowers.
- Bookmarks for plant lovers (plant in a pot when done!).
- Collages or framed art (plant after the project!).
- “No trash” favors at events—guests plant it instead of tossing it.
Wrapping up and next steps
Planting seed paper is a simple yet impactful way to bring life to your garden while reducing waste—no green thumb required! 🌱 With just a few layers of paper, seeds, and soil, you’ve got a sustainable way to grow flowers, herbs, or veggies.
Whether you’re a beginner or a seasoned gardener, this method proves that eco-friendly actions can be both easy and rewarding.
Now that you’re ready to dive in, pick your favorite seeds and start crafting your seed paper today. Share your blooming success with friends or even gift handmade seed paper—because every small step toward sustainability makes a difference! 🌟