
Lawn
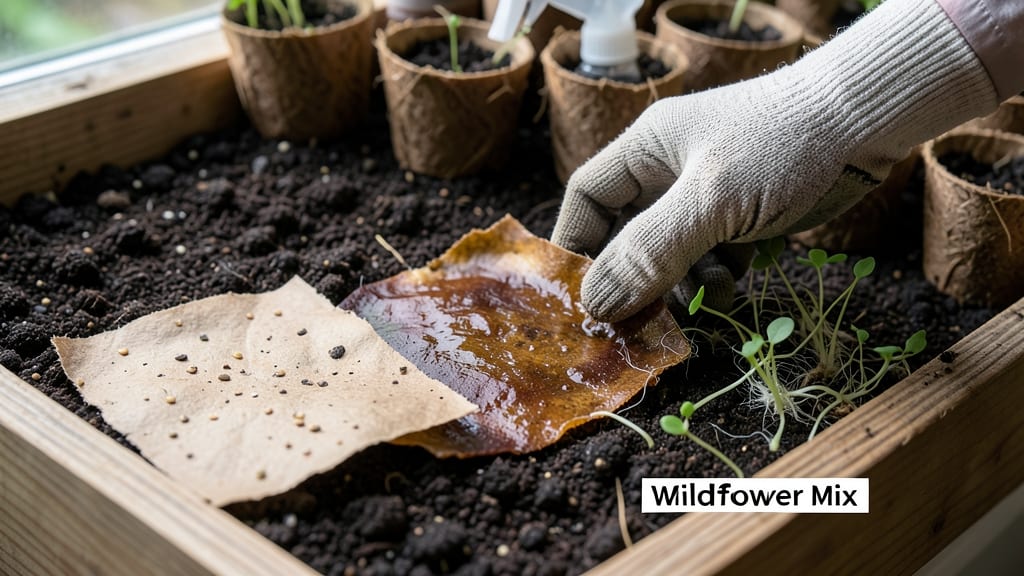
Transforming seed paper instructions into wildflowers is easier than you think—just water and wait. 🌱 I've turned this eco-friendly craft into my go-to for wedding favors, memorial gardens, and even office decor, and the process is shockingly simple once you know the tricks.
The key starts with soaking: place your seed paper in a shallow tray of room-temperature water for 10-15 minutes until the paper softens but doesn't fall apart. Handle it gently—it's delicate but stronger than regular paper when wet.
Plant it ½ inch deep in moist soil, pressing lightly to ensure good seed-to-earth contact. Most varieties germinate within 7-14 days, though some wildflower mixes take up to 3 weeks.
You'll see tiny green sprouts pushing through the soil's surface like magic, and within 4-6 weeks, you'll have lush, vibrant blooms perfect for pollinators. The best part? No thinning, no transplanting—just scatter, water, and admire. Even my black thumb can't kill these.
This method works for wildflower meadows, container gardens, or even hanging planters. The seed paper itself breaks down naturally, leaving no waste behind—just beautiful, thriving plants.
📚 In This Guide
- What you need
- Instructions
- Tips and common mistakes
- Wrapping up and next steps
What you need
- ● Wildflower or herb seeds: Choose fast-growing varieties like basil, marigold, or clover. Use 1 tsp (5g) per sheet of paper.
- ● Unbleached paper: Use printer paper, coffee filters, or recycled paper (avoid glossy or coated sheets). One sheet per seed paper.
- ● Water: Distilled or boiled (cooled) water to avoid contaminants.
- ● Blender or food processor: For pulverizing paper into pulp. Start with 2-3 sheets at a time.
- ● Large mixing bowl: Non-metallic (glass or ceramic) to avoid rust.
- ● Fine-mesh strainer or cheesecloth: To remove excess water from the pulp.
- ● Rolling pin or smooth surface: For flattening the seed paper evenly.
- ● Baking sheet or tray: Lined with parchment paper for drying.
- ○ Essential oils (optional): Add 2-3 drops of lavender or citrus oil for scent and natural preservation.
- ○ Natural dyes (optional): Use beet juice, turmeric, or spinach for colored pulp.
- ● Silicone mats or cookie cutters: For shaping custom designs (e.g., hearts, stars).
- ● Spray bottle with water: Keeps pulp moist during rolling.
- ● Hair dryer (low heat): Speeds up drying time (avoid direct heat!).
Step-by-Step instructions for crafting seed paper
Here's how I turn simple materials into eco-friendly plant starters that bloom beautifully.
🌱 Step 1: Prepare Your Base Materials
Start by gathering 4 cups of finely shredded paper—newspaper, printer paper, or egg cartons work best. Avoid glossy or colored paper, as inks can inhibit germination. Tear the paper into 1-inch squares for even blending. Place these in a large mixing bowl and add 2 cups of water to create a pulp-like consistency.
For the seed mixture, combine 1 tablespoon of wildflower seeds (or your chosen variety) with 1 tablespoon of psyllium husk powder. This acts as a natural binder, holding everything together once dry. Mix thoroughly in a separate bowl—this ensures even seed distribution in your final paper.
💧 Step 2: Blend and Form the Seed Paper
Combine the wet paper pulp with the seed-psyllium mixture in the mixing bowl. Stir vigorously with a spoon or your hands until the blend is smooth and uniform. The texture should resemble thick, damp playdough. If it feels too dry, add 1 teaspoon of water at a time until pliable.
Lay a sheet of parchment paper or a silicone mat on a flat surface. Scoop ¼ cup of the mixture onto the center and spread it into a 4x6-inch rectangle using your fingers or a rolling pin. Press firmly to remove air bubbles and create an even layer. The goal is a thin, uniform sheet—about ⅛-inch thick—so seeds germinate evenly.
☀️ Step 3: Dry and Cure the Seed Paper
Let the seed paper dry completely in a warm, dry place away from direct sunlight for 24-48 hours. Flip it halfway through to prevent curling. You’ll know it’s ready when it feels stiff and slightly brittle—like regular paper. Avoid using a hairdryer or oven, as high heat can kill the seeds.
Once dry, gently peel the seed paper off the parchment. Store it in a cool, dry place in an airtight container until ready to plant. The psyllium husk keeps the seeds viable for up to 6 months, making this a great project for gifting or long-term storage.
🌿 Step 4: Plant and Germinate
To plant, soak the seed paper in warm water for 10-15 minutes until pliable. Press it gently into prepared soil, seeds-side down, in a tray or directly into your garden bed. Cover lightly with a ¼-inch layer of soil to protect the seeds from birds and maintain moisture. Keep the soil consistently damp—not soggy—by misting daily or using a spray bottle.
Germination typically occurs in 7-21 days, depending on the seed type and environmental conditions. You’ll see tiny sprouts pushing through the paper first, followed by true leaves. Once seedlings reach 2-3 inches tall, you can transplant them directly into the ground or pots, paper and all—it’ll decompose naturally over time.
Tips & tricks for perfect seed paper crafting
Took me a while to master these eco-friendly plant starters, so here are my go-to tricks for foolproof results.
Paper Selection Tip: For best germination rates, use 100% unbleached paper like coffee filters or brown paper bags—these contain no chemicals that might inhibit seed growth. If using egg cartons, crush them finely to mimic the texture of shredded paper. Confession: I skipped this step for years and wondered why some batches performed better than others!
The Psyllium Secret: When mixing the seed-psyllium blend in Step 1, use a fork to crush the psyllium husk powder first—this prevents clumping and ensures even distribution throughout the paper. The 1 tablespoon measurement is critical: too little and your paper may disintegrate when wet; too much and it can create a gummy texture. I learned this the hard way after ruining three batches with uneven binder distribution.
Drying Strategy: For the 24-48 hour drying period in Step 3, place your seed paper on a wire cooling rack instead of directly on parchment. This allows air to circulate on both sides, preventing moisture buildup that could lead to mold. If your kitchen is particularly humid, extend the drying time to 48 hours—just monitor for stiffness rather than relying strictly on the clock.
Planting Hack: Before pressing your soaked seed paper into soil in Step 4, gently score the back with a fork to create small drainage channels. This prevents waterlogging while keeping the paper in contact with the soil. For container gardening, place a small piece of mesh or hardware cloth over the soil before adding the seed paper—this deters ants and other pests from stealing your seeds.
Pro Tips for Seed Paper Instructions
- Took me a while to master these eco-friendly plant starters, so here are my go-to tricks for foolproof results.
- Paper Selection Tip: For best germination rates, use 100% unbleached paper like coffee filters or brown paper bags—th...
- The Psyllium Secret: When mixing the seed-psyllium blend in Step 1, use a fork to crush the psyllium husk powder firs...
Frequently asked questions
Got questions about seed paper? You’re not alone—this eco-friendly planting method is simple but can feel new! Here are answers to the most common queries to help you grow with confidence.
How long does it take for seeds to sprout in seed paper?
Germination time varies by plant type, but most seed paper sprouts appear within 7–14 days under ideal conditions (moisture, warmth, and indirect light). Check the paper’s instructions—some herbs (like basil) may sprout faster (5–7 days), while flowers or wildflowers could take up to 3 weeks. Patience is key!
Do I need to soak seed paper before planting?
Nope! Seed paper is pre-moistened and designed to activate when exposed to natural humidity. Simply place it on damp soil (or water lightly) and press gently. Over-soaking can drown seeds, so a light mist or rain is perfect. Think of it like a self-watering seed starter!
Can I plant seed paper directly in my yard or garden?
Seed paper is biodegradable and safe for direct planting in gardens, pots, or even hanging planters. For best results, choose a spot with partial shade to full sun (depending on your plant type). Avoid compacted soil—loosen it slightly to help roots establish. Pro tip: Mark the area if you’re planting multiple sheets to track growth!
Will seed paper survive freezing temperatures?
Seed paper itself won’t freeze, but germination slows or stops in cold soil (below 40°F/4°C). For cold climates, start indoors near a sunny window or wait until spring to plant outdoors. If you’re planting in early spring, use a cloche or row cover to protect young sprouts until temperatures warm.
What if my seed paper doesn’t sprout? Troubleshooting tips?
Don’t panic! Try these fixes:
- Check moisture: Keep soil consistently damp (not soggy). Mist lightly daily if rain is scarce.
- Light levels: Most seed paper needs bright, indirect light (a south-facing window or grow light works). Avoid deep shade.
- Patience: Some seeds (like clover) take 3–4 weeks to sprout. Label your paper to track progress!
- Seed viability: If nothing happens after 4 weeks, the seeds may be old. Try a fresh sheet or contact the manufacturer.
Still stuck? Snap a photo and share it—seed paper communities love helping!
Wrapping up and next steps
Creating your own seed paper is a rewarding way to blend creativity with eco-friendly gardening! 🌱 With just a few simple steps—gathering materials, mixing the pulp, and pressing the seeds—you’ve unlocked a sustainable way to grow plants while reducing waste.
Whether you’re crafting gifts, decorating, or simply experimenting, this project proves that small actions can make a big impact on the planet.
Now that you’re armed with seed paper instructions, why not take the next step? Try making a batch today and share your green creations with friends or family. Happy planting—and remember, every seed you plant is a step toward a greener future! 🌿