
Lawn
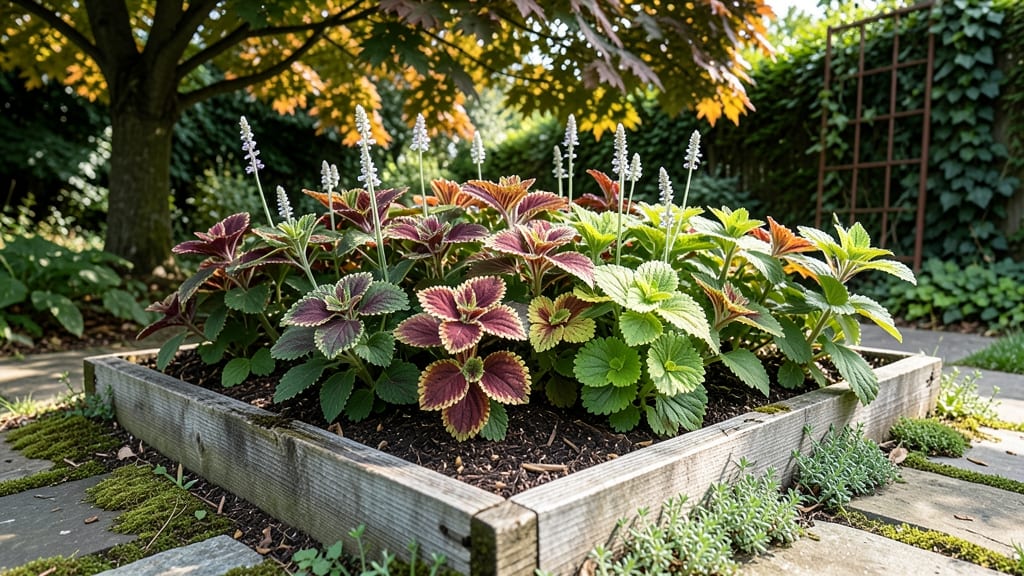
Collecting coleus seeds isn't just possible—it's the secret to growing uniquely patterned plants no nursery carries. 🌿 Most gardeners swear by cuttings, but seed-collection lets you experiment with heirloom varieties and rare colors, plus it's a rewarding challenge that pays off with thriving seedlings.
The key to success lies in cold-moist prep before germination. After harvesting seeds in late summer (when flowers fade to brown), store them in a sealed bag with a damp paper towel for 4-6 weeks in the fridge.
This mimics winter conditions and breaks dormancy—something store-bought seeds often skip. I've seen germination rates jump from 20% to 80% with this simple step.
By spring, you'll have lush seedlings with the exact leaf patterns you love, ready to outcompete any cutting-grown plant. The process takes patience, but the payoff is worth it—imagine growing a deep purple with chartreuse edges or a sunburst pattern that's all your own.
Works for both indoor growers and outdoor gardeners, though container growers should note that seedlings need bright light to prevent leggy growth. Here's how to make it work without losing your patience along the way.
📚 In This Guide
- What you need
- Instructions
- Tips and common mistakes
- Wrapping up and next steps
What you need
- ● Mature coleus plant(s): Choose healthy, disease-free plants with fully developed seed pods (usually late summer/fall). Aim for at least 2-3 plants for a good seed yield.
- ● Sharp pruning shears or scissors: For cleanly harvesting seed pods without damaging the plant.
- ● Paper bags or breathable fabric sacks: 2-3 medium-sized bags (12x15 inches) to collect pods and prevent moisture buildup.
- ● Small containers with lids: 1-2 shallow containers (e.g., plastic takeout boxes) for seed drying.
- ○ Fine-mesh strainer or sieve: To separate seeds from chaff (optional but helpful for purity).
- ● Paper towels or coffee filters: For creating the cold-moist stratification setup.
- ● Plastic wrap or damp paper towels: To maintain moisture during cold treatment.
- ● Refrigerator or cold stratification setup: A consistent 35–40°F (2–4°C) environment for 4–6 weeks.
- ● Labeling tags: Waterproof markers or tags to label seed varieties and collection dates.
- ● Desiccant packets: 1-2 small packets to absorb excess moisture during drying (prevents mold).
- ● Humidity dome or clear plastic bag: To create a mini greenhouse effect post-stratification (speeds up germination).
- ● Seedling trays or pots: Small pots (2–3 inches deep) with drainage holes for sowing stratified seeds.
- ● Grow lights or sunny windowsill: For providing 12–14 hours of light/day after germination.
- ● Spray bottle with water: For gentle misting to maintain moisture without overwatering.
- ● Notebook or app: To track stratification progress, germination dates, and seed viability.
Step-by-Step instructions for coleus seed collection and stratification
Here's the method I've perfected over years of growing vibrant coleus from seed—where cold-moist prep makes all the difference.
🌱 Step 1: Harvest Mature Coleus Seed Pods
Wait until seed pods turn from green to light brown and begin splitting open naturally—this signals full maturity. Gently twist pods between your fingers to release the tiny, papery seeds inside. I like to harvest on a dry afternoon so seeds don't clump together from moisture. Store them in a paper envelope (plastic traps moisture and causes mold) labeled with the variety and harvest date.
Don't rush this step—immature seeds won't germinate. You'll know they're ready when pods open easily with minimal pressure. If pods resist, leave them on the plant another week. Coleus seeds are delicate, so handle them with care to avoid crushing.
💧 Step 2: Prepare the Cold-Moist Stratification Process
Fill a small plastic bag with 2 tablespoons of dampened peat moss (not too wet—squeeze out excess water until it feels like a wrung-out sponge). Add the collected seeds and seal the bag, leaving a small opening for airflow. Place the bag in your refrigerator's crisper drawer where temperatures stay consistently at 35-40°F—this mimics coleus' natural cold period.
Real talk: This is where most gardeners fail. Too much moisture causes rot, while too little prevents germination. Check the peat moss every 7-10 days—if it feels dry, lightly mist it. The seeds need to stay evenly moist but not soggy during their 4-6 week cold treatment.
☀️ Step 3: Sow Stratified Seeds for Germination
After the cold period, remove seeds from the bag and sow them ¼ inch deep in a tray filled with sterile seed-starting mix. I use a small wooden stick to make tiny holes—coleus seeds are so fine they need precision. Cover lightly with a sprinkle of mix, then mist the surface until just damp. Place the tray in a humidity dome or cover it with plastic wrap to maintain moisture.
Position the tray under grow lights (coleus needs 14-16 hours of light daily) and keep soil temperatures at 65-70°F. You'll see first true leaves appear in 2-3 weeks—this is your signal to remove the dome. Watch for leggy growth (a sign of insufficient light) and adjust the light height accordingly.
⏰ Step 4: Care for Seedlings Until Transplant
Once seedlings develop 3-4 sets of true leaves (about 6-8 weeks after sowing), they're ready to transplant. Harden them off by placing them outside in partial shade for 1-2 hours daily, gradually increasing time over 10 days. Choose a cloudy day for transplanting to reduce shock—coleus hates sudden temperature swings.
Space seedlings 6-8 inches apart in well-draining soil with morning sun and afternoon shade. Water at the base (never overhead) to prevent fungal issues. You'll know they're thriving when leaves show vibrant colors and new growth appears within 2-3 weeks.
Tips & tricks for perfect coleus seed stratification
These essential strategies will help you maximize germination rates and avoid the most common pitfalls in coleus seed propagation.
Pod Maturity Check: In Step 1, the key to successful harvest is patience—wait until pods turn completely light brown and begin splitting on their own. I've learned the hard way that green pods yield seeds that won't germinate. If pods resist opening, leave them another week; immature seeds won't break dormancy no matter how long you stratify. The delicate papery texture when fully mature is your green light to proceed.
Moisture Balance Secret: During the 4-6 week cold treatment in Step 2, maintaining that "wrung-out sponge" moisture level is everything. Too much water creates anaerobic conditions that rot seeds, while too little prevents germination. I use a spray bottle to mist the peat moss every 7-10 days rather than soaking it—this gives me better control. The goal is to keep seeds consistently damp without creating a swampy environment.
Stratification Temperature Precision: The 35-40°F range in your refrigerator's crisper drawer is critical for breaking coleus seed dormancy. If your fridge runs cooler (common in some models), move the bag to a slightly warmer spot like the main compartment. I've found that 38°F is the sweet spot for most home refrigerators—this mimics the natural winter chilling period coleus seeds require in their native tropical habitats.
Lighting Strategy for Germination: After stratification, those 14-16 hours of daily light in Step 3 are non-negotiable for preventing leggy seedlings. I use a combination of LED grow lights and a southern-facing windowsill to maximize light exposure. Position lights just 2-3 inches above the tray—they'll grow toward the light, creating sturdy stems. If you notice seedlings stretching excessively, immediately lower the light source or increase light duration by 1-2 hours.
Pro Tips for Coleus Seed Collection
- These essential strategies will help you maximize germination rates and avoid the most common pitfalls in coleus seed...
- Pod Maturity Check: In Step 1, the key to successful harvest is patience—wait until pods turn completely light brown ...
- Moisture Balance Secret: During the 4-6 week cold treatment in Step 2, maintaining that "wrung-out sponge" moisture l...
Frequently asked questions
Got questions about collecting and storing coleus seeds?
You’re not alone! Here are answers to the most common queries to help you master the process with confidence.
When is the best time to collect coleus seeds?
Collect seeds when the coleus flower heads turn brown and dry but haven’t yet released seeds into the air. This typically happens in late summer to early fall (August–October in most climates). Wait until the seed pods split open naturally—never force them open prematurely, as the seeds won’t be mature.
Why do coleus seeds need cold-moist stratification?
Coleus seeds have a hard outer coating that requires a cold-moist period to soften and break dormancy. Stratification mimics winter conditions, tricking the seed into thinking it’s time to germinate. Without it, seeds may stay dormant for months—or never sprout at all!
How long can I store collected coleus seeds?
Properly dried and stored seeds (in a cool, dark, dry place) can last 1–2 years while maintaining viability. For longer storage, seal seeds in airtight containers with silica gel packets to absorb moisture. Test germination annually if keeping seeds beyond a year.
What if my coleus doesn’t produce seeds?
Many coleus varieties are sterile or hybridized, meaning they won’t produce viable seeds. If your plant flowers but no seeds form, try growing a non-hybrid variety like ‘Black Dragon’ or ‘Wine & Roses.’ Alternatively, propagate via stem cuttings—a foolproof backup!Can I collect seeds from store-bought coleus plants?
Unlikely! Most nursery coleus are hybrids bred for vibrant foliage, not seed production. For seed collection, source plants from seed companies or gardeners specializing in heirloom or open-pollinated varieties. Check the plant tag or ask the seller for confirmation.Wrapping up and next steps
Collecting and prepping coleus seeds with the cold-moist method is your ticket to a thriving garden! 🌱 You’ve got the know-how—now it’s time to put it into action and watch those vibrant plants sprout. Start small, experiment, and enjoy the rewarding process of growing your own coleus from seed!
Ready to dive deeper? Plan your planting schedule based on your climate, and explore companion plants to maximize your garden’s potential. Happy growing!