
Lawn
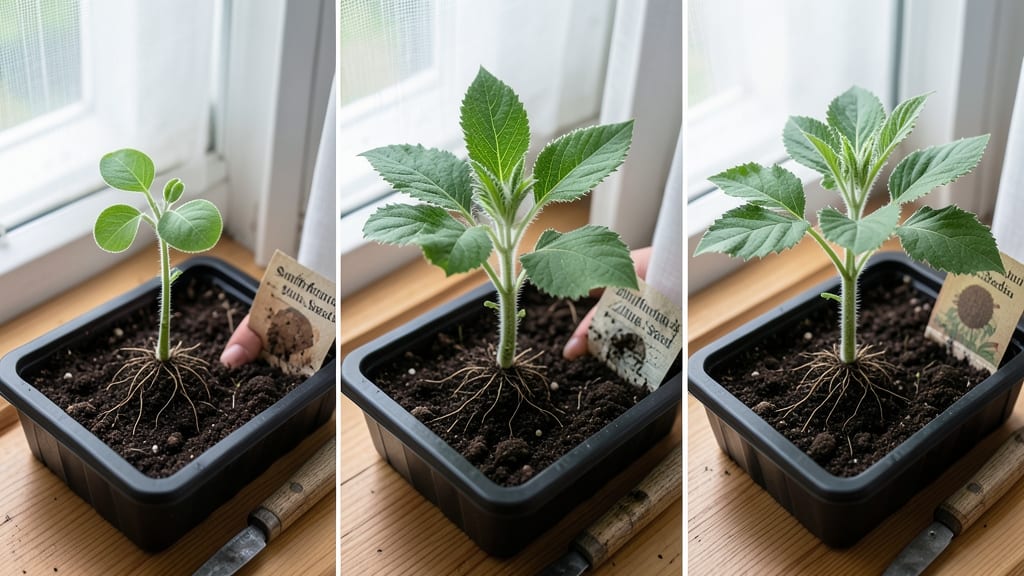
Understanding the seed stages of growth turns a guessing game into a predictable process. 🌱 When you know what to watch for—from that first crack in the seed coat to the sturdy grass blades—you can troubleshoot problems before they start.
The journey begins with imbibition, where seeds soak up moisture and swell, followed by radicle emergence, when the first root breaks through. This stage is all about keeping soil consistently damp (not soggy) and temperatures between 60-75°F—too hot or cold delays germination.
Light plays a minor role here, but proper moisture is non-negotiable. By day 7-14, you’ll spot the coleoptile (a protective sheath) pushing through the soil, followed by the first true leaves. This is when thinning becomes critical—crowded seedlings compete for nutrients, leading to weak, leggy growth.
A simple rake or hand-pulling ensures each plant gets space to thrive. Once seedlings hit 2-3 inches tall, they’re ready for their next challenge: establishing roots and outcompeting weeds.
The key is patience—healthy lawns take time, but each stage brings you closer to that lush, uniform carpet you’re dreaming of.
📚 In This Guide
- What you need
- Instructions
- Tips and common mistakes
- Wrapping up and next steps
What you need
- ● Lawn seed: Quantity: 10–20 lbs per 1,000 sq ft (adjust based on seed type—cool-season vs. warm-season grasses vary).
- ● Type: Choose a high-quality blend suited to your climate (e.g., Kentucky bluegrass, Bermuda, or fescue).
- ● Soil test kit: 1 kit (to check pH and nutrient levels; ideal range: 6.0–7.0).
- ● Lawn spreader: Broadcast or drop spreader (rent or buy; walk-behind models work best for large areas).
- ○ Optional: Hand-held spreader for small patches or edges.
- ● Topsoil or compost: ¼–½ inch layer (for seed-to-soil contact; organic matter improves drainage).
- ● Rake: Bow rake with fine teeth (for leveling soil and covering seeds lightly).
- ● Watering system: Garden hose with adjustable nozzle (or a sprinkler for even coverage).
- ○ Optional: Drip irrigation kit for precision watering.
- ● Fertilizer: Starter fertilizer (high in phosphorus, e.g., 5-10-10 ratio)—apply sparingly per package instructions.
- ○ Optional: Organic options like bone meal or compost tea.
- ● Clear the area: Remove debris, rocks, and weeds (use a weed trimmer or shovel).
- ● Test soil moisture: Soil should be damp but not soggy (press a handful—it should hold shape but not crumble).
- ● Check weather forecast: Aim to plant seeds 1–2 weeks before the first frost (cool-season grasses) or in late spring/early summer (warm-season grasses).
- ● Mark boundaries: Stakes or string to outline planting areas for even distribution.
- ● 🌡️ Seed depth: Cover seeds with ¼ inch or less of soil—too deep = slower germination.
- ● ✨ Mulch lightly: Use straw or peat moss (not wood chips) to retain moisture without suffocating seeds.
- ● 💧 Watering schedule: Keep soil consistently moist (not flooded) for the first 2–3 weeks.
Understanding the seed stages of growth in lawn germination
Here's how to recognize each phase—no guesswork, just clear visual cues.
🌱 Step 1: Imbibition – The Silent Soaking Phase
The moment you plant your seed, a hidden transformation begins. Imbibition is when the seed absorbs 2-3 times its weight in water, swelling as the seed coat softens. This phase lasts 6-12 hours and is critical—if seeds dry out here, germination fails completely. You won’t see anything yet, but the seed’s metabolic engine revs up, breaking dormancy. The soil should feel moist but not saturated—think of a wrung-out sponge.
I like to cover newly seeded areas with lightweight straw mulch (about ¼ inch thick) to retain moisture without smothering. This is where patience pays off—don’t disturb the soil or check for progress. The seed is busy rewriting its genetic instructions, preparing for the next visible stage. If your lawn seed packet says "needs stratification," this phase mimics winter’s cold-moisture cycle, breaking seed dormancy.
🌱 Step 2: Radicle Emergence – The First Visible Root
Within 3-7 days (depending on species), the radicle—the embryonic root—punches through the seed coat. This is your first visual checkpoint: tiny white threads, ⅛ inch long, pushing downward into the soil. They’ll grow ½ inch per day if conditions are ideal. You won’t see them from above, so gently lift a small section of mulch or use a hand trowel to peek beneath the surface.
This is the moment that matters: keep soil consistently moist (about 1 inch of water per week, either from rain or irrigation). If the radicle dries out, it’ll wither before it can anchor the seedling. I use a fine-mist sprinkler in the morning to avoid compacting the soil. The radicle’s job is to tap into the soil’s moisture and nutrients—its success sets the stage for everything above ground.
🌱 Step 3: Shoot Emergence – The First Green Signal
After 7-14 days, the coleoptile (a protective sheath) breaks the soil surface, followed by the first true leaves. These aren’t the tiny seed leaves (cotyledons)—they’re the grass blades you’ll recognize as your lawn. You’ll see them as tiny, pale green spikes, about ½ inch tall, emerging in clusters. This is when the lawn starts looking alive, but it’s still fragile.
Here’s where most mistakes happen: don’t mow yet. The roots are only 1-2 inches deep, and the shoots are still tender. If you walk on them or mow too soon, you’ll uproot the seedlings. Instead, use a lawn roller (filled with water) to firm the soil gently and encourage root growth. The leaves will darken to their mature color within 5-7 days—that’s your signal to adjust watering to ½ inch per week.
🌿 Step 4: Establishment – Root and Blade Growth
By 2-3 weeks, the grass enters the establishment phase, where roots grow 1-2 inches deeper per week and blades thicken. You’ll notice tiller formation—side shoots at the base of the plant—creating that lush, dense look. The lawn will feel springy underfoot (not spongy or hard), and you’ll see 3-4 inches of growth if conditions are right. This is when you can lightly fertilize with a starter blend (high in phosphorus) to boost root development.
Watch for uneven growth—this often means shade, poor soil contact, or inconsistent watering. If patches appear thin, rake lightly to ensure seeds made contact with soil and redistribute any exposed seeds. I’ve seen lawns stall here because of compaction—aerate if the soil feels hard when pressed. The goal is 70-80% ground cover before the first mowing, which usually happens at 3-4 inches tall.
⏰ Step 5: Maturity – The Lawn Takes Shape
After 4-6 weeks, your lawn reaches maturity, where roots extend 4-6 inches deep and blades grow 2-3 inches tall. This is when you’ll see color uniformity, dense tiller clusters, and resistance to weeds. The grass will now handle regular mowing (at 3-4 inches), foot traffic, and seasonal changes. You’ll know it’s fully established when you can walk across it without leaving prints—a sign the roots have woven a strong network.
Real talk: this is the phase where maintenance kicks in. Adjust your mower height based on grass type (cool-season grasses like 3-4 inches; warm-season like 1-2 inches). Water deeply 1-2 times per week (early morning) to encourage deep roots, and overseed bare spots if any appear. The first 6 weeks set the foundation—now it’s about consistency to keep your lawn thriving.
Tips & tricks for perfect lawn germination
Between us, the first 6 weeks of lawn growth are where most people see their hard work go wrong. Here's how to avoid those costly mistakes and give your seeds the best possible start.
Soil Moisture is Non-Negotiable: During the critical 6-12 hour imbibition phase, your seeds need consistent moisture—like a wrung-out sponge. I've ruined lawns by checking too often; resist the urge to disturb the soil. Use a fine-mist sprinkler in the morning to maintain that perfect moisture level without compacting the soil. The key is consistency—don't let the top layer dry out, even for a few hours.
Visual Cues Save You Time: In Step 2, when checking for radicle emergence, look for tiny white threads (⅛ inch long) pushing downward—not the green shoots you'll see later. Use a hand trowel to gently lift mulch in one small area; this gives you a progress report without disturbing the entire seedbed. Remember, these roots grow ½ inch per day if conditions are right, so patience pays off.
Timing is Everything: The 7-14 day window for shoot emergence is when most lawns fail. Don't mow until you see 3-4 inches of growth and the lawn feels springy underfoot. I've seen people mow at 2 inches, only to realize they'd just scalped their tender seedlings. Wait for that 5-7 day color darkening before adjusting watering to ½ inch per week—this is your green light to proceed.
Troubleshooting Uneven Growth: If you notice patches appearing thin during the establishment phase, it's usually one of three things: shade, poor soil contact, or inconsistent watering. Rake lightly to redistribute any exposed seeds, and consider aerating if the soil feels compacted. The goal is 70-80% ground cover before first mowing—this is when you'll see your lawn's true potential.
Pro Tips for Seed Stages Of Growth
- Between us, the first 6 weeks of lawn growth are where most people see their hard work go wrong. Here's how to avoid ...
- Soil Moisture is Non-Negotiable: During the critical 6-12 hour imbibition phase, your seeds need consistent moisture—...
- Visual Cues Save You Time: In Step 2, when checking for radicle emergence, look for tiny white threads (⅛ inch long) ...
Frequently asked questions
How long does it take for grass seed to germinate?
Germination time varies by grass type. Cool-season grasses (like fescue or ryegrass) typically sprout in 7–21 days, while warm-season grasses (like Bermuda or zoysia) may take 10–30 days. Soil temperature, moisture, and seed quality play key roles—keep seeds consistently moist and in the ideal temp range (60–75°F for warm-season, 50–65°F for cool-season).
What’s the best time to plant grass seed for fastest germination?
Timing depends on your climate. For cool-season grasses, aim for early fall or late spring when temps are mild (50–65°F). Warm-season grasses thrive when soil is warm (late spring to early summer, 65–75°F). Avoid planting during extreme heat or cold—seeds need stable conditions to sprout efficiently!
How often should I water newly planted grass seed?
Keep the soil consistently moist (not soggy!) by watering lightly 2–3 times daily for the first 2 weeks. Once sprouts appear, reduce to 1–1.5 inches per week, including rainfall. Use a gentle sprinkler to avoid displacing seeds. Pro tip: Water in the early morning to minimize evaporation and fungal risks.
Why aren’t my grass seeds germinating? Troubleshooting tips
If seeds aren’t sprouting, check these common culprits:
- Poor soil contact: Rake seeds lightly into soil (¼ inch deep) for warmth and moisture.
- Inconsistent moisture: Uneven watering can dry out seeds—use a misting nozzle for even coverage.
- Extreme temps: Seeds need stable conditions; avoid planting during heatwaves or frosts.
- Low-quality seed: Old or damaged seeds may fail—buy fresh, high-germination-rate seed.
If issues persist, test your soil’s pH (ideal: 6.0–7.0) and amend with compost or fertilizer as needed.
Can I overseed an existing lawn, or should I start fresh?
Overseeding works for thinning or patchy lawns—just rake the area, spread seed, and water well. For bare spots or new lawns, starting fresh ensures better germination. If overseeding, choose the same grass type or a compatible blend. Spring or fall are the best times to overseed for optimal results.
Wrapping up and next steps
Understanding the seed stages of growth in your lawn is like unlocking the secret to a lush, vibrant green carpet! 🌱 From the first sprouts to full coverage, each phase plays a critical role in shaping your outdoor space.
By recognizing these stages, you’re already on the path to success—so stay patient, keep nurturing those young blades, and soon, you’ll reap the rewards of your hard work.
Ready to take the next step? Monitor your lawn’s progress closely, adjust care as needed, and don’t hesitate to seek expert advice if challenges arise. Your dream lawn starts with knowledge—and you’ve got it!