
Propagation
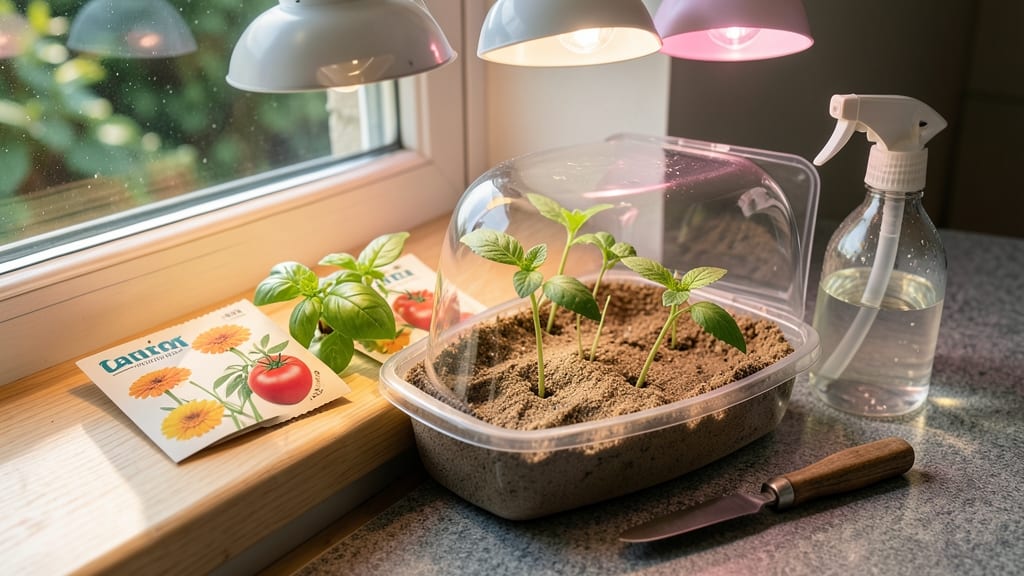
My Promix seed starting mix saved me from the "black mold tragedy" of last spring—no more weak, leggy seedlings that collapse at transplant time. 🌱 This stuff is designed to give seeds exactly what they need: perfect drainage, balanced nutrients, and a pH that won’t shock tender roots.
Unlike cheap peat mixes that compact into brick, Promix stays light and airy, so those first roots can spread without fighting for space.
Start with a clean container—even a repurposed egg carton works—and fill it halfway with the mix. Press seeds just below the surface (depth matters!), then water gently until the top inch feels damp but not soggy.
The secret? Promix holds moisture without turning into a swamp, which means fewer damping-off disasters. I’ve seen seeds pop in 3-5 days with this stuff, compared to the two-week wait with other mixes.
What sets Promix apart is its built-in balance: no extra fertilizer to burn seedlings, no need to amend it. Just add seeds, keep the tray in bright (but indirect) light, and watch those first leaves unfurl strong and sturdy.
Even my finicky snapdragons and slow-to-germinate parsley have become reliable with this mix—no more crying over lost batches.
For troubleshooting, remember: overwatering is the #1 killer. If you see mold, let the mix dry out slightly before watering again. And if seedlings look pale? They’re hungry—give them a light foliar spray of diluted fish emulsion after the first true leaves appear.
Promix works magic, but it’s not magic—just the right conditions for seeds to do their best work.
📚 In This Guide
- What you need
- Instructions
- Tips and common mistakes
- Wrapping up and next steps
What you need
- ● Promix Seed Starting Mix: 1 bag (typically 8 qt or 12 qt, depending on your needs). Look for the Promix BX or Promix BX Mycorrhizae for enhanced root development.
- ● Seedling trays or containers: 1-2 trays (72-cell or 128-cell trays work well) or small pots (2-3 inches deep). Ensure they have drainage holes!
- ● Seeds: High-quality seeds of your choice (check seed packets for planting depth and spacing).
- ● Watering can or spray bottle: With a fine mist nozzle to avoid disturbing seeds.
- ● Trowel or scoop: For filling trays or pots with the mix.
- ○ Flat or heat mat (optional but helpful): To maintain consistent warmth (70-75°F is ideal for germination).
- ● Plastic wrap or humidity dome: To retain moisture while seeds germinate.
- ● Grow lights or sunny windowsill: For 12-16 hours of light daily once seedlings sprout.
- ● pH testing kit: To check soil acidity (Promix is slightly acidic; aim for 5.8-6.2 for most seeds).
- ● Fertilizer (low-dose): A balanced, water-soluble fertilizer (like 5-5-5) for post-germination growth.
- ● Labels and markers: To track seed varieties and planting dates.
- ● Bottom tray or saucer: To catch excess water and prevent soggy trays.
Zero-fail germination with Promix: step-by-step for stronger seedlings
Here's my foolproof method for using Promix to grow seedlings that never flop or rot.
🌱 Step 1: Prepare Your Containers and Mix
Fill your seed-starting trays or small pots with Promix seed starting mix—it's already sterilized and light enough for tiny roots to thrive. I like to use 4-inch pots for most seeds since they give roots room to establish without crowding. Tap the container gently to settle the mix, then moisten it until it feels like a wrung-out sponge: damp but not dripping.
Don't skip this step—ProMix expands slightly when wet, so you'll need about 10-15% less than you think. Press down lightly to remove air pockets, but don't compact it. The mix should crumble easily between your fingers. This ensures your seeds won't drown when you water later.
🌱 Step 2: Sow Seeds at the Right Depth
Check the seed packet for depth guidelines, but a good rule of thumb is to plant seeds twice as deep as their diameter. For tiny seeds like lettuce, that's just a sprinkle on top. For larger seeds like beans, press them ½ inch deep. I use a toothpick to make small holes—it's more precise than just dropping seeds on the surface.
Cover seeds lightly with additional ProMix, then mist the surface with a spray bottle until evenly moist. Avoid heavy watering here—you'll see seeds wash away or get buried too deep. Once planted, place the tray in a warm spot (70-75°F) where they can germinate. Most seeds sprout within 5-14 days, depending on the type.
💧 Step 3: Maintain Ideal Moisture Without Overwatering
ProMix stays moist longer than regular soil, but that doesn't mean you should neglect watering. Keep the mix consistently damp—not soggy, not dry. Stick your finger ½ inch deep; if it feels dry, it's time to water. I use a spray bottle for the first week to avoid disturbing seeds, then switch to a gentle watering can with a fine rose.
Here's the trick: Water from the bottom by placing trays in ½ inch of water for 10 minutes. This prevents fungal diseases like damping-off, which turns seedlings to mush overnight. After watering, let excess drain completely—ProMix holds moisture well, but roots need air too.
☀️ Step 4: Provide Light Immediately After Germination
The moment you see green sprouts, move them to bright light—a south-facing window or grow light. Seedlings need 14-16 hours of light daily to grow strong. Without enough light, they'll stretch toward the window (called "legginess") and become weak. I use a T5 fluorescent grow light on a timer to keep things consistent.
Keep the light 2-4 inches above the seedlings and raise it as they grow. You'll know they're getting enough light when the leaves are dark green and compact, not pale and stretched. If you notice seedlings bending toward the light, rotate the tray daily so they grow straight.
🌿 Step 5: Harden Off Before Transplanting
Two weeks before your last frost date, start hardening off your seedlings. Move them outside for 1-2 hours the first day, gradually increasing time over 7-10 days. Choose a shaded, sheltered spot to avoid shock. This toughens them up so they can handle the real world.
Watch for wilting—they might look sad at first, but that's normal. Once they bounce back after a full day outside, they're ready for the garden. Plant in the early evening or on a cloudy day to reduce stress. ProMix's lightweight formula means minimal root disturbance when transplanting, so your seedlings will recover faster.
Tips & tricks for perfect seedling starts with Promix
Here's what nobody tells you about making seed starting foolproof with Promix—these little details make all the difference.
Container Size Matters: While 4-inch pots work for most seeds, larger seeds like squash or pumpkins need 6-inch pots to prevent root binding. I've seen seedlings grow roots that circle the pot like a pretzel—this stunts growth and makes transplanting painful. For tiny seeds like lettuce, you can use smaller cells (2-inch) to save space, but they'll need transplanting sooner.
Temperature Matters: The 70-75°F range is ideal for germination, but if your home runs cooler, consider using a seedling heat mat ($15-$20). I placed mine under my seed trays and saw germination times cut in half for slower starters like parsley. Just don't overheat—above 85°F can actually inhibit germination for many seeds.
Lighting Hack: If you're using a grow light, position it 2-3 inches above seedlings at first, then raise it as they grow. I noticed my seedlings developed leggy stems when the light was too far away—this happens because they stretch toward the light source. A simple timer set for 14-16 hours daily eliminates guesswork and gives consistent results. For windowsill growers, rotate trays daily to prevent leaning.
Harden Off Like a Pro: The 7-10 day hardening process is where many gardeners fail. Start with just 1-2 hours in partial shade, then gradually increase exposure. I've seen seedlings wilt dramatically after being moved outside too quickly—this is their shock response. The key is to watch their recovery time: if they perk up within an hour, they're ready for more sun the next day.
Pro Tips for Promix Seed Starting Mix
- Here's what nobody tells you about making seed starting foolproof with Promix—these little details make all the diffe...
- Container Size Matters: While 4-inch pots work for most seeds, larger seeds like squash or pumpkins need 6-inch pots ...
- Temperature Matters: The 70-75°F range is ideal for germination, but if your home runs cooler, consider using a seedl...
Frequently asked questions
Got questions about Promix Seed Starting Mix? You’re not alone! Whether you’re a seasoned gardener or just starting, these answers will help you get the most out of your seed-starting journey.
What’s the best way to sterilize Promix Seed Starting Mix before use?
Sterilization prevents mold and pests. Spread the mix in a thin layer on a baking sheet and bake at 200°F (93°C) for 30 minutes. Alternatively, microwave it in a bowl with a damp paper towel for 2–3 minutes (stir halfway). Let it cool before use!
How long does Promix Seed Starting Mix last after opening?
Once opened, store it in a cool, dry place (like a sealed container or bag with a tight lid). It stays fresh for 6–12 months, but check for mold or foul smells—if present, toss it! For best results, use it within a few months.
Can I reuse Promix Seed Starting Mix after transplanting seedlings?
Not recommended! The mix breaks down after use and may harbor pathogens or pests. Instead, compost it or discard it. For future starts, buy fresh—it’s a small price for zero-fail germination!
What’s the ideal moisture level for Promix when starting seeds?
Keep it consistently moist but not soggy. Think of a damp sponge—water should drain freely, but the surface shouldn’t dry out. Use a spray bottle or watering can with a fine rose to avoid disturbing seeds. Overwatering = rot; underwatering = weak starts!
Are there alternatives to Promix for seed starting?
Yes! Other sterile, lightweight mixes include:
- Pro-Mix BX (similar to Promix, peat-based)
- Fox Farm Seedling Mix (coco coir + peat)
- DIY mix: 50% peat moss + 50% perlite/vermiculite
Wrapping up and next steps
Mastering Promix Seed Starting Mix is your secret weapon for zero-fail germination and robust seedlings! With the right balance of nutrients, aeration, and moisture control, you’re setting your plants up for success from day one.
Whether you’re a seasoned gardener or just starting out, this mix simplifies the process and boosts confidence in your green thumb.
Ready to grow with purpose? Grab your Promix, follow the steps, and watch your seeds transform into thriving plants. Next up: Experiment with different seed types and track your germination rates—you’ve got this! 🌱✨