
Lawn
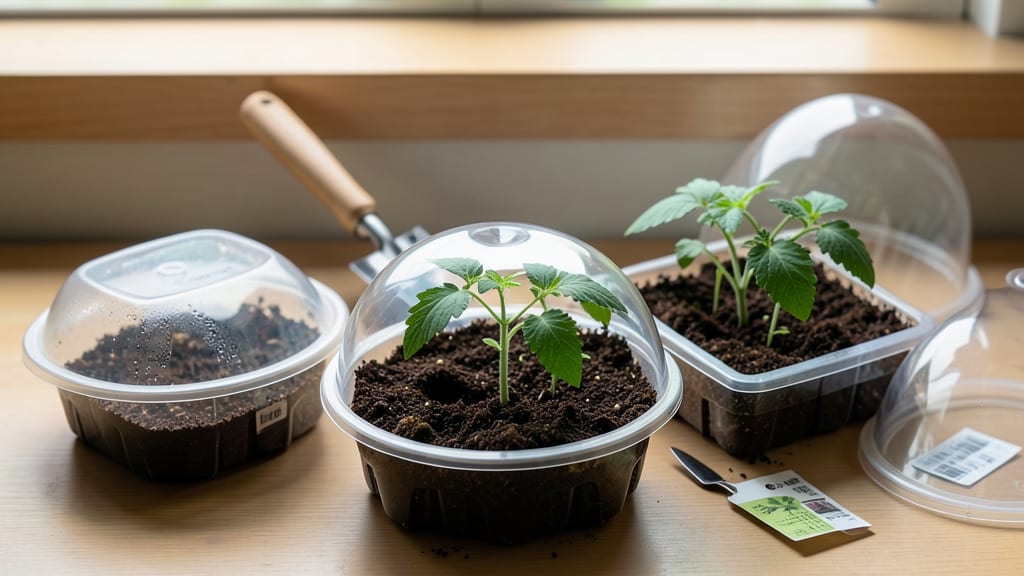
Seed trays with lids create the perfect greenhouse for tiny sprouts. 🌱 The right cover keeps soil moist, speeds up germination, and protects delicate seedlings from drying out—exactly what my first batch of parsley needed after they wilted within days last spring.
Silicone lids are the gold standard because they flex with the tray, trap humidity without overheating, and last for years. Plastic works too, but it fogs up faster and can trap too much moisture. Glass is great for watching roots grow, but it’s heavier and breaks easier.
You’ll see sprouts pop through the soil in half the time compared to uncovered trays, and the seedlings stay sturdy enough to transplant without damage. The key is cracking the lid daily to prevent mold—overdo it, and you’ll dry them out; skip it, and you’ll drown them.
Works for everything from finicky lettuce to hardy beans, and DIY options like plastic wrap or clear plastic containers can work in a pinch. Here’s how to use them right.
📚 In This Guide
- What you need
- Instructions
- Tips and common mistakes
- Wrapping up and next steps
What you need
- ● Seed trays: Standard 1020 or 2020 trays (10" x 20" or 20" x 20")—check dimensions for consistency.
- ● Silicone sheeting: Food-grade, 1/16" to 1/8" thick (12"–18" wide rolls work best). Pro tip: 💡 Opt for heat-resistant silicone (up to 400°F) if sterilizing with boiling water.
- ● Scissors or a utility knife: For cutting silicone to size.
- ● Measuring tape or ruler: To ensure precise cuts (account for tray edges).
- ● Double-sided tape or silicone adhesive: To secure edges (e.g., blank">Gorilla Clear Grip or blank">3M VHB Tape).
- ○ Sewing machine (optional): For hemmed edges if using fabric-backed silicone.
- ○ Drill with small bit (optional): To pre-poke ventilation holes (¼" diameter, spaced 2" apart).
- ● Clear plastic lids (alternative): Repurpose takeout containers or baking sheets with parchment for quick solutions.
- ● Waterproof marker: For labeling trays (e.g., plant type or date).
- ● Spray bottle with water: To mist trays and maintain humidity.
How to use reusable silicone lids for seed trays
These lids keep humidity perfect for germination without the hassle of plastic wrap.
🌱 Step 1: Clean and Prepare Your Seed Trays
Start by washing your seed trays with warm, soapy water to remove any dirt or residue. I use a soft brush to scrub between cells—this prevents mold from taking hold later. Rinse thoroughly and let them dry completely before adding soil. Moisture trapped in damp trays can cause seeds to rot before they even sprout.
Once dry, fill each cell with your seed-starting mix, leaving about ½ inch of space at the top. Press down gently to remove air pockets, but don’t compact the soil too tightly—you want roots to push through easily. This is where silicone lids shine: they create a perfect microclimate without smothering your seeds.
💧 Step 2: Plant and Water Your Seeds
Follow your seed packet’s instructions for planting depth—usually twice the seed’s diameter—and space seeds properly. Crowding leads to weak, leggy seedlings. After planting, water gently with a spray bottle until the soil feels evenly moist but not soggy. The goal is dampness, not puddles.
Here’s the trick: place the silicone lid on after watering. The lid traps humidity, but if you add it too soon, condensation can drown your seeds. Wait until the soil surface looks slightly damp but not wet—this ensures the lid works its magic without suffocating your seeds.
☀️ Step 3: Position Trays for Germination
Set your trays in a warm, bright spot—70-75°F is ideal for most seeds. A seedling heat mat helps if your home runs cooler. Place the trays under grow lights or near a south-facing window, but avoid direct sunlight, which can overheat the lids. You’ll see condensation form on the inside of the lid—that’s normal and exactly what you want.
Check daily for signs of germination. Once 50% of seeds have sprouted, remove the lid immediately. Keeping it on too long creates a damp, fungus-friendly environment. You’ll know it’s time when tiny green shoots appear—this usually takes 5-14 days, depending on the plant.
✂️ Step 4: Transition to Independent Growth
After removing the lid, move trays to a well-lit area with 12-16 hours of light daily. If seedlings look leggy (long, weak stems), they need more light—adjust your grow lights or rotate trays daily. Water from the bottom now to encourage strong root development, and avoid wetting leaves to prevent disease.
Reuse the silicone lids for future batches if they’re still clean. They’re dishwasher-safe, but hand-washing extends their life. Store them in a dry place until your next seed-starting session. This is where they pay off: no more sticky plastic wrap or soggy corners—just consistent, professional results.
Tips & tricks for perfect seedling humidity control
Here's what nobody tells you about maximizing those silicone lids for flawless seed starts.
Timing Secret: The 5-14 day germination window varies wildly by seed type—fast growers like radishes may sprout in 5 days, while tomatoes can take 14. Check daily starting at day 3 for signs of sprouts. I mark my calendar with seed types to remember which ones need extra patience. Once you see that first green shoot, remove the lid immediately—delaying creates the perfect mold party.
Temperature Matters: That 70-75°F range is non-negotiable for most seeds, but here's the thing: if your kitchen runs cooler, a seedling heat mat makes all the difference. I place mine under half the tray to create a warm zone for slower germinators. Pro tip: Test your setup with a thermometer first—some heat mats run hotter than advertised, which can actually cook your seeds.
Lighting Strategy: Grow lights are worth the investment for consistent results. Position them just 2-3 inches above seedlings after germination—closer than that can scorch tender leaves. I rotate my trays daily to prevent uneven growth. For window placement, south-facing gets the most light, but avoid hot afternoon sun which can overheat your silicone lids and create steam pockets that suffocate seeds.
Reuse Wisdom: Those silicone lids are built to last through multiple batches, but cleanliness is key. I soak them in warm soapy water between uses, then rinse thoroughly. For stubborn soil residue, a soft toothbrush works wonders. Store them in a dry, ventilated container between uses—condensation buildup can promote bacterial growth. Think of them like your favorite gardening tool: treat them right and they'll serve you for years.
Pro Tips for Lids For Seed Trays
- Here's what nobody tells you about maximizing those silicone lids for flawless seed starts.
- Timing Secret: The 5-14 day germination window varies wildly by seed type—fast growers like radishes may sprout in 5 ...
- Temperature Matters: That 70-75°F range is non-negotiable for most seeds, but here's the thing: if your kitchen runs ...
Frequently asked questions
Got questions about using lids for seed trays? You’re not alone! Here are some common concerns—and their answers—to help you grow with confidence.
Why do seed trays need lids at all?
Seed trays with lids create a mini greenhouse that traps humidity, keeping seeds moist and warm until germination. Without one, soil dries out faster, and seeds may fail to sprout. Think of it as a cozy blanket for your tiny plants!
How long should I leave the lid on after planting?
Keep the lid on until seeds sprout (usually 5–14 days, depending on the plant). Once you see green shoots, remove the lid for 1–2 hours daily to harden them off. Overwatering after germination can drown tender seedlings—so monitor closely!
Can I reuse silicone seed tray lids?
Silicone lids are durable and reusable for multiple planting cycles. Just clean them with warm, soapy water after use, rinse well, and let them air-dry. Avoid harsh chemicals—they can degrade the silicone over time.
What if condensation builds up inside the lid?
Condensation is normal! It’s a sign of high humidity. If it’s excessive, prop the lid slightly open (use a toothpick or small stick) or ventilate for 10–15 minutes daily. Too much moisture can lead to mold—so balance is key.
Are there alternatives to silicone lids?
Yes! You can use:
- Plastic wrap (cheap but less durable)
- Glass cloche (reusable but heavier)
- DIY cardboard covers (eco-friendly but less breathable)
Wrapping up and next steps
Choosing the right lids for seed trays—like reusable silicone covers—can make all the difference in nurturing healthy seedlings with ease! These simple tools help maintain ideal humidity and protect your young plants from pests, ensuring stronger growth from day one. 🌱
Now that you’re equipped with the knowledge, it’s time to put it into action. Grab a pair of silicone lids, prep your seed trays, and watch your garden thrive! Happy planting—your future plants will thank you! 🌿✨