
Lawn
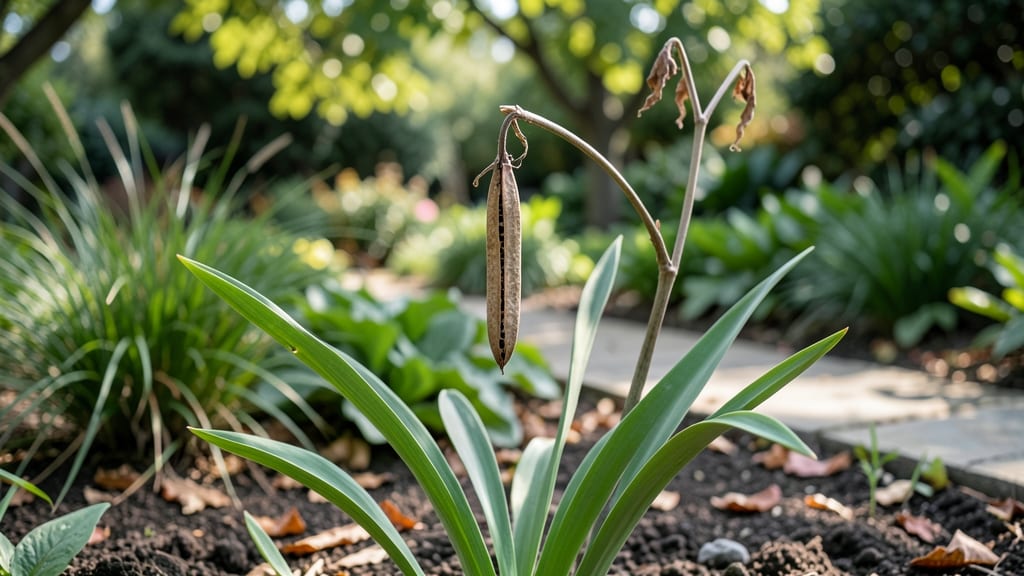
Growing lilies from seed pods means next year’s garden could be full of these striking blooms. ✨ The process starts with spotting those dried seed pods after your lilies finish flowering—each pod holds the potential for new plants that’ll thrive in your lawn or garden beds.
You’ll need patience and a little know-how: collect the pods when they’re fully dry, split them open to reveal the seeds, and then stratify them in the fridge for 6-8 weeks to mimic winter conditions.
This cold treatment tricks the seeds into thinking they’ve survived a natural season, making them much more likely to sprout. Once planted, young lily seedlings need consistent moisture and protection from strong winds until they’re established.
By next spring, you could be watching those familiar sword-like leaves push through the soil—proof that your cold-stressed seeds are working their magic. This method works for daylilies, Asiatic lilies, and even rare heirloom varieties you might not find at nurseries.
The key is timing: harvest pods in late fall, plant seeds in early spring, and give them space to grow strong before they bloom.
📚 In This Guide
- What you need
- Instructions
- Tips and common mistakes
- Wrapping up and next steps
What you need
- ● Lilly seed pods: Collect at least 10-15 mature pods (brown, dry, and slightly papery) from healthy plants. Aim for 20+ pods for better germination rates.
- ● High-quality seed starting mix: 1 gallon of well-draining, sterile potting soil (avoid garden soil to prevent mold).
- ● Small seedling trays or pots: 6-12 individual cells or 4-inch pots (biodegradable options work too!).
- ● Watering can or spray bottle: With a fine mist nozzle to avoid disturbing seeds.
- ● Pruning shears or scissors: For harvesting pods without damaging the plant.
- ○ Paper towels or coffee filters: To dry pods before storage (optional but recommended).
- ● Plastic storage bag or airtight container: For long-term seed storage (e.g., quart-sized Ziploc).
- ● Grow lights or sunny windowsill: If starting indoors (12-16 hours of light/day for best results).
- ○ Heat mat (optional): For faster germination (70-75°F is ideal).
- ● Patience: Lilly seeds can take 4-8 weeks to germinate—stay consistent!
- ○ Cold stratification (optional): Chill seeds in the fridge for 4-6 weeks before planting to mimic winter conditions (boosts success rates!).
- ● Outdoor space: A sunny, well-draining lawn area (full sun, 6+ hours/day) for transplanting seedlings.
How to harvest and grow Lilium seed pods for next season
Here’s how to turn those spent blooms into next year’s garden stars—no fancy tools needed.
🌱 Step 1: Identify and Collect Mature Seed Pods
Wait until the flower’s petals have fully dropped and the pod turns brown but remains firm—this usually takes 2-4 weeks after blooming. Gently twist the pod from the stem; if it resists, use clean pruners to avoid damaging the plant. Place pods in a paper bag to dry in a shady, well-ventilated spot for 1-2 weeks. Overripe pods (soft or moldy) won’t produce viable seeds.
I always label the bag with the lily variety and date—this helps track germination rates later. If pods split open prematurely, scoop out the seeds immediately and let them dry separately. The key is patience: rushing the drying process reduces seed viability.
☀️ Step 2: Extract Seeds and Prepare for Planting
Once pods are completely dry, crack them open with your fingers or a small knife. Seeds will be flat, black, and slightly wrinkled—discard any that feel mushy or smell off. Store viable seeds in an envelope or small jar with a silica gel packet to prevent moisture buildup. Keep them in a cool, dark place (like a fridge) until spring planting.
Here’s the thing—lily seeds need cold stratification to germinate. If you plant them too early, they’ll rot. Instead, sow them 6-8 weeks before your last frost date in well-draining soil mixed with compost. This mimics winter conditions and tricks seeds into breaking dormancy.
💧 Step 3: Sow Seeds and Maintain Moisture
Scatter seeds ¼ inch deep in a prepared bed or small pots, spacing them 1-2 inches apart. Water gently but thoroughly—soil should stay evenly moist but not soggy. Place pots in a shady spot or cover outdoor sowings with 1-2 inches of mulch to retain moisture. Germination can take 3-6 months, so don’t give up if nothing appears in the first few weeks.
I’ve found that keeping the soil 60-70°F speeds up germination. If your climate runs cooler, use a mini greenhouse or cold frame to maintain steady warmth. Once seedlings emerge, thin them to 6 inches apart—crowding weakens stems and invites disease.
⏰ Step 4: Nurture Seedlings to Maturity
Young lilies need bright, indirect light for the first year. Gradually introduce them to morning sun over 2-3 weeks to avoid leaf scorch. Fertilize lightly with a balanced 10-10-10 mix every 4-6 weeks in spring and summer. By their second year, they’ll develop bulbs and start flowering—though expect full bloom in 3-5 years for most varieties.
Real talk: Seed-grown lilies take longer to mature than store-bought bulbs, but the payoff is worth it. Watch for pale stems or yellowing leaves—this signals overwatering. Lilies hate soggy roots, so ensure pots or beds have drainage holes and sandy soil if your area holds moisture.
Tips & tricks for perfect Lilium seed pod harvesting
These simple strategies will help you maximize seed viability and grow thriving lilies from next year's blooms.
Pod Maturity Check: The 2-4 week waiting period after blooming is critical—don't harvest too soon! Look for pods that are completely brown and firm to the touch. If they're still green or feel soft, they need more time. I've learned the hard way that premature harvesting means no viable seeds.
Storage Wisdom: Once you've collected your pods, keep them in a paper bag in a shady, well-ventilated spot for exactly 1-2 weeks. This drying period is essential for seed viability. I recommend placing the bag in a dark closet with a small fan to improve airflow without direct sunlight.
Cold Stratification Secret: The 6-8 week timing before your last frost date isn't just about calendar math—it's about replicating winter conditions. If you're unsure when your last frost occurs, check your local weather service or use a soil thermometer to aim for planting when soil temperatures reach consistently 60°F. This cold treatment breaks seed dormancy and dramatically improves germination rates.
Soil Temperature Tip: Maintaining that 60-70°F soil temperature range during germination is easier than it sounds. If you're concerned about your climate, consider using a simple soil warming mat (available at garden centers) or placing pots on a heat mat designed for seedlings. This small investment can cut your germination time in half.
Pro Tips for Lilly Seed Pod
- These simple strategies will help you maximize seed viability and grow thriving lilies from next year's blooms.
- Pod Maturity Check: The 2-4 week waiting period after blooming is critical—don't harvest too soon! Look for pods that...
- Storage Wisdom: Once you've collected your pods, keep them in a paper bag in a shady, well-ventilated spot for exactl...
Frequently asked questions
Got questions about growing and harvesting lilly seed pods? You’re not alone! Here are answers to the most common queries to help you master these hardy blooms for next year’s lawn.
When is the best time to harvest lilly seed pods?
Harvest seed pods when they turn light brown and begin splitting open—usually 4-6 weeks after flowering. Wait too long, and seeds may scatter or lose viability. Early morning harvests (when pods are dry) work best for easy collection.
Why do my lilly pods look frostbitten or brown?
Cold stress is normal! Lilly seed pods often purple or brown in chilly weather as a survival mechanism. If pods aren’t splitting by late fall, they may need a dry, sheltered spot to mature. Avoid watering heavily before harvest to prevent rot.
Can I grow lilly seed pods from store-bought bulbs?
Yes! Many lilly bulb varieties (like Lilium candidum) produce seed pods, but results vary. For reliable seeds, cross-pollinate two different lilly plants or buy open-pollinated bulbs labeled for seed production.
What’s the fastest way to germinate lilly seeds?
Lilly seeds need cold stratification—mix them with damp sand, refrigerate for 4-6 weeks, then plant in well-draining soil. Sprinkle seeds lightly (they’re tiny!) and keep soil moist but not soggy for best sprouting.
Are lilly seed pods toxic to pets or wildlife?
Most lilly seed pods are non-toxic, but the bulbs and flowers can be harmful to cats/dogs. Keep pets away from chewed pods or fallen petals. Birds and squirrels may snack on seeds—harvest promptly to protect your yield!
Wrapping up and next steps
Growing lilly seed pods is a rewarding way to ensure vibrant blooms and a lush lawn next season—even in colder climates! 🌱 By following these steps, you’ll harness nature’s resilience and turn your yard into a stunning display of hardy, cold-tolerant beauty.
Whether you’re a seasoned gardener or just starting out, every seed pod planted today is a promise for tomorrow’s garden.
Ready to take the next step? Start small—collect pods from a trusted source, prep your soil, and plant with confidence. Watch your lawn transform as these cold-stressed blooms thrive, proving that patience and care yield the most breathtaking results. Grab your tools and get growing! 🌿