
Lawn
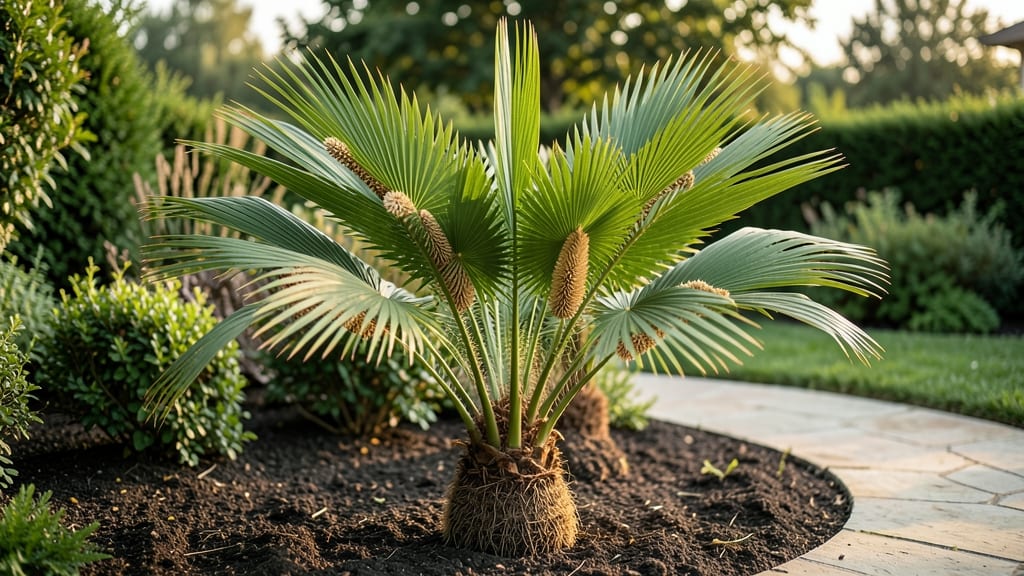
Transforming palm seed pods into garden art turns your yard into a living gallery. 🌿 These organic sculptures blend seamlessly with any landscape while adding a touch of tropical charm—no artistic skills required.
I’ve turned overgrown pods into everything from rustic planters to wind chimes, and the best part? They’re free if you harvest them yourself.
The key is working with what nature provides. Clean pods thoroughly, let them dry completely, and choose a sturdy base like driftwood or metal rods for stability. My favorite project? A whimsical palm pod archway that frames my front path—it took just a weekend and cost nothing.
The texture contrasts beautifully with smooth stones or lush greenery, creating a focal point that feels intentional yet effortless.
You’ll end up with pieces that tell a story—each pod carries its own history, from coastal beaches to desert oases. The art stays lightweight, weather-resistant, and endlessly customizable, whether you lean into boho vibes or minimalist elegance. Plus, it’s a sustainable way to upcycle "waste" into something stunning.
Perfect for gardeners who love textural contrast or eco-friendly decor. Start small with a single planter, or go bold with a full palm pod mosaic. The possibilities are limited only by your imagination—and the pods you can find. Ready to begin?
📚 In This Guide
- What you need
- Instructions
- Tips and common mistakes
- Wrapping up and next steps
What you need
- ● Palm seed pods: 10–20 (fresh or dried, depending on project size—look for cocos nucifera or similar varieties at craft stores, tropical gardens, or online).
- ● Natural adhesives: White glue (e.g., Elmer’s) – 1 small bottle (8 oz).
- ● OR hide glue (eco-friendly, requires heat activation).
- ● Wire or vine: 1–2 yards of 18–20-gauge floral wire OR flexible vines (e.g., willow or grapevine) for structural support.
- ● Base materials: Small wooden dowels (¼" diameter, 6–12" long) – 2–4.
- ● OR air-dry clay (1 lb) for custom bases.
- ● Basic tools: Scissors or wire cutters.
- ● Pencil and ruler (for sketching designs).
- ● Paintbrush (½" wide for glue application).
- ○ Optional enhancements: Acrylic paint + sealant (e.g., Mod Podge) for coloring.
- ● Twine or jute for wrapping bases.
- ● Small nails/screws + hammer (for securing to garden stakes).
- ● Hot glue gun (for quick fixes—use sparingly!).
- ● Patience: Drying time varies (24–72 hours for glue).
- ● Outdoor space: A flat surface (table or ground) for assembly.
- ● Weather awareness: Work in dry conditions to avoid mold (especially with natural adhesives).
Step-by-step instructions for crafting palm seed pod art
Turn those fallen palm seed pods into charming garden art with this creative, nature-inspired method.
🌱 Step 1: Collect and Clean Your Seed Pods
Gather seed pods from palm trees—look for ones that have fallen naturally rather than forcing them open. Rinse each pod thoroughly under lukewarm water to remove dirt and debris. Use a soft brush to scrub away any stubborn grime, especially in the crevices where moisture can trap mold.
Let the pods dry completely in a well-ventilated area for 3-5 days. Place them in a single layer on a screen or rack to ensure airflow circulates around each one. You'll know they're ready when the outer fibers feel crisp rather than damp to the touch.
🎨 Step 2: Prepare Your Design and Materials
Sketch your design on paper first—think whimsical shapes like animals, flowers, or abstract patterns. Palm seed pods work best when arranged in clusters, so plan for 4-6 pods per sculpture depending on size. Use a lightweight wire frame (like floral wire or chicken wire) as your base to hold the pods in place.
Gather additional materials like non-toxic glue, paint, and sealant. I like using acrylic paint for vibrant colors and a waterproof sealant to protect the finished piece from weather. Arrange your pods on the wire frame before gluing to visualize the final look.
✂️ Step 3: Assemble and Secure the Pods
Apply a small amount of glue to the back of each pod where it meets the wire frame. Press firmly and hold for 10-15 seconds to ensure a strong bond. Work in sections, allowing each layer to dry slightly before adding the next. For intricate designs, use a hot glue gun for quicker bonding—just be cautious with the heat near the pods.
Once the pods are securely attached, let the glue dry completely for 24 hours. This ensures stability before moving to the next steps. If any pods shift during drying, gently reposition them while the glue is still tacky but fully set.
🎨 Step 4: Paint and Seal Your Artwork
Apply a base coat of paint to your sculpture, working in thin layers to avoid drips. Let each coat dry for 1-2 hours before adding the next. Use a small brush for details and a larger one for broader strokes. For a natural look, try earthy tones, while bold colors can make your art pop in the garden.
Once the paint is fully dry, seal the artwork with a waterproof sealant to protect it from rain and sun. Apply two thin coats, allowing each to dry for 4-6 hours between applications. This step is crucial—unprotected paint will fade quickly under outdoor conditions.
☀️ Step 5: Display Your Garden Sculpture
Choose a spot in your garden where the sculpture will be visible but not exposed to harsh winds. A sheltered area near a patio or garden path works beautifully. Use a sturdy post or stake to secure the wire frame if needed, especially for larger pieces.
Watch how the light changes throughout the day—morning sun casts soft shadows, while afternoon light brings out the colors. Your palm seed pod art will evolve with the seasons, offering a unique touch of nature’s artistry to your outdoor space.
Tips & tricks for perfect palm seed pod art
Transforming simple seed pods into stunning garden art takes a few clever strategies—and avoiding some common pitfalls. Here’s how to elevate your project from charming to showstopping.
Drying Efficiency: The 3-5 day drying period can feel long, but speed it up by placing pods in a single layer under a fan on low setting. This maintains airflow while cutting drying time by nearly half. Just avoid direct heat sources—pods can crack if dried too quickly! The crisp texture you’re aiming for comes from complete moisture evaporation, so don’t rush this step.
Design Visualization: Before gluing, create a test layout using just the wire frame and empty space. This helps you visualize how the 4-6 pods per sculpture will distribute light and shadow. I’ve found that arranging pods in a slightly asymmetrical pattern creates more visual interest than perfectly symmetrical designs. Sketch your wire frame layout on paper first to refine proportions before committing to glue.
Glue Application: For Step 3, use a toothpick to apply glue in tiny dots rather than a continuous line—this creates stronger adhesion with less product. When working with intricate designs, I recommend using a hot glue gun for the initial attachment, then switching to a non-toxic craft glue for final securing. This two-step method gives you more time to adjust positions before the glue sets completely.
Sealing Strategy: The 4-6 hour drying time between sealant coats might seem excessive, but it’s worth it. For outdoor pieces, I add an extra third coat after 24 hours—this creates a nearly invisible protective barrier that makes cleaning a breeze. If you’re short on time, you can reduce this to two coats with 6 hours between applications, though the piece may need re-sealing after heavy rain.
Pro Tips for Palm Seed Pod Art
- Transforming simple seed pods into stunning garden art takes a few clever strategies—and avoiding some common pitfall...
- Drying Efficiency: The 3-5 day drying period can feel long, but speed it up by placing pods in a single layer under a...
- Design Visualization: Before gluing, create a test layout using just the wire frame and empty space. This helps you v...
Frequently asked questions
Got questions about turning palm seed pods into stunning garden art? Here are some of the most common inquiries—and their answers—to help you get started with confidence!
How do I know if a palm seed pod is ready for crafting?
A palm seed pod is typically ready when it’s fully dry and has turned a light brown or tan color. If it still feels damp or has a greenish tint, it needs more time to cure—this can take weeks or even months, depending on your climate. Avoid using pods that are cracked or rotting, as they’ll crumble when you try to shape them. Pro tip: Place them in a warm, dry spot with good airflow to speed up the drying process!
Can I use any type of palm seed pod for art?
Not all palm seed pods are ideal for crafting! Look for large, fibrous pods like those from coconut palms, royal palms, or sago palms—they’re sturdy and perfect for carving or assembling. Smaller or smoother pods (like those from date palms) may not hold details well. If you’re unsure, test a small section first to see how it responds to tools. Bonus: Mix and match pods for texture and visual interest!
What tools do I need to carve or shape palm seed pods?
Start with basic, safe tools like a wood carving knife, sandpaper (medium and fine grit), and a pair of scissors for trimming fibers. For more intricate designs, a Dremel tool or carving gouge works well. Always wear gloves to protect your hands from sharp edges and fibers. Safety first: Work on a stable surface and avoid forcing tools—let the pod guide your cuts!
How do I prevent my palm seed pod art from rotting or attracting pests?
To keep your art looking fresh, seal it with a natural or synthetic finish like beeswax, linseed oil, or outdoor varnish. Avoid placing it in constantly wet areas, and store unused pods in a dry, ventilated space. If pests (like insects) are a concern, lightly spray the pod with neem oil before sealing. Extra tip: Elevate your sculpture off the ground with a small stand to improve airflow!
What are some easy beginner-friendly palm seed pod art projects?
Start with simple, low-commitment projects like:
- Wind chimes: Drill small holes in pods and thread them onto a string for a rustic garden decoration.
- Planters: Hollow out a large pod and line it with moss or coconut coir for a quirky succulent home.
- Wall hangings: Arrange small pods in a frame with twine or wire for a boho-chic accent.
- Animal shapes: Carve basic outlines (like owls or fish) by sketching first and sanding gently.
Wrapping up and next steps
Palm seed pod art is more than just a creative outlet—it’s a celebration of nature’s beauty and sustainability! 🌿 With just a few simple materials and a dash of imagination, you can transform humble seed pods into stunning garden sculptures that bring joy and whimsy to your outdoor space.
Whether you’re a seasoned crafter or a beginner, this eco-friendly project is the perfect way to connect with nature while adding charm to your lawn.
Ready to turn your garden into an art gallery? Start small—try a single sculpture or a cluster of pods—and watch your creativity grow! 🌱 Grab your tools, gather your pods, and let your green thumb shine.