
Lawn
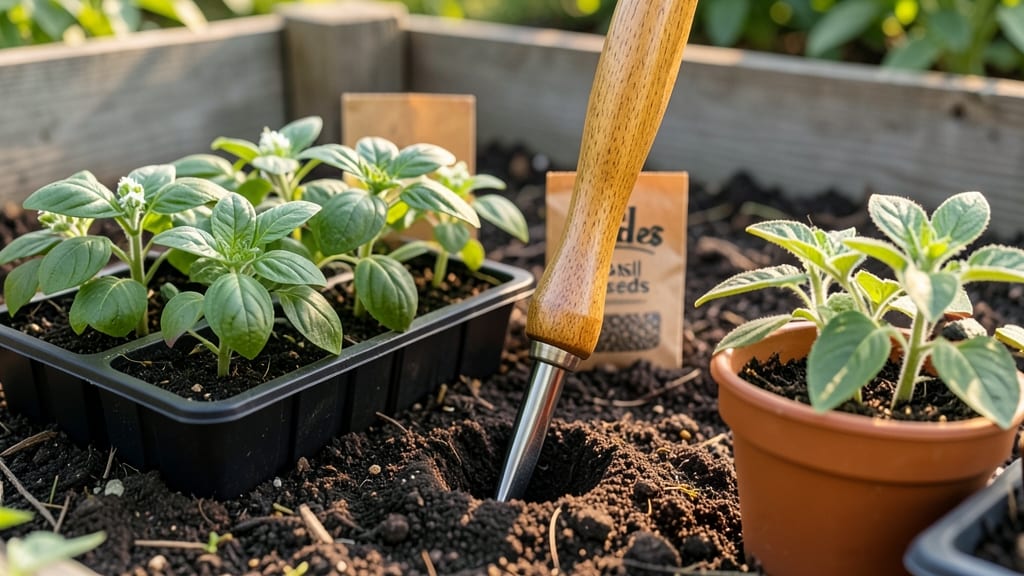
A seed dibber tool turns messy seed planting into perfectly spaced rows that germinate like clockwork. 🌱 I used to struggle with uneven seed drops that led to patchy growth—until this simple tool changed everything. The right depth every time means stronger seedlings and fewer weeds stealing space.
Most dibbers cost under $5 and work for veggies, flowers, or herbs. You’ll need seeds, soil, and a sunny spot—no fancy gear required. The tool creates holes at consistent intervals, so you can plant seeds exactly where they’ll thrive, not where they randomly land.
You’ll notice seedlings emerging uniformly, with less thinning needed and healthier plants from the start. The difference between a crowded, weak garden and one that looks like a professional display comes down to this one tool. Works for both small containers and large garden beds.
Once you try it, you’ll wonder how you ever planted without one!
📚 In This Guide
- What you need
- Instructions
- Tips and common mistakes
- Wrapping up and next steps
What you need
- ● Seed dibber tool (store-bought or DIY): Length: 6–12 inches (adjust based on seed depth needs)
- ● Material: Wood, metal, or sturdy plastic (wood is lightweight and rust-resistant)
- ● Tip: Tapered or pointed for easy seed placement
- ● Seeds: Choose high-quality, fresh seeds suited for your climate and soil type.
- ● Gloves: A pair of gardening gloves to protect your hands from dirt and sharp dibber tips.
- ● Trowel or small shovel: For digging planting holes or loosening soil.
- ● Measuring tape or ruler: To ensure consistent seed depth (critical for germination!).
- ● Watering can or hose with a gentle spray nozzle: For post-planting hydration.
- ● DIY dibber materials: If building your own, grab a pencil, dowel rod, or even a wooden skewer (sand the edges smooth!).
- ● Seed spacing guide: A small printed chart or app to track plant spacing and depth.
- ● Knee pad or small stool: For comfort during long planting sessions.
- ● Compost or fertilizer: To enrich the soil before planting.
- ● Labeling tags: For marking rows or plant varieties (especially useful for beginners!).
How to use a seed dibber for perfect planting spacing
Here's the foolproof way to plant seeds with precision—no more guessing depths or spacing.
🌱 Step 1: Understand Your Seed Dibber's Depth Settings
Most seed dibbers have adjustable depth markers or a sliding collar that lets you set planting depth. For tiny seeds like lettuce or carrots, I use the shallowest setting—usually around ¼ inch deep. Larger seeds like beans or peas go deeper, around 1 inch. Check your dibber's markings and adjust the collar to match your seed's recommended planting depth.
Here's the thing—planting too deep slows germination because the seedling has to push through more soil. Too shallow and seeds dry out before sprouting. I always double-check the seed packet for exact depth, then set my dibber accordingly. For example, tomato seeds need ½ inch deep, so I adjust the collar to that mark before planting.
🌿 Step 2: Prepare Soil and Mark Rows
Work the soil until it's loose and crumbly—you should be able to squeeze a handful without it forming a hard clump. For rows, use a stick or your dibber to scratch a shallow line through the soil. This keeps your planting straight and makes it easier to space seeds evenly. I like to keep rows about 12-18 inches apart for most vegetables, depending on their mature size.
If you're planting in containers, use your dibber to poke small holes in the soil instead of marking rows. The dibber's tip creates perfect-sized planting pockets that hold seeds securely. For seeds like marigolds or sunflowers, I make holes about 6 inches apart—this spacing gives them room to grow without crowding later.
💧 Step 3: Plant Seeds with Precision
Hold the dibber vertically and press the tip gently into the soil at your marked depth. For small seeds, I like to drop 1-2 seeds into the hole, then tap the dibber lightly to settle them into place. For larger seeds, I place just one seed per hole—overcrowding leads to weak, leggy seedlings that compete for light. After planting, use your finger to cover the hole lightly with soil, pressing down just enough to secure the seed.
This is the moment that matters: consistency. I plant seeds in a straight line by aligning the dibber's tip with my marked row. For round containers, I plant seeds in a circle by pacing evenly around the edge. Watch for the dibber's tip to pop out of the soil—this tells me the seed is at the right depth. If the dibber sinks too easily, the soil is too loose; if it resists, firm it up slightly before planting more.
☀️ Step 4: Water and Monitor Germination
After planting, water gently with a spray bottle or fine rose attachment on your watering can. You want the soil to be moist but not soggy—think of a damp sponge, not a dripping one. I avoid heavy watering right after planting because it can wash seeds deeper than intended. Instead, I mist the surface until it looks evenly damp.
Place your dibber near the planted seeds as a visual marker for where you've planted. This helps you remember which areas need watering and where to expect sprouts. Most seeds germinate within 7-14 days, depending on the type and soil temperature. Keep the soil consistently moist during this time—don't let it dry out, but avoid waterlogging either.
⏰ Step 5: Thin Seedlings for Strong Growth
Once seedlings appear, use your dibber to mark the spacing for mature plants. For example, if your carrots need 2 inches apart at maturity, I use the dibber to measure and remove weaker seedlings. Gently grasp the thinnest seedling at the base and pull it straight up—twisting can damage the roots of nearby plants.
Real talk: thinning is the hardest part, but it's worth it. Crowded seedlings compete for nutrients and light, leading to weak, spindly plants. After thinning, water deeply to help the remaining seedlings establish strong roots. I always use the dibber to measure spacing again after thinning to ensure consistency—this step is what turns a messy seedling bed into a thriving garden.
Tips & tricks for perfect seed dibber planting
Here's what nobody tells you about using a seed dibber like a pro—these tricks will transform your planting game.
Depth Consistency is Everything: After setting your dibber's depth collar (like the ¼ inch for lettuce or ½ inch for tomatoes), test it on a spare piece of soil first. Press the dibber in and check the depth—this helps you get a feel for how much pressure to apply. I've found that pressing too hard can bury seeds deeper than intended, while too light a touch might not go deep enough.
Mark Your Rows with the Dibber Itself: Instead of using a separate stick to scratch row lines, use your dibber to create a shallow trench first. This gives you a built-in guide for spacing your planting holes. For container gardening, I make a complete circle with the dibber's edge to ensure even distribution around the pot's perimeter.
The Two-Seed Rule for Small Seeds: When planting tiny seeds like carrots or radishes, I always drop 2 seeds per hole rather than just 1. This gives you a backup in case one doesn't germinate. After they sprout, thin to the strongest seedling. The dibber helps you make these tiny holes consistently, which is crucial for small seeds that need precise placement.
Thinning Made Easier: After seedlings emerge, use your dibber to create a spacing grid in the soil. For example, if your mature plants need 4 inches apart, make holes every 4 inches with the dibber. Then simply pull seedlings that fall outside these marked spots. This visual guide makes thinning feel less overwhelming and ensures proper spacing from the start.
Pro Tips for Seed Dibber Tool
- Here's what nobody tells you about using a seed dibber like a pro—these tricks will transform your planting game.
- Depth Consistency is Everything: After setting your dibber's depth collar (like the ¼ inch for lettuce or ½ inch for tomatoes), test it on a spare piece of soil first.
- Mark Your Rows with the Dibber Itself: Instead of using a separate stick to scratch row lines, use your dibber to create a shallow trench first.
Frequently asked questions
Got questions about using a seed dibber tool? You’re not alone! Here are some of the most common queries—plus quick, actionable answers to help you plant like a pro.
What’s the best time of day to use a seed dibber?
The ideal time is early morning or late afternoon when temperatures are cooler and humidity is higher. This reduces moisture loss and stress on seeds. Avoid midday heat, which can dry out soil and seeds too quickly. Pro tip: Water the soil lightly before planting for even better results!
Can I make a seed dibber at home if I don’t have one?
DIY options include:
- A wooden dowel (¼-inch diameter) sharpened at one end
- A pencil or chopstick with the tip whittled to a point
- A plastic drinking straw cut to 4–6 inches and sharpened
Why are my seeds not germinating even with a dibber?
Check these common issues:
- Depth: Too deep? Most seeds need 2–3x their diameter below soil.
- Moisture: Keep soil damp (not soggy) until sprouts appear.
- Soil temp: Cool soil can slow germination—use a seedling heat mat if needed.
- Seed viability: Test old seeds by soaking them in water (floaters are likely dead).
Is a dibber better than just hand-planting seeds?
Yes! A dibber offers:
- Precision: Creates consistent holes for even spacing.
- Speed: Saves time vs. hand-poking with fingers.
- Less disturbance: Minimizes soil compaction around seeds.
Can I reuse a seed dibber for different seed types?
Yes, but clean it between uses! Sanitize with:
- Rubbing alcohol (for sterilization)
- Hot, soapy water (for general cleaning)
Wrapping up and next steps
Mastering the use of a seed dibber tool transforms your gardening game—ensuring even spacing, deeper planting, and healthier germination. Whether you're a lawncare pro or a beginner, precision planting with this simple tool sets the stage for lush, thriving greenery. 🌱
Ready to elevate your garden? Grab your dibber, pick your seeds, and start planting with confidence! For even better results, experiment with soil prep and seed varieties—your future garden will thank you. Get dibbing!