
Propagation
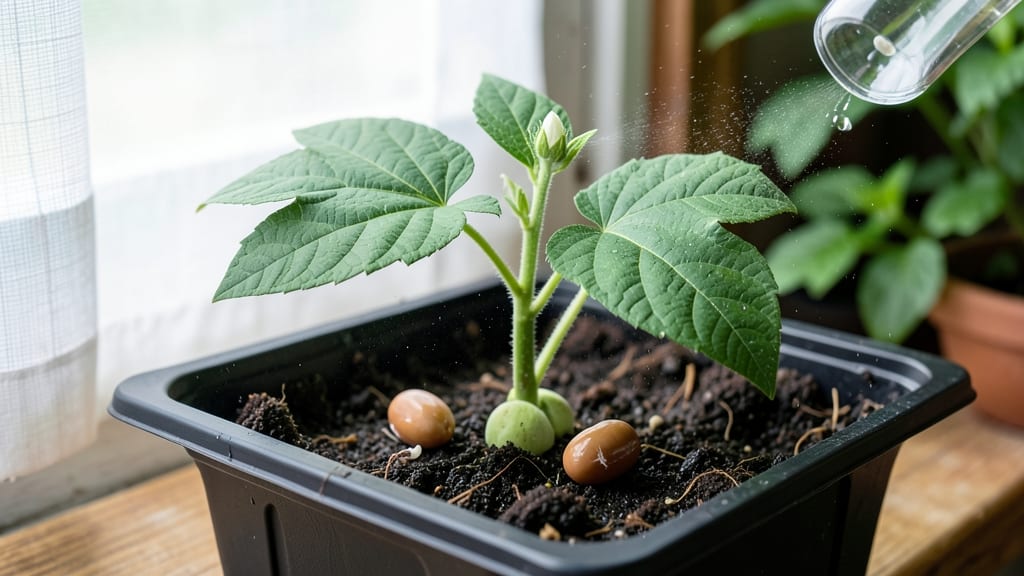
Bean seeds don’t need fancy tricks to sprout—just the right conditions. 🌱 I’ve learned that pre-soaking them for 12 hours cuts germination time in half, and a simple paper towel method works better than I expected. The secret isn’t complicated: warmth, moisture, and patience.
You’ll need a warm spot (70–80°F), damp paper towels or a seedling tray, and 3–4 days of consistent moisture. Avoid overwatering—damp, not soggy, is key. Runner beans and kidney beans both respond well to this method, but timing varies slightly by variety.
By day 4 or 5, you’ll see tiny roots breaking through, and within a week, sturdy seedlings ready for transplanting. The best part? No expensive equipment—just what’s already in your kitchen. For faster results, try a germination tray with a heating mat. Troubleshooting?
Cold soil or dry seeds are the usual culprits. Let’s get those sprouts growing!
📚 In This Guide
- What you need
- Instructions
- Tips and common mistakes
- Wrapping up and next steps
What you need
- ● Bean seeds: 10–20 fresh, high-quality seeds (e.g., kidney, black, or pinto beans). Pro tip: 💡 Choose organic or non-GMO for best results!
- ● Germination container: 1–2 paper towels or seedling trays (with drainage holes)
- ● OR a shallow dish (like a plastic container with a lid)
- ● Water: Room-temperature, filtered water (avoid tap water with chlorine)
- ○ Spray bottle: Optional but handy for gentle misting
- ● 1 humidity dome or plastic wrap (to retain moisture)
- ● 1 thermometer (ideal germination temp: 70–85°F)
- ● 1 grow light (if sprouting indoors without sunlight)
- ● 1 notebook (to track progress and conditions)
Step-by-step instructions for speed-sprouting bean seeds
Here's the foolproof method I use to get bush beans, pole beans, or runner beans sprouting reliably within 5-7 days—no more waiting weeks for stubborn seeds.
🌱 Step 1: Soak Seeds to Kickstart Germination
Place 4 bean seeds in a small bowl and cover them with lukewarm water—just enough to fully submerge them. I use a 1:4 seed-to-water ratio (1 part seeds to 4 parts water) to avoid overcrowding. Let them soak for 12 hours at 70-75°F. You'll see the outer seed coat soften and tiny white roots appear—this is your signal the seeds are ready.
Don't skip this step. The outer coating of bean seeds slows germination, and a 12-hour soak softens it considerably. If your water cools below 65°F, germination slows dramatically. Use a shallow dish so seeds don't sink to the bottom and become waterlogged.
💧 Step 2: Prepare Moisture-Retentive Germination Medium
Line a 9x13-inch baking sheet with 2 paper towels (I use unbleached, seed-safe towels) and dampen them thoroughly with lukewarm water. The towels should feel like a wrung-out sponge—squeeze out excess water to prevent drowning the seeds. Lay the soaked seeds 1 inch apart in a single row on one towel.
Fold the second towel over the seeds to create a sandwich. This keeps them in place and maintains 90% humidity—critical for preventing seed desiccation. Place the folded towel in a ziplock bag (not airtight) to trap moisture while allowing slight airflow. Real talk: If you skip this step, seeds dry out before sprouting.
☀️ Step 3: Provide Warmth and Check Daily
Store the bagged seeds in a warm, dark place—I like using the top of my fridge (75-80°F) or a seedling heat mat set to 78°F. Check them twice daily for moisture. If the towels feel dry to the touch, mist them lightly with lukewarm water—never soak again. You'll see radicles (tiny white roots) emerge within 24-48 hours.
This is the moment that matters: Wait until radicles reach ½ inch long before transplanting. If you move seeds too soon, the delicate roots break easily. Leggy sprouts (long stems, tiny leaves) mean the seeds got too much light—keep them in darkness until first true leaves appear.
🌿 Step 4: Transplant Sprouted Seeds into Soil
Fill 4 biodegradable seedling pots (2-3 inches deep) with warm, moist potting mix (I preheat it in the microwave for 30 seconds to 80°F). Plant each sprout 1 inch deep, pressing the soil gently around the roots. Water lightly from the bottom to avoid disturbing the seeds—no top-watering yet.
Place the pots under grow lights (14-16 hours/day) or in a south-facing window (direct sun). You'll see first true leaves (not the initial cotyledons) within 3-5 days. If leaves yellow, you're overwatering—let the top inch of soil dry slightly between waterings. I know it seems counterintuitive, but beans hate soggy roots.
⏰ Step 5: Harden Off and Prepare for Outdoor Planting
After 7-10 days (when seedlings have 2-3 sets of true leaves), start hardening off by moving them outside for 1 hour daily in a shaded, sheltered spot. Gradually increase exposure over 5-7 days until they tolerate full sun. You'll notice stems darken and leaves thicken—this means they're ready for the garden.
Transplant 2-3 weeks after germination (when soil is 60°F+) into well-draining soil, spacing bush beans 4 inches apart, pole beans 6 inches apart, and runner beans 8 inches apart. Water deeply at the base—never overhead—to prevent fungal diseases. Here's the thing: Beans establish roots quickly, so keep soil evenly moist (not soggy) for the first 2 weeks after transplanting.
Tips & tricks for speed-sprouting bean seeds
Here's what I've learned after watching seeds fail—and succeed—over countless batches.
Soaking Precision: The 12-hour soak at 70-75°F is non-negotiable for bean seeds, but here's the secret: Use a shallow dish and only enough lukewarm water to fully submerge them—no more. I've ruined batches by letting seeds sink to the bottom and become waterlogged. Also, if your kitchen runs cold (below 65°F), germination slows dramatically. Place the bowl on a warm spot like the top of your fridge or near a sunny window to maintain consistent warmth.
Humidity Control: That 90% humidity in Step 2 is critical, but don't overdo it. The ziplock bag should be slightly breathable—leave it loosely closed to prevent condensation buildup. I've seen seeds drown in their own moisture when bags are sealed too tightly. After 24-48 hours, you should see radicles (tiny white roots) emerge—this is your cue that everything's working. If you notice mold or slimy towels, you've got too much moisture.
Light Management: Keep those sprouts in darkness until first true leaves appear—no exceptions. I learned this the hard way when my seedlings turned leggy and pale after premature light exposure. The moment you see those initial cotyledons (the first leaves), you can introduce gentle light for 14-16 hours daily. Use grow lights if your windows don't get enough sun, but avoid direct sunlight until hardening off begins.
Transplant Timing: Wait until radicles reach ½ inch before transplanting—this gives roots enough strength to establish. I've had fragile seedlings snap when moved too soon. Also, when preheating your potting mix to 80°F, do it in 30-second bursts in the microwave. Overheating can kill beneficial microbes in the soil, and you want that warm environment to encourage root growth.
Pro Tips for Bean Seed Germination
- Here's what I've learned after watching seeds fail—and succeed—over countless batches.
- Soaking Precision: The 12-hour soak at 70-75°F is non-negotiable for bean seeds, but here's the secret: Use a shallow...
- Humidity Control: That 90% humidity in Step 2 is critical, but don't overdo it. The ziplock bag should be slightly br...
Frequently asked questions
Got questions about getting your bean seeds to sprout like a pro? Here are answers to the most common ones—so you can avoid pitfalls and grow with confidence!
How long does it take for bean seeds to germinate?
Most bean seeds (like kidney, pinto, or black beans) sprout in 5–10 days under ideal conditions—warmth (70–85°F), moisture, and darkness. Fastest results? Try soaking seeds overnight before planting. Pro tip: If they’re still dry after 2 weeks, they may be old or damaged.
Why are my bean seeds taking so long to sprout?
Slow germination usually means one of three things: cold temps (keep them warm!), dry soil (check moisture daily), or old seeds (test viability by soaking—if they float, toss ’em). Try this: Place a damp paper towel in a sealed bag with seeds for 24 hours to jumpstart growth.
Can I germinate bean seeds indoors without soil?
Use the paper towel method for quick starts: Fold a damp towel, place seeds inside, and store in a warm, dark spot. Check daily—once sprouts are 1–2 inches tall, transplant to soil. Bonus: This works great for indoor growers or small spaces!
What should I do if my bean seeds rot instead of sprouting?
Rot = too much moisture or poor drainage. Fix it fast: Stop watering, let soil dry slightly, and replant seeds in fresh, well-draining mix. Prevent future rot: Use a seed-starting mix with perlite and avoid overwatering—soggy soil is a seed’s worst enemy!
Do all beans germinate the same way?
Most common beans (like bush or pole varieties) germinate similarly, but large seeds (e.g., lima beans) may need deeper planting (1–2 inches). Exception: Soybeans often sprout faster (3–7 days) and prefer slightly cooler soil. Always check seed packets for variety-specific tips!
Wrapping up and next steps
Mastering bean seed germination is all about patience, the right conditions, and a little know-how! Whether you're growing green beans for your garden or experimenting with microgreens, these speed-sprouting secrets will help you achieve reliable, healthy starts. 🌱
Now that you’re armed with the best techniques, give it a try—start small, track your progress, and soon you’ll be harvesting fresh, homegrown beans like a pro! For even better results, experiment with different varieties or explore container gardening to maximize your space.
Happy growing! 🌟