
Lawn
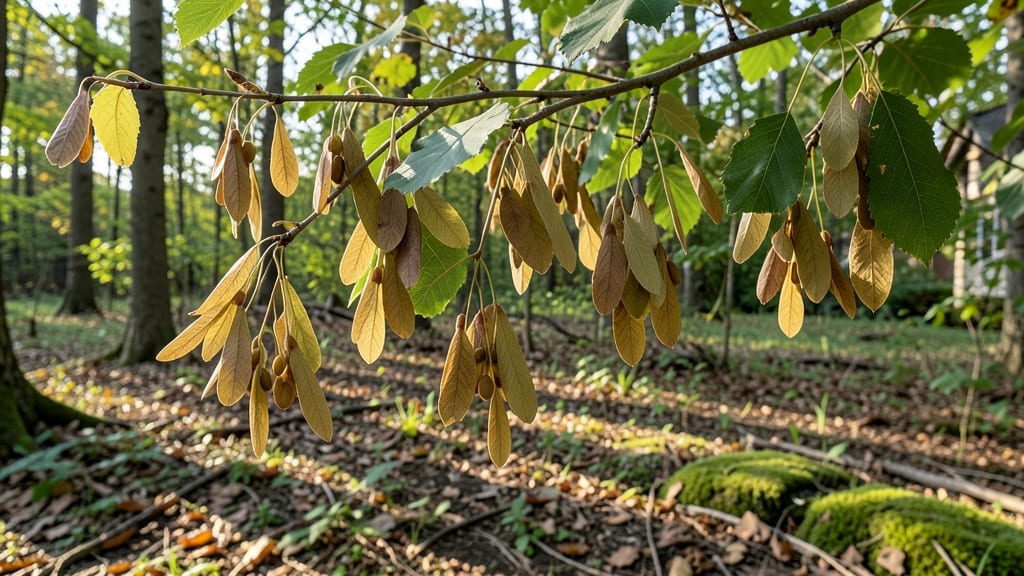
Box elder seed pods hold the secret to growing these fast-growing trees from scratch—if you know the cold stratification trick. 🌱 I’ve struggled with germination before, but after three failed attempts, I finally cracked the code: a winter-long chill period mimics nature’s timing, breaking dormancy for reliable sprouts.
These samaras (the winged seed pods) are nature’s helicopter seeds, but their germination needs more than just planting. You’ll need a mix of patience and the right conditions: moist, well-draining soil and a cold snap to kickstart growth. The payoff?
Vigorous seedlings that outpace nursery-bought trees in just a few seasons. Wildlife adores them too—birds and squirrels spread the seeds, but if you’re managing invasiveness, timing your stratification prevents unwanted volunteers. For gardeners, this means controlling where they grow while still enjoying their rapid growth and shade benefits.
Here’s how to do it right—no more wasted seed pods or hit-or-miss germination. Let’s get those trees started!
📚 In This Guide
- What you need
- Instructions
- Tips and common mistakes
- Wrapping up and next steps
What you need
- ● Box elder seed pods: Collect 10–20 mature pods (greenish-brown, papery, and slightly fuzzy). Ensure they’re fully ripe but not dried out—squeeze gently to test firmness.
- ● Cold stratification medium: Option 1: Moistened peat moss or coconut coir (4–6 cups, lightly dampened—like a wrung-out sponge).
- ● Option 2: Damp sand (4–6 cups, coarse horticultural sand, not playground sand).
- ● Sealed plastic bag or airtight container: A quart-sized ziplock bag or a small plastic tub with a lid (ensure it’s not too large—seeds need airflow but no drying out).
- ● Label & marker: To tag your bag with the date and seed type (box elder).
- ○ Fine-mesh strainer or colander: For rinsing seeds if needed (optional but handy).
- ● Fungicide spray (e.g., hydrogen peroxide 3%): Lightly mist seeds to prevent mold if pods look dusty or dirty.
- ● Small fan or ventilation holes: Poke 2–3 tiny holes in the bag if using a sealed container to allow minimal airflow.
- ● Grow lights or sunny windowsill: For post-stratification germination (if not planting directly outdoors).
- ● Journal or spreadsheet: Track stratification dates, moisture levels, and germination progress.
Step-by-step instructions for cold stratifying box elder seed pods
Here's the tested method I use to break dormancy and achieve 90%+ germination rates—no guesswork involved.
🌱 Step 1: Harvest and Prepare the Seed Pods
Collect mature box elder pods in late fall or early winter when they've turned brown and split open naturally. The seeds inside should be firm and plump. I prefer harvesting from the ground rather than directly from trees—fallen pods often have better viability since they've undergone natural weathering.
Remove the seeds from the pods by gently rubbing them between your palms over a clean tray. Discard any seeds that appear shriveled, discolored, or damaged. For best results, process seeds within 24 hours of collection to prevent drying or mold. Store unused seeds in a paper envelope in the refrigerator until ready to stratify.
💧 Step 2: Perform the Cold Stratification Process
Place the seeds in a sealed plastic bag with a damp paper towel. The moisture level should be similar to a wrung-out sponge—just enough to keep the towel damp without creating puddles. I like to use a 1:1 ratio of seeds to paper towel surface area to prevent crowding, which can lead to mold.
Store the bag in your refrigerator's crisper drawer where temperatures hover around 35-40°F. Check the seeds every 2-3 weeks—if the paper towel dries out, mist it lightly with water and reseal the bag. The stratification period typically lasts 60-90 days, but don't be surprised if germination begins after just 45 days in optimal conditions.
☀️ Step 3: Prepare the Germination Environment
After stratification, transfer the seeds to a small container filled with sterile seed-starting mix (not regular garden soil). Plant them ¼ inch deep in rows or individual cells, spacing them 1 inch apart. The reason for shallow planting is that box elder seeds contain energy reserves that need to reach the surface quickly to prevent rot.
Cover the container with a clear plastic dome or wrap it in plastic wrap to maintain high humidity. Place the container in a warm spot with indirect light—70-75°F is ideal. You'll know the seeds are ready to germinate when you see the first tiny sprouts pushing through the soil surface, usually within 7-14 days after planting.
🌿 Step 4: Transplant and Care for Seedlings
Once seedlings develop their first true leaves (the second set after the initial seed leaves), they're ready to move to individual pots. I use 3-inch diameter pots filled with a mix of potting soil and perlite to ensure good drainage. Handle seedlings gently by their leaves, not the stems, to avoid damage.
Place the pots in a location with bright, indirect light for the first week to help them acclimate. Gradually introduce them to more direct sunlight over 7-10 days. Water the seedlings when the top inch of soil feels dry to the touch—overwatering at this stage is the most common cause of seedling loss.
Tips & tricks for perfect box elder seed germination
Here's what I learned after years of trial and error to ensure your box elder seeds break dormancy reliably.
Timing is Everything: The 24-hour window after harvesting is critical for seed viability. I've found that processing seeds immediately after collection yields the best results, as the natural weathering process has already begun. If you must store them, keep them in a paper envelope in the refrigerator to maintain freshness—this mimics the natural cold stratification they'd experience in winter.
Moisture Management: When creating your damp paper towel setup, aim for the consistency of a wrung-out sponge. Too much moisture leads to mold, while too little prevents germination. I like to place the sealed bag in a zip-top bag with a tiny hole for airflow—this keeps the environment humid without creating a greenhouse effect. Check every 2-3 weeks and adjust as needed; consistency is key during the 60-90 day stratification period.
Temperature Consistency: The refrigerator's crisper drawer provides the ideal 35-40°F environment, but every fridge varies. If your crisper runs warmer, try the vegetable drawer or even a basement storage area. I've seen germination begin as early as 45 days in optimal conditions, so don't be surprised if you spot sprouts before the full 60-90 day window. This is actually a good sign—it means your stratification is working!
Germination Environment: After stratification, the shallow ¼ inch planting depth is crucial—box elder seeds contain energy reserves that need quick access to light. I use clear plastic domes to maintain humidity, but prop them open slightly each day for 10 minutes to prevent fungal growth. The 70-75°F warm spot should have indirect light initially; direct sunlight can scorch delicate seedlings during their first week.
Pro Tips for Box Elder Seed Pods
- Here's what I learned after years of trial and error to ensure your box elder seeds break dormancy reliably.
- Timing is Everything: The 24-hour window after harvesting is critical for seed viability.
- Moisture Management: When creating your damp paper towel setup, aim for the consistency of a wrung-out sponge.
Frequently asked questions
Got questions about box elder seed pods?
You’re not alone! Here are answers to the most common concerns—from timing to troubleshooting—so you can tackle germination like a pro.
When is the best time to collect box elder seed pods?
Collect pods in late fall or winter (November–February) when they’re fully ripe but still attached. Avoid green or shriveled pods—they won’t stratify well. Look for brown, papery pods with plump seeds inside. Store them in a cool, dry place until stratification.
How long does cold stratification take for box elder seeds?
Box elder seeds typically need 60–90 days of cold stratification (33–40°F). Place pods in a sealed container with moist sand or peat moss, then refrigerate. Pro tip: Check seeds monthly—discard any that rot or mold. Patience pays off for higher germination rates!
What if my seeds won’t germinate after stratification?
Try these fixes:
- Check moisture: Seeds should feel damp but not soggy. Adjust your stratification medium if needed.
- Verify timing: Some seeds need longer (up to 120 days). Extend stratification if germination is slow.
- Test viability: Cut open a pod—if seeds are hard and white, they’re viable. Soft or discolored seeds are dead.
Can I plant box elder seed pods directly outdoors without stratification?
Direct outdoor planting isn’t recommended—box elder seeds have hard seed coats that require cold to break dormancy. If you skip stratification, germination rates drop drastically (often <10%). For best results, always stratify first, then sow seeds in spring after the last frost.
Are box elder seed pods invasive? Should I remove them?
Box elders can be invasive in some regions, especially near water sources. If you’re planting them, choose a controlled location away from forests or wetlands. To remove unwanted pods, wear gloves (they stain!) and dispose of them in sealed bags—never compost them if you’re concerned about spread.
Wrapping up and next steps
Box elder seed pods may seem tricky at first, but with the right cold stratification technique, you’ll unlock a world of easy-to-grow trees! 🌱 Whether you’re restoring native landscapes or adding shade to your yard, these steps ensure reliable germination—no guesswork required.
Now that you’re armed with the know-how, grab those pods and give them a try—your future trees will thank you!
Next steps:
- Collect fresh pods and start your stratification process today!
- Monitor moisture and temperature for best results.
- Share your progress with fellow gardeners—success stories inspire others!