
Propagation
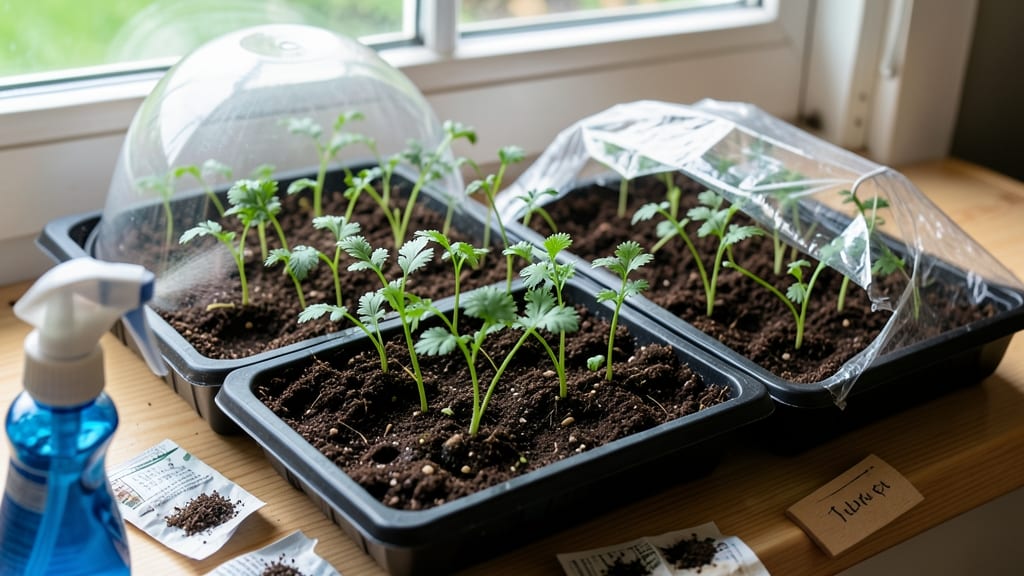
Starting carrots in seed trays isn't just possible—it's the secret to fast germination and sturdy seedlings that outpace store-bought plants. 🌱 I used to struggle with slow germination and leggy seedlings until I switched to trays, and now my carrot harvest begins weeks earlier than neighbors planting directly in the ground.
The key is mimicking their natural environment: fine, loose soil, consistent moisture, and gentle warmth. You'll need shallow trays (4-6 inches deep), a lightweight seed-starting mix, and patience—carrot seeds take 2-3 weeks to sprout, but they germinate more reliably in trays than in cold spring soil.
Once those first green shoots appear, you'll watch them thicken into pencil-thin seedlings ready for transplanting. The trays protect them from pests, give you control over moisture, and prevent the soil crusting that often smothers tiny seeds planted directly outdoors.
Here's where it gets interesting—transplanting these delicate roots requires care, but the payoff is worth it. We'll cover that next, plus how to avoid the common pitfalls that turn seedlings into sad, stunted plants.
📚 In This Guide
- What you need
- Instructions
- Tips and common mistakes
- Wrapping up and next steps
What you need
- ● Seed trays or starter flats: 10" x 20" (or similar) with individual cells (at least 2" deep). Pro tip: Biodegradable trays work great for transplanting!
- ● High-quality seed-starting mix: 1 bag (1-2 cubic feet). Avoid garden soil—it’s too dense for tiny seeds!
- ● Carrot seeds: A small packet (1/4 lb covers ~300 plants). Choose heirloom or hybrid varieties like ‘Nantes’ or ‘Danvers’ for best results.
- ● Spray bottle or watering can with a fine rose: For gentle hydration without disturbing seeds.
- ○ Clear plastic dome or plastic wrap: To create a humidity tent (optional but highly recommended for germination).
- ● Plant labels: Small sticks or tags to mark trays (e.g., “Carrots – Planted [Date]”).
- ● Grow lights or sunny windowsill: Carrots need 12–16 hours of light daily. A simple LED grow light (~$20) works wonders!
- ● Heating mat: Keeps soil warm (70–75°F) to speed up germination (especially useful in cool climates).
- ● Fertilizer (low-dose): A balanced starter fertilizer (5-5-5 or 10-10-10) to give seedlings a nutrient boost after sprouting.
- ● Seedling heat mat or greenhouse: For extra protection if your climate is chilly.
Step-by-step instructions for starting carrots in seed trays
Here's how to get your carrot seeds sprouting quickly and evenly—no more patchy germination!
🌱 Step 1: Prepare the Seed Tray and Soil
Fill your seed tray with a light, fine-textured seed-starting mix—carrot seeds need loose soil to push through easily. I press the mix down gently with my fingers until it's firm but not compacted. The goal is to create a smooth, even surface because uneven soil leads to uneven germination. Tap the tray lightly on the table to settle everything.
Moisten the soil until it's damp but not soggy—think of a wrung-out sponge. You want moisture to stay consistent, but standing water will drown those tiny seeds before they even sprout. A spray bottle works best here; a heavy watering can will disturb the soil surface and bury seeds too deep.
🌱 Step 2: Sow Seeds Thinly and Cover Lightly
Carrot seeds are tiny, so I use a toothpick or tweezers to place them ¼ inch deep in rows spaced 1 inch apart. I like to scatter them thinly—about 10-12 seeds per square inch—because thinning later is easier than dealing with crowded roots. Press each seed gently into the soil with your fingertip to ensure good soil contact.
Cover the seeds with a thin layer of fine vermiculite or additional seed mix—just enough to shield them from light but not bury them too deep. A sprinkle from a sieve works perfectly. Label the tray with the date and variety if you're growing multiple types. Patience here pays off: uneven coverage leads to uneven sprouting.
💧 Step 3: Provide Warmth and Moisture for Germination
Carrot seeds germinate best at 65-75°F, so I place the tray on a seedling heat mat or in a warm spot like on top of the fridge. A clear plastic dome or plastic wrap keeps humidity high, which speeds up germination. Check the soil daily—it should stay evenly moist but not waterlogged. Overwatering now will cause the seeds to rot before sprouting.
Germination takes 14-21 days, so don’t rush it. Once the first green shoots appear, remove the dome immediately to prevent fungal growth. You’ll see tiny, delicate leaves—these are your first true leaves, and they’re a sign everything is on track. If the soil dries out too quickly, mist lightly with water to keep it damp.
☀️ Step 4: Thin Seedlings and Provide Light
When seedlings reach 1 inch tall, it’s time to thin them to ½ inch apart in rows. Use sharp scissors to snip unwanted seedlings at soil level—pulling can disturb the roots of the remaining plants. This step is crucial because crowded carrots grow forked or stunted. I like to do this under bright light so I can see exactly where to cut.
Move the tray to a bright, indirect light source—a south-facing window or under grow lights for 14-16 hours daily. Carrot seedlings need light to stay strong, but too much direct sun too soon can scorch them. Watch for leggy growth (long, weak stems) as a sign they need more light. If you see this, move the tray closer to the light source.
🪴 Step 5: Transplant or Harden Off for Outdoor Planting
After 4-6 weeks, when seedlings have 4-5 true leaves, they’re ready to transplant. If moving outdoors, harden them off by placing the tray in a shaded, sheltered spot for 1-2 hours the first day, gradually increasing time over 7-10 days. This helps them adjust to outdoor conditions without shock. Avoid transplanting on a hot, sunny day—they’ll wilt quickly.
For direct sowing in trays, ensure the tray is at least 6 inches deep—carrots need room to grow. Keep the soil consistently moist but not soggy, and watch for pests like carrot rust flies. If you notice yellowing leaves or stunted growth, check the soil moisture and light conditions immediately. With these steps, you’ll have strong, straight carrots ready for harvest in no time!
Tips & tricks for starting carrots in seed trays
Here's what nobody tells you about getting those stubborn carrot seeds to sprout reliably—these tricks cut germination time in half.
Soil Texture Matters: The light, fine-textured seed-starting mix is non-negotiable for carrot seeds. I've tried regular potting soil, and it's a disaster—seeds either don't sprout or push through unevenly. Press the mix gently but firmly to create a smooth surface, then tap the tray lightly to settle it. This prevents air pockets that trap seeds too deep or leave gaps where seeds dry out. Think of it like creating a perfect canvas for those tiny seeds to work with.
Precision Planting: Those toothpick or tweezers aren't just suggestions—they're essential for placing seeds exactly ¼ inch deep in rows spaced 1 inch apart. I measure with a ruler to ensure perfect spacing, and I swear by the 10-12 seeds-per-square-inch rule. This density gives you enough seedlings to thin properly, but not so many that you'll struggle with overcrowding later. Mark your rows with a pencil before planting to avoid misalignment.
Germination Speed Hack: The 65-75°F temperature range is critical, but I take it a step further by using a seedling heat mat for the first 7 days. After that, I move the tray to a warm spot like on top of the fridge. The key is maintaining that warmth consistently—fluctuations slow germination. Once you see those first green shoots, remove the dome immediately to prevent fungal growth. I've seen germination times drop from 21 days to as little as 12 days using this method.
Lighting Strategy: For the 14-16 hours daily of light, I use a combination of south-facing window light and grow lights. The grow lights are essential during winter months when natural light is insufficient. Watch for leggy growth—those long, weak stems mean your seedlings need more light. If you see this, move the tray closer to the light source or increase the duration slightly. The goal is strong, sturdy seedlings that can handle transplanting.
Pro Tips for Can You Start Carrots In Seed Trays
- Here's what nobody tells you about getting those stubborn carrot seeds to sprout reliably—these tricks cut germinatio...
- Soil Texture Matters: The light, fine-textured seed-starting mix is non-negotiable for carrot seeds. I've tried regul...
- Precision Planting: Those toothpick or tweezers aren't just suggestions—they're essential for placing seeds exactly ¼...
Frequently asked questions
Got questions about starting carrots in seed trays?
You’re not alone! Here are some of the most common concerns—and straightforward answers—to help you grow confident, fast-germinating carrot seedlings.
How deep should I plant carrot seeds in seed trays?
Carrot seeds are tiny and need light to germinate, so don’t bury them deep! Scatter seeds on the soil surface and press them in lightly (about ¼ inch deep). Cover them with a thin layer of fine soil or vermiculite—just enough to shield them from drying out. Over-deepening can delay germination or cause leggy seedlings.
Why aren’t my carrot seeds germinating in the trays?
Carrots are slow to sprout—wait 2-3 weeks before worrying! Common culprits include cold soil (below 50°F), dry conditions, or old seeds. To troubleshoot:
- Keep trays consistently moist (not soggy).
- Use a heat mat (70–75°F) to speed things up.
- Test seed viability by soaking a few in water—if they sink, they’re likely good.
Can I reuse seed trays for carrots after growing other plants?
Yes! Clean and sanitize trays between uses to prevent disease. Scrub with soapy water, rinse well, and disinfect with a 10% bleach solution (1 part bleach to 9 parts water). Let them dry completely before reuse. Pro tip: Sterilizing trays reduces the risk of damping-off, a fungal issue that can kill young seedlings.
What’s the best alternative if I don’t have seed trays?
No seed trays? No problem! Try these low-cost alternatives:
- Egg cartons: Poke drainage holes and fill with seed-starting mix.
- Toilet paper rolls: Cut into 2-inch sections, soak in water, and plant seeds inside.
- Peat pots: Biodegradable and easy to transplant.
- Direct sowing (if weather permits): Thin seedlings later, but germination is slower.
What should I do if my carrot seedlings look leggy or weak?
Leggy seedlings usually mean they’re stretching for light. Fix it by:
- Moving trays to a sunny windowsill or under grow lights (12–16 hours/day).
- Thinning seedlings to 1 inch apart to reduce competition.
- Avoid overcrowding—carrots need space to grow straight.
Wrapping up and next steps
Starting carrots in seed trays is a game-changer for gardeners eager to see quick, healthy germination! 🌱 With the right setup—like well-draining soil, proper spacing, and consistent moisture—you’ll be well on your way to a bountiful harvest. Don’t let hesitation hold you back; just give it a try!
Once your seedlings sprout and grow their first true leaves, it’s time to transplant them into your garden or larger containers. Ready to take the next step? Grab your gloves and get growing—your future carrot crop will thank you!