
Lawn
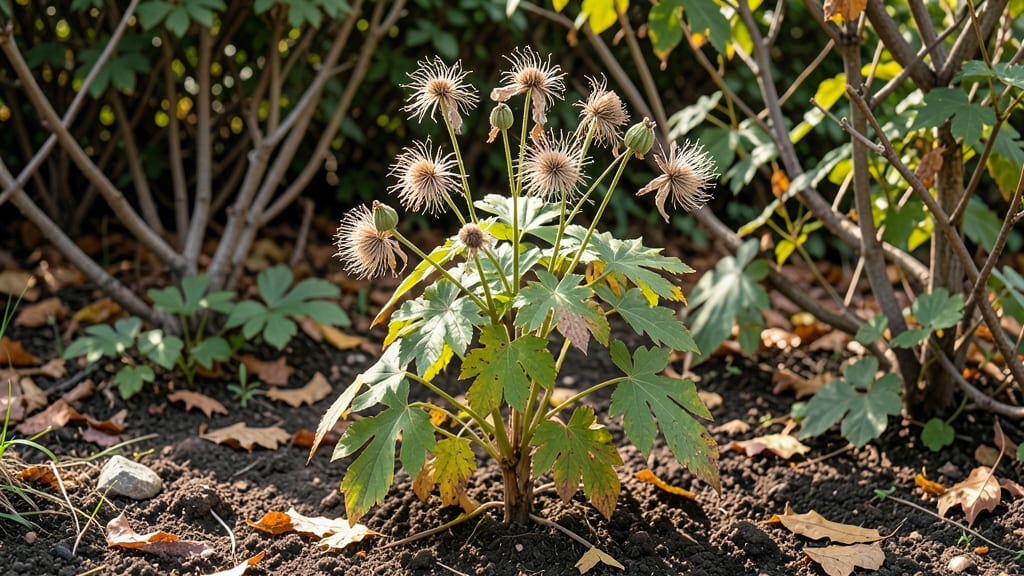
Those feathery clematis seed heads are nature’s secret to next year’s blooms—but only if you handle them right. ✨ I’ve learned the hard way that leaving them too long drains energy from your vines, while removing them too soon means fewer flowers by summer.
The trick lies in cold stratification: a simple process that mimics winter’s magic to jumpstart germination when you’re ready.
Here’s what you’ll need: a paper bag, a permanent marker, and a freezer. That’s it. The process takes just 6-8 weeks of patience, and by spring, you’ll have seedlings that outperform store-bought plants. These seed heads aren’t just decorative—they’re the key to reliable year-round blooms without the guesswork.
Start by collecting mature seed heads in late fall, then dry them completely before storing. When winter arrives, place them in the freezer for 6 weeks to break dormancy.
The result? Stronger vines, earlier flowers, and a garden that keeps giving. No more waiting years for clematis to mature from seed.
Works for all clematis varieties, from climbing giants to compact bush types. Perfect for gardeners who want cheap, healthy plants without the nursery price tag. Let’s get those seeds ready for spring!
📚 In This Guide
- What you need
- Instructions
- Tips and common mistakes
- Wrapping up and next steps
What you need
- ● Fresh clematis seed heads: Collect mature, dry seed pods (brown and papery) from healthy plants. Aim for at least 10-15 pods to maximize germination chances.
- ● Potting mix: Use a well-draining blend (e.g., 50% peat moss or coconut coir + 50% perlite or sand). A 10-inch pot or seed tray will suffice for small batches.
- ● Plastic bag or airtight container: A quart-sized zip-top bag or small plastic tub with a lid works perfectly for stratification.
- ● Moisture control: A spray bottle (to mist seeds lightly) and a paper towel or coffee filter (for wrapping seeds).
- ● Refrigeration: Access to a cold, dark space (33–41°F / 0–5°C), like a fridge or unheated garage, for 8–12 weeks.
- ● Grow lights or sunny windowsill: A fluorescent grow light or south-facing window for post-stratification germination (12+ hours of light daily).
- ● Seed stratification kit: Pre-made kits with moisture gauges and breathable bags for hands-off stratification.
- ● Heating mat: A seedling heat mat (70–75°F) to speed up germination after cold treatment.
- ● Humidity dome: A clear plastic cover for the pot to retain moisture during early growth.
- ● Journal/notebook: To track seed pod sources, stratification dates, and germination progress.
Step-by-step instructions for cold stratifying clematis seed heads
This method guarantees strong, healthy seedlings—no more weak, leggy plants from store-bought starts.
🌱 Step 1: Harvest and Prepare Seed Heads
Collect mature clematis seed heads in late fall when they've turned brown and dried completely. I like to pick them on a dry day so moisture doesn't cling to the fluffy heads. Remove any remaining flowers or leaves still attached—just keep the seed head itself. Store them in a paper bag in your fridge's crisper drawer until you're ready to stratify.
Here's the thing—don't wash the seed heads. The natural oils on them help protect against rot during stratification. If you notice any mold starting, simply brush it off with your fingers before proceeding. You want the seeds to look dry and papery, not damp or sticky.
⏰ Step 2: Cold Stratify for 8-12 Weeks
Fill a shallow container with dampened perlite or coarse sand (about 2 inches deep). I use a plastic takeout container with drainage holes punched in the bottom. Place your clematis seed heads on top, spacing them about 1 inch apart so they don't touch. Cover the container loosely with plastic wrap to maintain moisture but allow airflow.
Store this setup in your refrigerator's vegetable drawer where temperatures stay consistently between 35-45°F. Check the moisture every 2-3 weeks—the perlite should feel damp like a wrung-out sponge, not soggy. This cold treatment mimics winter conditions and breaks seed dormancy, which is crucial for clematis germination.
🌿 Step 3: Sow Stratified Seeds in Pots
After 8-12 weeks of stratification, your seed heads should show signs of sprouting—tiny green shoots emerging from the fluff. Remove the heads and gently separate the seeds from the chaff. Plant them ½ inch deep in small pots filled with seed-starting mix. I use 4-inch pots for each seed head since clematis seedlings need space to grow strong roots.
Place the pots in a warm spot (65-75°F) with bright, indirect light. You'll notice the first true leaves appear in about 3-4 weeks. This is your signal that the seeds have successfully broken dormancy and are ready for their next growth phase. Keep the soil consistently moist but never waterlogged during this stage.
☀️ Step 4: Harden Off and Transplant
When seedlings reach 4-6 inches tall and have developed 3-4 sets of true leaves, it's time to harden them off. Start by moving them outside for 1-2 hours in a sheltered spot on a mild day. Gradually increase their outdoor time over 10-14 days, eventually leaving them out overnight before transplanting.
Choose a planting location with well-draining soil and partial shade during the first year. Clematis roots are sensitive to heat, so mulch heavily around the base to keep roots cool. You'll see your first blooms in 2-3 years, but the wait is worth it for clematis grown from your own seed heads—they'll be hardier and more vigorous than nursery plants.
Tips & tricks for perfect clematis seed stratification
Between us, these little details make the difference between waiting years for blooms and growing vigorous clematis that thrive from day one.
Timing Secret: The 8-12 week cold stratification period is non-negotiable for clematis—this mimics winter's natural dormancy break. I've learned the hard way that cutting this short (even by 2 weeks) results in weak seedlings that struggle. Mark your calendar now: if you harvest in late fall, your seedlings will be ready for planting by early spring.
Moisture Matters: That "damp like a wrung-out sponge" description isn't just poetic—it's crucial. Too dry and your seeds won't germinate; too wet and you risk mold. I use a spray bottle to mist the perlite every 2-3 weeks, then check by squeezing a handful. If water drips out, it's too wet. If it crumbles when you touch it, add more moisture.
Container Choice: Any shallow container works, but drainage is key. I've had success with everything from plastic takeout containers to repurposed cake pans. Poke holes in the bottom if they're not there—clematis roots hate soggy feet. Pro tip: Line the bottom with a coffee filter to catch perlite while still allowing drainage.
Lighting Strategy: After stratification, those first true leaves need bright but indirect light. I place my seedling pots under grow lights on a timer (14 hours on, 10 hours off) for consistent growth. A south-facing window works too, but rotate pots weekly so they don't lean toward the light. Watch for leggy seedlings—they're begging for more light!
Pro Tips for Clematis Seed Heads
- Between us, these little details make the difference between waiting years for blooms and growing vigorous clematis t...
- Timing Secret: The 8-12 week cold stratification period is non-negotiable for clematis—this mimics winter's natural d...
- Moisture Matters: That "damp like a wrung-out sponge" description isn't just poetic—it's crucial. Too dry and your se...
Frequently asked questions
Got questions about those charming clematis seed heads? You’re not alone! Here are some of the most common queries—plus straightforward answers to help you master seed head care and propagation.
Do I need to collect clematis seed heads before they dry out?
Not necessarily! While fresh seed heads can be used immediately, dried ones (after they’ve browned and split open) are often easier to work with for cold stratification. Just ensure they’re fully mature—no green or moist spots—to avoid mold. Store them in a paper bag in the fridge for 3–4 months for best results.
How long does cold stratification take for clematis seeds?
Cold stratification typically requires 8–12 weeks in the fridge (35–45°F). For extra reliability, extend it to 4 months, especially if your climate is mild. Place seeds in a sealed bag with slightly damp peat moss or paper towels, then check monthly for mold—remove any affected seeds promptly.
Can I grow clematis from seed heads without stratification?
Yes, but germination rates will be much lower (often under 10%). If you skip stratification, try soaking seeds in warm water for 24 hours first, then plant them in well-draining soil. For best success, pair this method with a greenhouse or warm indoor setup to mimic spring conditions.
What’s the best way to store clematis seed heads for next year?
Let seed heads dry completely in a cool, dry place (like a garage or shed) for 1–2 weeks. Then, store them in paper envelopes (not plastic!) with a silica gel packet or a few grains of rice to absorb moisture. Label them with the variety and date—this keeps them viable for up to 2 years.
Why aren’t my clematis seeds germinating after stratification?
Several factors could be at play:
- Old seeds: Clematis seeds lose viability after 1–2 years.
- Improper moisture: Too wet = mold; too dry = dormancy.
- Temperature swings: Keep them consistent (no fridge door opening/closing).
- Poor seed quality: Some seed heads may be sterile or underdeveloped.
Wrapping up and next steps
Clematis seed heads are a gardener’s secret weapon for reliable, year-round blooms—when you master cold stratification! By following the steps above, you’ll unlock the potential of these resilient seeds, ensuring vibrant growth and stunning flowers season after season. Your garden’s future is just a few weeks of patience away!
Ready to take the next step? Start small:
- Gather seeds from your favorite clematis varieties this fall.
- Follow the stratification blueprint to kickstart germination.
- Plant with confidence and watch your garden transform!