
Propagation
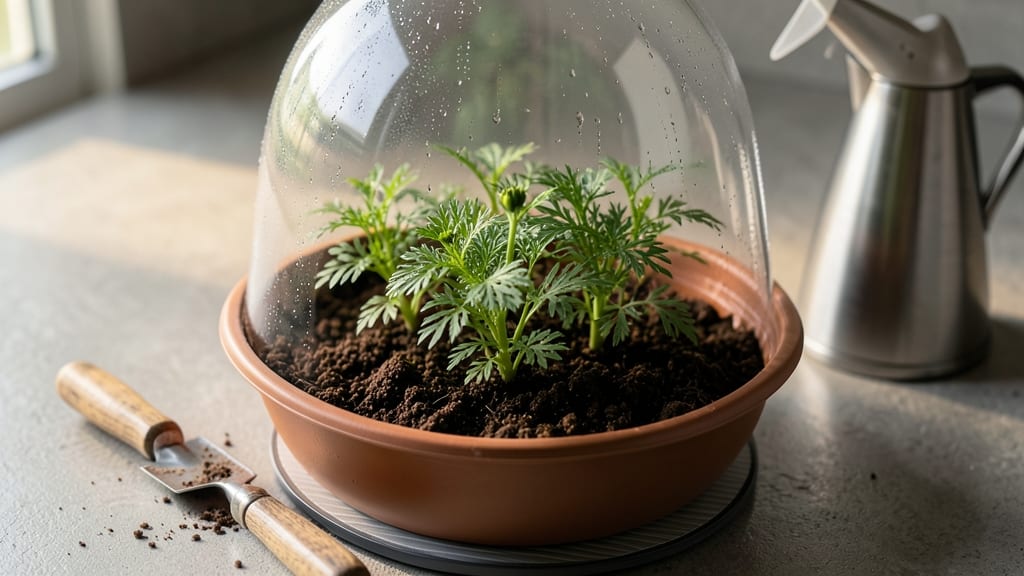
Starting cosmos seeds with cold stratification guarantees those dreamy, paper-thin blooms next summer—no more waiting for store-bought plants that flop in heat. 🌻 I learned the hard way that regular indoor starting skips the natural dormancy break these seeds need, leaving me with patchy germination.
The trick is mimicking winter's chill before spring planting, and it works every time.
You'll need just three things: a zip-top bag, a damp paper towel, and your seeds. No fancy equipment—just patience. After 4-6 weeks in the fridge, those seeds wake up ready to germinate like clockwork.
The process takes about 10 minutes to set up, and the payoff is cosmos that outperform anything you'd buy at the nursery.
By the time you transplant, you'll have stocky seedlings with true leaves, not the leggy, weak plants that struggle in summer heat. The blooms arrive earlier, last longer, and resist powdery mildew better than store-bought varieties. Plus, you get to choose from colors and types no garden center carries.
Works for both indoor starts and direct sowing after stratification. Here's exactly how to do it—no more hit-or-miss germination or floppy plants that never thrive.
📚 In This Guide
- What you need
- Instructions
- Tips and common mistakes
- Wrapping up and next steps
What you need
- ● Cosmos seeds: 10–20 seeds (choose heirloom or hybrid varieties like 'Bright Lights' or 'Sensation Mix').
- ● Seed-starting mix: 2–3 cups of sterile, well-draining potting mix (look for "seed-starting" blends or mix 50% peat moss + 50% perlite).
- ● Containers: 2–4 small pots (3–4 inches deep) or
- ● A seed tray with cell inserts (for batch starting).
- ● Plastic bags or dome lids: To create a mini greenhouse effect (1–2 per container).
- ● Spray bottle: With room-temperature water for gentle hydration.
- ○ Plastic wrap or humidity dome: Optional but helpful for moisture retention.
- ● Refrigerator: A standard fridge with a crisper drawer (for cold stratification).
- ● Grow lights or sunny windowsill: A south-facing window or a LED grow light (12–16 hrs/day post-stratification).
- ○ Thermometer (optional but helpful): To monitor fridge temps (ideal: 35–45°F).
- ● Heating mat: For faster germination after stratification (set to 65–75°F).
- ● Fertilizer: A diluted liquid seedling fertilizer (e.g., fish emulsion at ½ strength).
- ● Labels & markers: To track seed varieties and stratification dates.
- ● Humidity tray: A shallow tray with pebbles and water to boost humidity.
- ● Transplanting tools: Small trowel or spoon for moving seedlings later.
Step-by-Step instructions for cold stratifying cosmos seeds
Here's the foolproof method I use to break dormancy and ensure robust cosmos seedlings every season.
🌱 Step 1: Select and Prepare Seeds for Stratification
Choose fresh cosmos seeds—older seeds may require extra time to break dormancy. Place them in a quart-sized resealable plastic bag with a damp paper towel. The towel should feel like a wrung-out sponge: moist but not dripping. Seal the bag loosely (leave a small gap for airflow) and store it in the refrigerator.
Check the seeds after 7-10 days. If they've softened slightly or begun to swell, stratification is working. If not, give them another week—cosmos seeds vary in their cold requirements. I always label the bag with the seed variety and date to track progress.
⏰ Step 2: Monitor Stratification and Prepare Growing Medium
Keep the bag in the fridge for 2-4 weeks total, checking weekly for signs of sprouting. The ideal fridge temperature is 35-40°F—any warmer and the seeds may germinate too soon. Once the seeds show tiny white roots (about ¼ inch long), they're ready for planting.
While seeds stratify, fill 4-inch pots with a sterile seed-starting mix (never garden soil—it's too dense and may harbor pathogens). Moisten the mix until it holds together when squeezed but doesn't drip. I like to press it down lightly to remove air pockets, then tap the pot gently to settle the soil evenly.
🌿 Step 3: Sow Stratified Seeds and Provide Warmth
Plant the stratified seeds ¼ inch deep—any deeper, and they'll struggle to reach the surface. I use a toothpick to poke small holes and drop one seed per pot. Cover lightly with additional mix and mist the surface with a spray bottle until evenly damp. Avoid soaking the soil, as cosmos seeds rot easily in soggy conditions.
Place the pots in a seedling heat mat set to 70-75°F to encourage rapid germination. Without this warmth, seeds may take weeks to sprout. Keep the soil consistently moist (not wet) by checking the top inch daily. You'll see the first sprouts in 7-14 days—watch for tiny green leaves pushing through the soil.
☀️ Step 4: Transition to Light and Harden Off Seedlings
Once seedlings emerge, move them to a bright, indirect light source (like a south-facing window) for 12-14 hours daily. Cosmos seedlings grow fast but need strong light to prevent leggy stems. If they stretch toward the light, raise the grow light to 2-3 inches above the plants or rotate the pots weekly for even growth.
After 4-6 weeks, when seedlings have 3-4 true leaves, start hardening them off. Place pots outside in a sheltered, shaded spot for 1-2 hours the first day, then gradually increase exposure over 10-14 days. By the time they're ready for transplanting, they'll tolerate full sun without wilting.
🪴 Step 5: Transplant and Maintain for Blooms
Transplant seedlings 12-18 inches apart in well-draining soil with full sun exposure. Cosmos thrive in average garden soil but benefit from a light mulch (like straw) to retain moisture. Water deeply at the base once weekly, letting the top 2 inches of soil dry between waterings—overwatering leads to weak stems and fewer blooms.
Deadhead spent flowers regularly to encourage continuous blooming. In my experience, cosmos grown from cold-stratified seeds produce sturdier stems and larger blooms than those sown directly in spring. With this method, you'll have vibrant cosmos flowers from mid-summer through frost.
Tips & tricks for perfect cold stratification of cosmos seeds
These little-known strategies will help you maximize your success rate with cosmos seeds every single season.
Moisture Balance: The damp paper towel in Step 1 should feel like a wrung-out sponge—neither soggy nor dry. I've found that using two paper towels layered together helps maintain even moisture distribution without creating anaerobic conditions that can cause mold. If the towel feels dry after a few days, lightly mist it with water and reseal the bag. The key is consistency: cosmos seeds need steady moisture to break dormancy effectively.
Temperature Precision: While the instructions specify a fridge temperature range of 35-40°F, I recommend placing your bag on the middle shelf rather than the crisper drawer. The crisper can get too cold (below 35°F), which may slow down the stratification process. If your fridge runs warmer than 40°F, consider using a second refrigerator or placing the bag in a cooler with ice packs to maintain the ideal range. Remember, seeds need cold but not freezing temperatures to properly stratify.
Visual Cues for Readiness: In Step 2, when checking for tiny white roots (about ¼ inch long), look for seeds that have visibly softened or show a slight swelling. These visual cues indicate the seeds are ready for planting. I've learned that some cosmos varieties may take up to 4 weeks to show these signs—patience is key. If you're unsure, gently press a seed between your fingers; it should feel slightly softer than when you first placed it in the fridge.
Light Transition Strategy: For Step 4, when moving seedlings to bright, indirect light, I've found that using a sheer curtain over a south-facing window creates the perfect light environment. This prevents the intense midday sun from scorching young seedlings while still providing ample light. If you notice seedlings stretching toward the light source, it's time to raise the grow light or rotate the pots—this helps develop stronger stems that can support the plant's eventual height and bloom production.
Pro Tips for Cosmos Seed Starting
- These little-known strategies will help you maximize your success rate with cosmos seeds every single season.
- Moisture Balance: The damp paper towel in Step 1 should feel like a wrung-out sponge—neither soggy nor dry.
- Temperature Precision: While the instructions specify a fridge temperature range of 35-40°F, I recommend placing your bag on the middle shelf rather than the crisper drawer.
Frequently asked questions
Got questions about jumpstarting your cosmos seeds? Here are answers to the most common ones—so you can grow vibrant blooms like a pro!
Why do cosmos seeds need cold stratification?
Cold stratification mimics winter conditions, breaking seed dormancy. Cosmos seeds often germinate poorly without it. A 2-4 week cold spell (like in a fridge) tricks them into thinking spring is near—boosting germination rates from 50% to nearly 100%!
How long should I cold stratify cosmos seeds?
For best results, stratify cosmos seeds for 2-4 weeks in a moist paper towel or peat moss, stored in a sealed bag in the fridge (34-40°F). Avoid over-stratifying—beyond 4 weeks, germination may slow down.
Can I skip cold stratification and still grow cosmos?
Yes, but expect slower, uneven germination (often 10-14 days later). If you’re impatient, try pre-sprouting seeds on a damp paper towel for 3-5 days before planting. For reliability, though, stratification is the gold standard!
What’s the best soil mix for starting cosmos seeds?
Use a light, well-draining mix like 50% peat moss + 50% perlite or vermiculite. Avoid heavy garden soil—it compacts and suffocates tiny seedlings. A seed-starting tray with drainage holes works best!
My cosmos seeds aren’t germinating—what went wrong?
Check these fixes:
- Temperature: Keep soil at 70-75°F (use a heat mat if needed).
- Moisture: Keep soil damp (not soggy)—use a spray bottle.
- Light: Place trays in bright, indirect light (no direct sun yet!).
- Patience: Germination takes 7-21 days—don’t give up!
Wrapping up and next steps
Starting cosmos seeds with cold stratification is your ticket to vibrant, reliable blooms next season! By following these steps—from gathering materials to monitoring germination—you’ve set the stage for a thriving garden.
The key? Patience and precision—your efforts will soon reward you with effortless, cheerful flowers that attract pollinators and brighten up any space.
Ready to take the next step? Plant your stratified seeds in well-draining soil, keep them moist, and watch your garden transform! 🌱✨ Check out our guide on post-germination care to maximize your success.