
Lawn
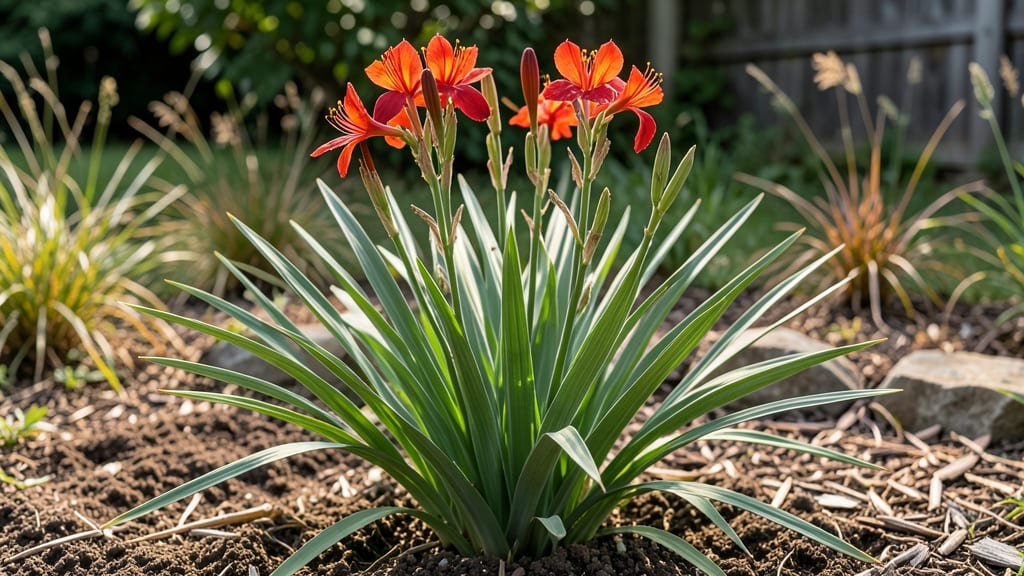
Those twisted, papery crocosmia seed pods are nature’s way of storing seeds for years—if you know how to collect them. 🌱 I’ve spent seasons watching these dramatic pods dry and twist, only to finally crack the code on when and how to harvest seeds that still sprout fresh.
The timing is everything, and missing it means waiting another year for the show. The pods themselves are easy to spot: they start green, then turn straw-colored and twist tightly like a corkscrew by late fall.
Once they’re fully dried and brittle, gently squeeze them over a tray—seeds will rain out like tiny, glossy beads. Store them in a cool, dry place, and they’ll stay viable for 2-3 years, ready to surprise you with new plants whenever you’re ready.
You’ll end up with delicate, grass-like foliage and fiery blooms by next spring, proving that patience pays off. The seeds are finicky to germinate, so soaking them first gives you the best shot at success—just don’t rush the process.
While seed propagation is possible, most gardeners prefer dividing the rhizomes in early spring. But if you’re curious about the natural cycle, these pods offer a fascinating glimpse into how crocosmia renews itself. Here’s how to make it work!
📚 In This Guide
- What you need
- Instructions
- Tips and common mistakes
- Wrapping up and next steps
What you need
- ● Mature crocosmia seed pods: Harvest only fully dried pods (brown, papery texture) from late fall to winter.
- ● Collect 10–20 pods per project (adjust based on desired seed quantity).
- ● Pruning shears or sharp scissors: For cleanly snipping pods from stems.
- ● Paper bags or breathable mesh bags: 1–2 bags (to store pods and allow airflow).
- ○ Damp paper towels or seed-starting mix: For moisture control during germination (optional but helpful).
- ● Small containers or seed trays: With drainage holes (e.g., 4–6-inch pots or a shallow tray).
- ● Spray bottle: For gentle misting (avoid soaking).
- ● Permanent marker & labels: To track seed pod sources and planting dates.
- ○ Gloves (optional): Protect hands from prickly pods or soil.
- ● Heat mat: Speeds up germination (set to 70–75°F).
- ● Clear plastic wrap: Creates a mini greenhouse effect for humidity.
- ● Grow lights: If starting seeds indoors before spring.
- ● Journal/notebook: To log pod sources, germination rates, and growth notes.
- ● Compost or fertilizer: For transplanting seedlings into richer soil.
How to collect and store crocosmia seed pods for year-round germination
Here's the simple, hands-off method I use to save crocosmia seeds naturally.
🌱 Step 1: Identify and Harvest Mature Seed Pods
Wait until the seed pods turn a deep brown and begin to twist naturally—this usually happens in late summer or early fall. The pods will look dried out and papery, almost like they're curling up on their own. Gently twist them off the stems by hand; they should release easily without forcing. If they resist, they're not quite ready.
I like to harvest on a dry morning when dew has evaporated. This prevents moisture from sticking to the pods and encourages them to stay dry during storage. Place the harvested pods in a paper bag—no plastic—to allow airflow while keeping them contained.
💧 Step 2: Dry and Prepare Pods for Storage
Spread the pods out on a clean, dry surface in a single layer. Let them dry for 3-5 days in a warm, dry place with good air circulation—like a sunny windowsill or a well-ventilated shelf. You'll know they're properly dried when they feel light and brittle to the touch. If they still feel damp or heavy, give them another day or two.
Once completely dry, gently rub the pods between your fingers to release the seeds. The twisting mechanism should make this easy—you'll hear a faint popping sound as the seeds separate. Store the seeds in a small envelope or airtight container with a desiccant packet to keep them bone-dry.
☀️ Step 3: Store Seeds for Year-Round Viability
Place the sealed container in a cool, dark spot—like a pantry or basement—where temperatures stay between 35-50°F. Crocosmia seeds can remain viable for 1-2 years if stored properly. I label each container with the harvest date so I know how old they are when planting time comes around.
Here's the thing—crocosmia seeds need a cold period to break dormancy. In spring, I either sow them directly outdoors after the last frost or stratify them in the fridge for 4-6 weeks before planting. This mimics winter conditions and triggers germination. Watch for tiny green shoots in 4-8 weeks after planting.
⏰ Step 4: Plant Seeds When Ready
Direct sow seeds in well-draining soil in full sun during early spring or fall. Scatter them lightly on the soil surface—don't bury them—since they need light to germinate. Press them gently into the top layer of soil and water lightly. Keep the soil consistently moist but not soggy until germination occurs.
You'll see the first signs of growth in 2-4 weeks if conditions are right. Thin seedlings to 6 inches apart once they reach 3-4 inches tall to give them room to grow. The twisting pods make this process fun—just let nature do the work for you!
Tips & tricks for perfect crocosmia seed collection
Here's what nobody tells you about making this process foolproof—trust me, these little details make all the difference.
Harvesting Timing: The 3-5 day drying window in Step 2 is non-negotiable—this is when the pods fully release their seeds. If you harvest too early, the seeds won't pop cleanly. I've learned the hard way that rushing this step means struggling to separate seeds later. Place a small weight on top of the drying pods to keep them flat against the surface, which speeds up moisture evaporation. This simple trick cuts your drying time by nearly a day.
Seed Release Technique: When rubbing the dry pods between your fingers in Step 2, work over a clean white surface like a paper towel or baking sheet. The seeds are tiny and can easily scatter—this makes collection much easier. I also recommend wearing gloves if you're sensitive to plant fibers. Once you hear that satisfying pop, gently shake the paper to separate any lingering seeds from the pod fragments.
Storage Environment: The 35-50°F range mentioned in Step 3 is crucial for long-term viability. I keep my seed containers in the back of my pantry where the temperature stays consistently around 40°F. For extra protection, I double-wrap the containers in breathable fabric before sealing them completely. This prevents condensation buildup that could trigger mold. The desiccant packets are essential—without them, seeds can lose viability within months instead of years.
Pro Tips for Crocosmia Seed Pods
- Here's what nobody tells you about making this process foolproof—trust me, these little details make all the difference.
- Harvesting Timing: The 3-5 day drying window in Step 2 is non-negotiable—this is when the pods fully release their se...
- Seed Release Technique: When rubbing the dry pods between your fingers in Step 2, work over a clean white surface lik...
Frequently asked questions
Got questions about crocosmia seed pods? You’re not alone! Whether you’re a gardener curious about timing or troubleshooting, here are some answers to common queries to help you get the most out of these unique seed pods.
When do crocosmia seed pods mature and release seeds?
Crocosmia seed pods typically mature in late summer to early fall (August–October, depending on your climate). They’ll turn brown and papery before splitting open to release seeds. Pro tip: Harvest them before they fully dry to prevent seed loss to birds or wind!
How long do crocosmia seed pods take to germinate?
Germination can take 2–4 weeks under ideal conditions (warmth, moisture, and indirect light). For best results, sow seeds in spring or early fall. Keep the soil consistently moist but not soggy—patience is key!
Can I save crocosmia seeds from store-bought flowers?
Yes, but with a catch! Many commercial crocosmia flowers are hybrids, meaning saved seeds may not produce identical plants. For true-to-type results, source seeds from open-pollinated varieties or reputable seed suppliers.
Why aren’t my crocosmia seed pods forming?
Missing seed pods? Check these common issues:
- Lack of pollinators: Crocosmia relies on bees or butterflies. Plant near pollinator-friendly flowers to attract them!
- Over-fertilizing: Too much nitrogen promotes foliage over blooms. Use a balanced fertilizer instead.
- Poor growing conditions: Ensure full sun (6+ hours/day) and well-draining soil.
How do I store crocosmia seeds for next season?
Once pods are dry but not yet split, remove seeds and store them in a cool, dry place (like a paper envelope in the fridge) for up to 6 months. Label them to avoid mix-ups!
Wrapping up and next steps
Crocosmia seed pods offer a unique, eco-friendly way to preserve viable seeds year-round without harsh chemicals—just nature’s clever twist-and-release mechanism! Whether you’re a gardener looking to extend seed freshness or a DIY enthusiast eager to try sustainable solutions, these pods prove that simplicity can be highly effective. 🌱
Ready to give it a try? Start small—harvest a few pods, experiment with the technique, and watch your garden thrive with homegrown confidence. Happy gardening! 🌿✨