
Size
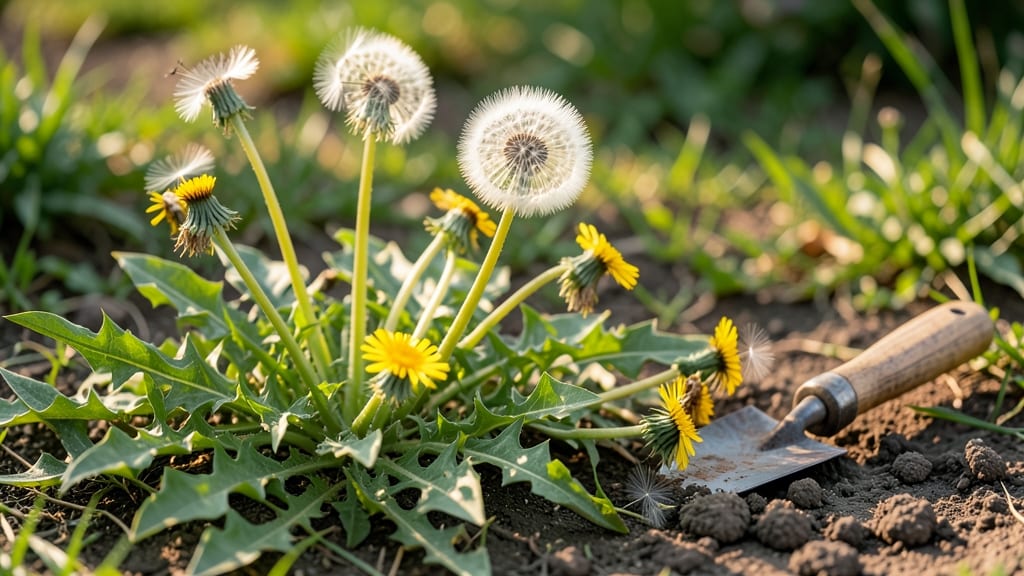
Growing a garden from dandelion seeds is easier than you think—and way more rewarding. 🌱 Those "weeds" you pull every spring can actually become a pollinator magnet, edible snack source, and early-season beauty if you give them a chance.
My first intentional dandelion patch now blooms before anything else in the yard, feeding bees when little else is available.
The secret starts with soil: dandelions thrive in poor, compacted ground—the exact conditions most gardeners avoid. They don’t need rich compost or perfect drainage. Just loosen the top 2 inches of soil, scatter seeds in early fall or late winter, and let nature do the rest.
No fancy tools required—just a rake and patience.
By next spring, you’ll have bright yellow blooms that outshine store-bought flowers, plus a steady supply of edible greens and seeds. The trade-off? Fewer lawn patches to mow. Dandelions spread easily, but their benefits—early nectar, pest-resistant foliage, and cheerful color—make them worth the "mess."
This method works best in cool climates where winter stress triggers early blooming. For warmer zones, plant in fall to avoid summer dormancy. The key is timing: let the cold do the work, then step back and watch them flourish.
📚 In This Guide
- What you need
- Instructions
- Tips and common mistakes
- Wrapping up and next steps
What you need
- ● Dandelion seeds: Collect at least 20-50 seeds from fully mature, healthy dandelions (avoid roadsides or treated lawns). Store in a paper envelope in a cool, dry place until planting.
- ● Growing medium: Option 1: Potting soil (2-3 gallons) – Use a well-draining mix (e.g., 60% peat/coir, 30% perlite, 10% compost).
- ● Option 2: Seed-starting trays (4-6" deep) with drainage holes.
- ● Option 3: Direct outdoor spot – Loose, sandy or clay-loam soil (pH 6.0-7.5). Till to 6" depth and remove weeds.
- ● Watering tools: Spray bottle (for seedlings) or gentle watering can (with a fine rose nozzle).
- ○ Misting nozzle (optional but helpful for humidity control).
- ● Light source: Grow lights (LED or fluorescent, 12-16 hours/day) OR a sunny windowsill (south-facing, 6+ hours of light).
- ● Plant labels: Toothpicks + masking tape or biodegradable markers to track varieties.
- ● Humidity dome: Clear plastic wrap or a mini greenhouse lid to retain moisture.
- ● Fertilizer: Balanced liquid fertilizer (5-5-5 NPK) or compost tea (diluted, 1 tbsp/gallon).
- ● Transplanting tools: Small trowel or butter knife for delicate seedlings.
- ● Cold frame or row cover: If planting outdoors in early fall (to protect from frost).
Step-by-Step guide to harvesting and saving dandelion seeds
Turn those cheerful weeds into next year’s garden’s early pollinator magnet with this simple, no-fuss method.
🌱 Step 1: Identify and Select Healthy Dandelion Blooms
Wait until dandelions have fully bloomed and the flower heads begin turning brown—this signals seed maturity. Choose plants that are free of pests or disease, with plump, closed seed heads that feel slightly fuzzy to the touch. Avoid plants near roads or chemically treated lawns, as contaminants can affect seed viability.
Harvest on a dry morning after dew has evaporated—this prevents moisture from clumping seeds together. Cut the entire seed head with clean scissors, leaving a 1-inch stem attached. This makes handling easier and prevents seed loss during processing.
💧 Step 2: Dry and Prepare Seed Heads for Processing
Spread the harvested seed heads on a clean, dry surface like a baking sheet or cardboard tray in a well-ventilated, dry area out of direct sunlight. Let them dry for 3-5 days until the seed heads feel light and brittle—you’ll know they’re ready when a gentle squeeze releases a fine, powdery dust (the seeds).
I like to place them in a paper bag and hang it upside down in a cool, dry spot for the final day. This allows any lingering moisture to escape while keeping seeds contained. Avoid plastic bags—they trap humidity and can cause mold.
✂️ Step 3: Extract Seeds from Mature Heads
Once dry, hold a seed head over a clean, white bowl or tray and gently rub the dried flower head between your fingers or a fine mesh sieve. The seeds will release as a fine, fluffy powder—this is the moment you’ve been waiting for. Work in small batches to prevent seed loss from air currents.
I find using a small paintbrush or makeup brush helps collect stubborn seeds clinging to the stem. Store the extracted seeds in a paper envelope or glass jar with a label noting the harvest date—fresh seeds germinate best within 1-2 years.
☀️ Step 4: Cold-Stress Seeds for Better Germination
For optimal results, place the dried seeds in a sealed container with a bit of damp sand or paper towel (just enough to keep them slightly moist but not soggy). Store them in the refrigerator for 4-6 weeks—this mimics winter conditions and breaks seed dormancy, ensuring stronger, more uniform germination.
After cold treatment, let the seeds sit at room temperature for 24 hours before planting. You’ll notice the seeds look slightly plump and darker—this is your signal that dormancy has been broken. Now they’re ready to sprout reliably in spring.
🌿 Step 5: Plant Cold-Treated Seeds in Garden Beds
Scatter seeds directly into prepared garden soil in early spring or late summer, when temperatures are cool but not freezing. Lightly cover them with ¼ inch of soil—dandelion seeds need light to germinate, so don’t bury them deeply. Space seeds 6-12 inches apart if you want individual plants, or sow densely for a naturalized meadow effect.
Keep the soil evenly moist but not waterlogged until seedlings appear in 1-3 weeks. Thin to your desired spacing once they reach 2-3 inches tall. These cold-stressed seeds will establish faster and produce stronger plants than untreated ones.
Tips & tricks for perfect dandelion seed preservation
These simple yet game-changing strategies will help you maximize your harvest and ensure those precious seeds stay viable for planting.
Harvest Timing Secret: The 3-5 day drying period in Step 2 is your best friend—don't rush it! I've learned this the hard way after trying to process seeds too soon, which leads to clumping and poor germination. Test readiness by gently squeezing a seed head; if it releases powdery dust easily, it's perfect. For extra assurance, place a few dried heads in a paper bag overnight—if condensation forms inside, they need more time.
Equipment Upgrade: While fingers work fine for seed extraction in Step 3, I've found a fine mesh sieve (like those used for flour sifting) dramatically reduces seed loss. Hold the sieve over your bowl and gently tap the dried seed heads against it—the seeds will fall through while stems remain behind. This method catches even the finest particles that might otherwise float away in a breeze.
Cold-Treatment Precision: The 4-6 week refrigerator period in Step 4 is non-negotiable for breaking dormancy, but here's the pro tip: place a small piece of chalk or a labeled tag inside your container before sealing. This lets you easily check moisture levels without opening the container—which could expose seeds to warm air and break dormancy prematurely. The seeds should feel slightly damp but not wet when you check.
Pro Tips for Dandelion Seed Grow A Garden
- These simple yet game-changing strategies will help you maximize your harvest and ensure those precious seeds stay vi...
- Harvest Timing Secret: The 3-5 day drying period in Step 2 is your best friend—don't rush it! I've learned this the h...
- Equipment Upgrade: While fingers work fine for seed extraction in Step 3, I've found a fine mesh sieve (like those us...
Frequently asked questions
about growing dandelions from seed—because even the hardiest blooms have their mysteries!When is the best time to plant dandelion seeds?
Dandelions thrive in cool seasons, so plant seeds in early spring (March–April) or late summer/early fall (August–September). They’re frost-tolerant, so don’t worry if temps dip—they’ll bounce back! For a year-round garden, scatter seeds in fall for surprise spring blooms.
How deep should I plant dandelion seeds?
Dandelion seeds need just a light dusting of soil—about ¼ inch deep. Press them gently into the soil (they’re tiny!) and water lightly. Over-planting? No problem! They self-seed easily, so thin seedlings later if needed. Pro tip: Mix seeds with sand for even distribution.
Why aren’t my dandelions growing?
Common culprits:
- Too much shade—dandelions love full sun (6+ hours/day).
- Overwatering—they prefer dry soil; soggy conditions cause rot.
- Competition—weed out grass/clover to give them space.
- Poor soil—they adapt but grow faster in loamy, slightly acidic soil.
Can I grow dandelions in containers?
Use 5+ inch deep pots with drainage holes and well-draining soil. Dwarf varieties (like ‘Vanessa’ or ‘Patrick’) stay compact. Bonus: Container dandelions attract pollinators and are easier to control. Just avoid overcrowding—space plants 6–12 inches apart.
Are there dandelion alternatives for pollinators?
If dandelions aren’t your style, try these low-maintenance pollinator magnets:
- Goldenrod – Drought-tolerant and late-season nectar.
- Coreopsis – Bright blooms and deer-resistant.
- Yarrow – Perennial with fern-like foliage.
- Evening Primrose – Thrives in poor soil.
Wrapping up and next steps
Growing dandelions from seed is a rewarding way to add resilience and beauty to your garden—without the fuss! These hardy blooms thrive in poor soil, require minimal care, and even support pollinators.
Whether you’re saving seeds for next year or simply enjoying their cheerful presence, you’ve got all the tools to succeed.
Ready to turn your garden into a dandelion haven? Start small—plant a few seeds this fall, observe their growth, and soon you’ll be sharing tips with fellow gardeners! 🌱✨