
Propagation
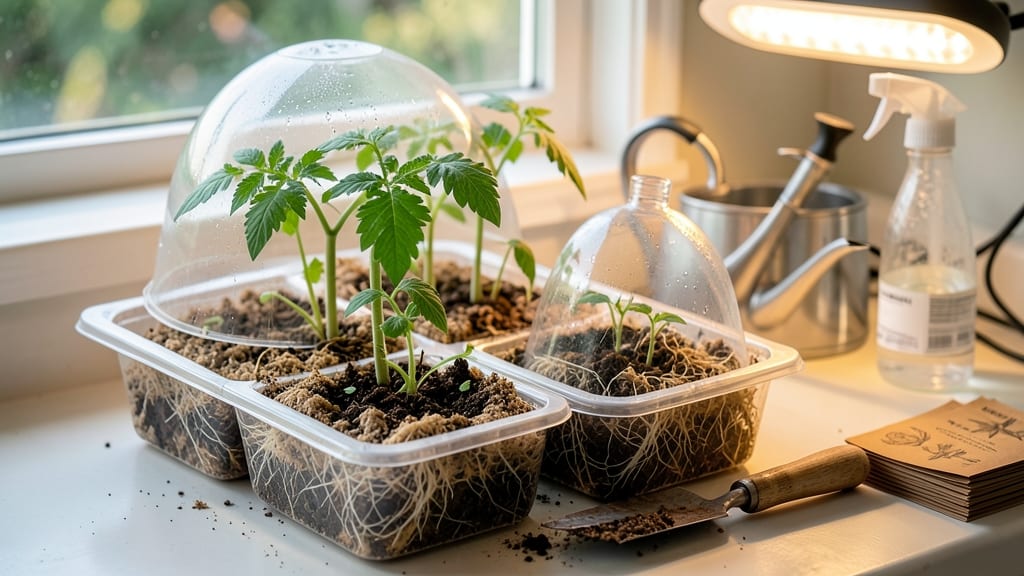
Deep root seed starting trays give seedlings the strong foundation they need to thrive—no more leggy, weak plants that flop at transplant time. 🌱 I’ve tried traditional seedling trays, but these deep-root systems create air-pruned roots that grow outward instead of circling, which means less transplant shock and bigger harvests down the road.
The difference shows up when seedlings hit the garden: they’re sturdy, established, and ready to take off. The setup is simple: you’ll need the trays themselves (with individual cells at least 3-4 inches deep), a quality seed-starting mix, and a way to keep moisture consistent.
No fancy equipment—just a sunny spot, patience, and a little attention to watering. These trays work best for tomatoes, peppers, herbs like rosemary or thyme, and any plant that benefits from deep roots.
By the time you’re ready to transplant, your seedlings will have roots that spread outward like a network, not tangled knots. That means they establish faster in the garden and handle dry spells better.
You’ll notice the difference in just a few weeks—healthier plants, fewer losses, and a garden that looks like it’s been growing there for years. If you’ve ever struggled with weak seedlings or high transplant shock rates, this method is a game-changer.
It’s perfect for beginners and pros alike, and the trays can even be reused year after year. Let’s get those roots growing strong!
📚 In This Guide
- What you need
- Instructions
- Tips and common mistakes
- Wrapping up and next steps
What you need
- ● Deep Root Seed Starting Trays: 1–2 trays (6–12 cell count, 6–8" deep with air-pruning technology)
- ● Preferred brands: Spiral Plugs, Jiffy 7, or Oatsy (biodegradable options)
- ● Seed Starting Mix: 1–2 bags of high-quality, sterile mix (e.g., FoxFarm Ocean Forest or Black Gold Seedling Mix)
- ● Seeds: Choose fast-growing varieties (e.g., tomatoes, peppers, herbs) or slow-germinating plants (e.g., broccoli, cabbage)
- ● Watering Can or Spray Bottle: Fine-mist nozzle for gentle hydration
- ● Grow Lights or Sunny Windowsill: 12–16 hours of light daily (LED grow lights recommended)
- ○ Heat Mat (Optional but Helpful): For cold climates or slow-germinating seeds (70–75°F ideal)
- ● Plant Labels: To track varieties and planting dates
- ● Tweezers or Seedling Flat: For precise seed placement
- ● Humidity Dome or Plastic Wrap: To retain moisture during germination
- ● Fertilizer (Low-Dose): Water-soluble, balanced formula (e.g., Fish Emulsion 5-5-5)
- ● Scissors or Knife: For trimming trays or removing plants later
How to use deep root seed starting trays for stronger plants
Here's my go-to method for growing robust seedlings with air-pruned roots—no special skills needed.
🪴 Step 1: Prepare Trays and Fill with Moistened Mix
Start by filling each cell of your deep root seed starting tray with a high-quality, sterile seed-starting mix. I like to moisten the mix first—just dampen it until it holds together when squeezed but doesn't drip. This ensures even moisture without waterlogging. Fill each cell to about 1 inch below the rim.
Tap the tray gently on the table to settle the soil without compacting it. You want the mix to be loose enough for roots to grow freely. The deeper cells (usually 4-6 inches deep) give roots room to develop, which translates to stronger transplants later. Avoid garden soil—it's too dense and can harbor diseases.
🌱 Step 2: Sow Seeds at the Correct Depth and Spacing
Check your seed packet for depth guidelines, but a general rule is to plant seeds at a depth of twice their diameter. For example, a ¼-inch diameter seed should go ½-inch deep. Use your finger to make a small hole, drop in 1-2 seeds, then cover lightly with additional mix.
Here's the thing—don't overcrowd. I tap the seed packet gently to release one seed at a time, planting just one per cell unless specified otherwise. Overcrowding leads to weak, competitive seedlings that struggle later. After sowing, mist the surface with water until the soil looks evenly moist but not soggy.
💧 Step 3: Provide Warmth, Moisture, and Light for Germination
Place the tray in a warm spot, ideally 70-80°F, to encourage germination. A seedling heat mat works wonders if your home runs cooler. Cover the tray with a clear humidity dome or plastic wrap to retain moisture and warmth. You'll see sprouts in 5-14 days, depending on the plant.
Once the first true leaves appear (not the initial seed leaves), remove the dome immediately. Trapped humidity after germination invites damping-off, a fungal disease that collapses seedlings overnight. Move the tray to a bright spot with 12-16 hours of light daily. A grow light positioned 2-4 inches above the tray ensures even growth.
🌿 Step 4: Maintain Moisture and Monitor Root Development
Water from the bottom by placing the tray in a shallow tray of water for 10-15 minutes. This encourages roots to grow deeper and stronger. Let the soil dry slightly between waterings—you'll know it's time when the top inch feels dry to the touch. Overwatering is the #1 killer of seedlings, so resist the urge to keep the mix soggy.
Here's where the deep cells shine: roots will naturally air-prune at the cell edges, encouraging a bushier root system. You'll see this as roots grow freely downward instead of circling. Avoid transplanting until seedlings have 3-4 true leaves and roots fill the cell—this ensures minimal shock when moving them to larger pots.
⏰ Step 5: Harden Off and Transplant Strong Seedlings
Two weeks before your last frost date, start hardening off seedlings by placing them outside in a sheltered spot for 1-2 hours the first day. Gradually increase outdoor time by 1 hour daily over 10-14 days. This toughens seedlings so they handle transplant shock better. Choose an overcast day to transplant outdoors to reduce stress.
When transplanting, slide the entire cell out of the tray—roots will spill out intact, ready to establish in the garden. Space plants according to their mature size, and water deeply at the base. The deep root system you've nurtured will translate to faster establishment and stronger growth in the soil.
Tips & tricks for perfect deep root seed starting trays
These little-known tricks will help you get the most out of your deep root trays—transforming weak seedlings into garden-ready powerhouses.
Soil Preparation Secret: Before filling your deep root trays, lightly fluff the seed-starting mix with your fingers to break up any clumps. This creates tiny air pockets that improve drainage and root penetration. I like to sprinkle a thin layer of perlite or vermiculite on top—about ¼-inch—to prevent crusting and encourage even moisture distribution. This step makes all the difference in preventing waterlogged cells.
Germination Temperature Tip: While the instructions suggest 70-80°F, I've found that most seeds germinate fastest when the soil stays consistently at the higher end of that range. If your home runs cooler, place the tray directly on top of a seedling heat mat set to 75°F. The heat rises naturally into the tray, creating the perfect environment without needing extra equipment.
Lighting Hack: For the 12-16 hours of light daily, position your grow light so it's just 2 inches above the tallest seedlings. As they grow, raise the light incrementally—about ½-inch every 5-7 days—to prevent leggy seedlings. I use a simple timer to automate the light cycle, which saves time and ensures consistency. This mimics natural daylight patterns perfectly.
Transplanting Pro Move: When your seedlings have 3-4 true leaves and roots fill the cells, don't rush to transplant. Instead, gently slide the entire cell out of the tray and place it in a larger pot with fresh soil. The intact root ball transfers perfectly, and the seedlings establish faster. This method reduces transplant shock by up to 50% compared to pulling seedlings out by their stems.
Pro Tips for Deep Root Seed Starting Trays
- These little-known tricks will help you get the most out of your deep root trays—transforming weak seedlings into garden-ready powerhouses.
- Soil Preparation Secret: Before filling your deep root trays, lightly fluff the seed-starting mix with your fingers to break up any clumps.
- Germination Temperature Tip: While the instructions suggest 70-80°F, I've found that most seeds germinate fastest when the soil stays consistently at the higher end of that range.
Frequently asked questions
Got questions about deep root seed starting trays?
You’re not alone! Here are answers to the most common queries to help you grow like a pro.
What’s the best time to transplant seedlings from deep root trays?
Transplant seedlings once they’ve developed 2-3 sets of true leaves and roots fill about 70% of the tray’s depth. Avoid transplanting in extreme heat or cold—early morning or late afternoon is ideal. For most veggies, this window is 4-6 weeks after sowing, but check seed packet guidelines for specifics!
Can I reuse deep root seed starting trays?
Clean trays with a 10% bleach solution (1 part bleach to 9 parts water) to kill pathogens, then rinse thoroughly. Sterilization prevents mold and disease. Pro tip: Soak in vinegar for extra disinfection if you’re dealing with stubborn residue. Reusing saves money and reduces waste!
What if my seedlings look leggy or weak in the trays?
Leggy seedlings usually mean not enough light. Move trays to a sunniest spot (or supplement with grow lights) and ensure they’re 1-2 inches from the light source. Thin crowded seedlings if needed, and avoid overwatering—soggy soil weakens stems. A light touch of fertilizer (half-strength) can also boost vigor!
Are deep root trays worth it compared to regular seedling pots?
Yes! Deep root trays encourage stronger root systems and reduce transplant shock, leading to 20-30% faster growth in some cases. While they’re an upfront investment, they’re cost-effective for high-value crops (like tomatoes or peppers) or large seed batches. For small gardens, compostable cell trays are a budget-friendly alternative.
How do I prevent damping-off disease in deep root trays?
Damping-off is caused by overwatering + poor airflow. Use sterilized soil mix, water only at the base (avoid overhead spraying), and ensure trays have drainage holes. Space seedlings properly for airflow, and consider a light fungicide spray (like neem oil) if humidity is high. Thin crowded seedlings immediately if you spot yellowing!
Wrapping up and next steps
Ready to give your seedlings the strongest start? Deep root seed starting trays are a game-changer for gardeners who want healthier, hardier plants with minimal fuss.
By mimicking natural root growth and reducing transplant shock, you’re setting yourself up for a thriving garden—whether you’re a beginner or a seasoned pro.
Your next step? Grab a tray, gather your seeds, and get growing! 🌱 Start small with a few favorite plants, experiment with different seed types, and watch your confidence (and your garden) flourish. Happy planting!