
Propagation
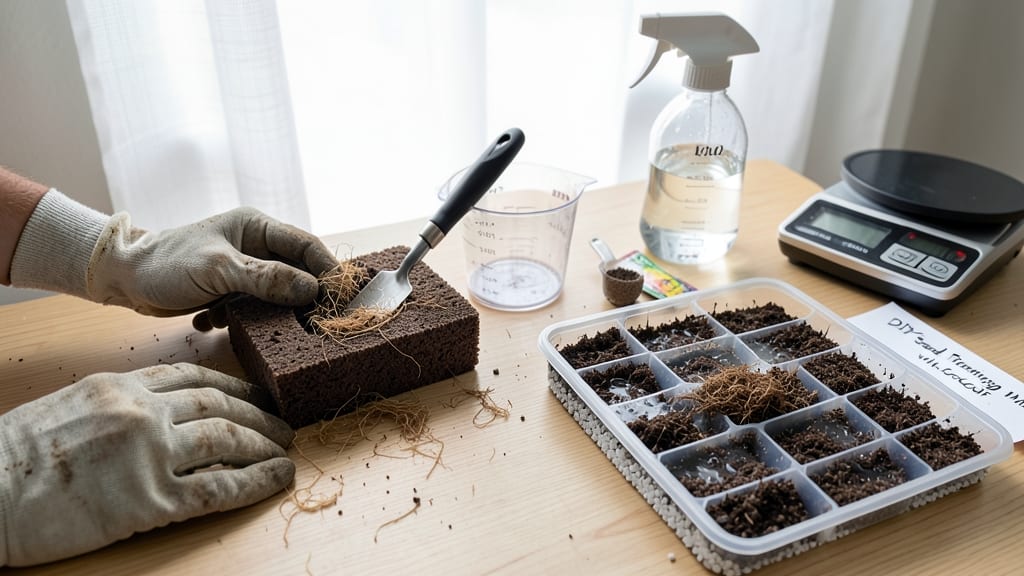
My DIY seed starting mix with coco coir cuts germination time by nearly half—no fancy equipment needed. 🌱 I’ve been using this blend for years, and it’s the reason my seedlings go from sprout to transplant-ready in just three weeks instead of six.
The secret lies in coco coir’s perfect balance of moisture retention and aeration, which mimics the ideal conditions for tiny roots to stretch and strengthen.
You’ll need three simple ingredients: coco coir bricks (the base), perlite or vermiculite (for drainage), and a handful of compost or worm castings (for nutrients). The mix is lightweight, sterile, and free of disease, making it ideal for everything from delicate herbs to hearty vegetables.
Plus, it’s a fraction of the cost of pre-made seedling soil.
Once mixed, this loam stays fluffy and crumbly—just right for delicate roots to explore. You’ll see faster germination, stronger seedlings, and fewer leggy plants struggling for light. The best part? It’s reusable for multiple batches if you refresh the compost layer.
Perfect for gardeners who want fast, healthy starts without the guesswork. Whether you’re growing tomatoes, peppers, or flowers, this mix gives you the control to fine-tune moisture and nutrients exactly how your seeds need them.
📚 In This Guide
- What you need
- Instructions
- Tips and common mistakes
- Wrapping up and next steps
What you need
- ● Coco coir (bricks or pre-moistened) – 1 part (e.g., 4 cups for a 1-gallon batch). Look for 100% coco coir, not blends with peat.
- ● Perlite or vermiculite – 1 part (e.g., 4 cups). Perlite improves aeration; vermiculite retains moisture better.
- ● Compost or worm castings – ½ part (e.g., 2 cups). Boosts nutrients without compacting the mix.
- ○ Optional: Horticultural charcoal – ¼ part (e.g., 1 cup). Helps prevent mold and improves drainage.
- ● Large mixing container (e.g., plastic bin, wheelbarrow, or clean bucket).
- ● Measuring cups or scale (for precision).
- ● Garden trowel or spoon (for stirring).
- ● Spray bottle (to mist coco coir if using bricks).
- ● Seed trays or pots (with drainage holes).
- ○ Optional: pH testing kit (to check mix acidity, ideal range: 5.8–6.2).
Step-by-Step guide to mixing a DIY coco coir seed starting mix
Here's how to create a lightweight, sterile mix that gives seedlings a strong start—no store-bought blends needed.
🌱 Step 1: Measure and Hydrate the Coco Coir
Start with 4 cups of coco coir—this is your base. Coco coir holds moisture beautifully while allowing roots to breathe, which is why it’s perfect for fast germination. Place it in a large bucket and pour in 2 cups of warm water. Let it soak for 10-15 minutes until it expands to about double its original volume. You’ll see it fluff up like a cloud—this is the texture you want for your seedlings.
Stir gently with your hands or a clean stick to break up any clumps. The mix should feel damp but not soggy—think of a wrung-out sponge. If it’s too dry, add a splash more water; if it’s too wet, let it sit uncovered for 5 minutes to evaporate excess moisture. This step ensures your mix won’t compact when seedlings push through.
🌿 Step 2: Add Perlite for Aeration and Drainage
Sprinkle in 1 cup of perlite—this is your secret weapon for preventing waterlogged roots. Perlite’s porous structure keeps the mix light and airy, which is critical for fast root growth. Use a fine-grade perlite (not coarse) to avoid sharp edges that could irritate delicate seedling roots. Mix it thoroughly with your hands until it’s evenly distributed throughout the coco coir.
Here’s the thing—too much perlite can dry out your mix too quickly, so stick to this 1:4 ratio (perlite to coco coir). Test the texture by squeezing a handful: it should hold its shape but crumble easily when pressed. If it feels gritty, you’ve added too much; if it sticks together like wet sand, add a little more perlite and remix.
💧 Step 3: Incorporate Worm Castings for Nutrients
Add ½ cup of worm castings—this is where the magic happens for seedling strength. Worm castings are packed with beneficial microbes and gentle, slow-release nutrients that give seedlings a head start without burning tender roots. Sift them lightly into the mix to avoid clumps, then fold them in with your hands until evenly distributed.
Worm castings also improve soil structure, helping roots spread quickly. If you’re using aged compost instead, reduce the amount to ¼ cup—fresh compost can introduce pathogens that stunt germination. After mixing, give the blend one final stir to ensure the castings are fully integrated. The final texture should be light, fluffy, and rich—like a cloud you could plant seeds into.
✂️ Step 4: Sterilize and Test the Mix
To prevent damping-off disease, which can wipe out seedlings overnight, sterilize your mix by microwaving it in 2-minute intervals until it reaches 160°F internally. Divide the mix into two microwave-safe containers, cover loosely with a damp paper towel, and heat until steam rises consistently. Let it cool completely before using—this step kills any lurking fungi or bacteria.
Test your mix’s readiness by filling a small container with it and pressing down lightly. It should hold its shape but still feel airy. If it compacts too easily, add 1 more tablespoon of perlite and remix. If it’s still too dense, your coco coir might have been over-soaked—dry it slightly under a fan before proceeding. Now your mix is ready to give those seeds the perfect, sterile start they deserve.
🪴 Step 5: Store or Use Immediately
Use your mix within 2 weeks for best results, as coco coir can dry out over time. Store any leftovers in a sealed container with a damp paper towel to retain moisture, but not soaking wet—excess moisture encourages mold. Label the container with the date to track freshness. When you’re ready to sow, fill your seed trays or pots to ½ inch below the rim, leaving room for watering and topsoil.
Here’s the pro tip: Press the mix down very lightly with your fingers to remove air pockets, then water it gently until it’s evenly moist but not dripping. Tap the tray once to settle the soil—this ensures seeds make solid contact with the mix for reliable germination. Now you’re ready to sow those seeds with confidence, knowing they’ve got the perfect lightweight loam to fuel fast, healthy growth.
Tips & tricks for perfect DIY seed starting mix
A few game-changing insights that'll transform your seed starting mix from good to exceptional—let's dive into what makes this blend truly work its magic.
Hydration Precision: The 10-15 minute soaking time in Step 1 is where it all begins. I've learned this the hard way—under-soaked coco coir won't expand properly, while over-soaked mix becomes a compacted brick. Use warm water (not hot) to speed up hydration without shocking your mix. After soaking, squeeze a handful: it should release water when pressed but not drip like a wet sponge. This texture is your golden ticket for fast root growth.
Perlite Ratio Mastery: That 1:4 ratio of perlite to coco coir in Step 2 isn't arbitrary—it's science. Too much perlite creates a desert; too little turns your mix into swampy quicksand. For visual reference, think of it like adding salt to water: you want just enough to enhance, not dominate. Pro tip: If you're working with larger seed trays, scale up perlite proportionally—just maintain that same ratio. The goal is to create a mix that feels like a cloud when you hold it, not like wet sandpaper.
Sterilization Shortcut: The 160°F internal temperature in Step 4 might sound intimidating, but here's the secret: your microwave becomes a sterilization chamber. Divide your mix into two containers to prevent overheating—this is critical. I use a meat thermometer inserted into the center of the mix to check temperature. Once it hits 160°F, let it cool completely before using. This step prevents damping-off disease, which can wipe out your seedlings overnight without warning.
Texture Test: Before you commit to sowing, perform this simple test: fill a small container with your finished mix and press down gently with your thumb. It should hold its shape but still feel light and airy. If it crumbles too easily, you need more coco coir; if it sticks together like wet clay, add another tablespoon of perlite and remix. This final texture check ensures your seeds get the perfect balance of support and aeration for fast, healthy growth.
Pro Tips for Diy Seed Starting Mix With Coco Coir
- A few game-changing insights that'll transform your seed starting mix from good to exceptional—let's dive into what m...
- Hydration Precision: The 10-15 minute soaking time in Step 1 is where it all begins. I've learned this the hard way—u...
- Perlite Ratio Mastery: That 1:4 ratio of perlite to coco coir in Step 2 isn't arbitrary—it's science. Too much perlit...
Frequently asked questions
about using coco coir for your DIY seed-starting mix—because even the best gardeners need a little clarity! Here are answers to the most common queries.Can I reuse coco coir for seed starting?
While coco coir itself can be reused once, it’s best to avoid it for seed starting after the first use. Reused coir may harbor pathogens or lose its ideal moisture-retention properties. For subsequent batches, repurpose it as a soil amendment in pots or garden beds instead!
How long does my DIY coco coir mix stay fresh?
Your homemade mix stays fresh for 6–12 months if stored in a cool, dry place (like a sealed bucket or bag). Add a sprinkle of perlite or vermiculite to extend freshness by improving aeration. If mold appears or it smells sour, toss it—it’s time for a new batch!
What’s the best alternative if I can’t find coco coir?
No coco coir? No problem! Try these lightweight alternatives:
- Peat moss (traditional but less sustainable)
- Composted bark fines (great for drainage)
- Shredded coconut husk (similar texture, eco-friendly)
- Worm castings (nutrient-rich but pricier)
Why are my seeds rotting in the coco coir mix?
Overwatering or poor drainage are the usual culprits! Ensure your mix has 30–40% perlite/vermiculite for airflow. Water only when the top inch feels dry, and use trays with drainage holes. If rot persists, sterilize your mix with a 5-minute microwave bake (100°F) before reuse.
Does coco coir need to be pre-moistened before use?
Yes! Coco coir absorbs water like a sponge—soak it in warm water for 10–15 minutes until it expands to 3–4x its size. Squeeze out excess moisture (it should feel like a damp sponge, not dripping). Pre-moistening ensures even hydration for your seeds and prevents clumping.
Wrapping up and next steps
Creating your own seed starting mix with coco coir is a game-changer for gardeners!
This lightweight, nutrient-rich blend promotes fast root growth and ensures healthy seedlings—all while being cost-effective and eco-friendly. 🌱 Whether you're a beginner or a seasoned pro, this DIY approach gives you full control over your plants' early development.
Now that you’ve got the perfect mix down, it’s time to put it to work! Start small with a few trays, experiment with different seed types, and watch your garden thrive. Happy planting—your future harvests will thank you! 🌿