
Lawn
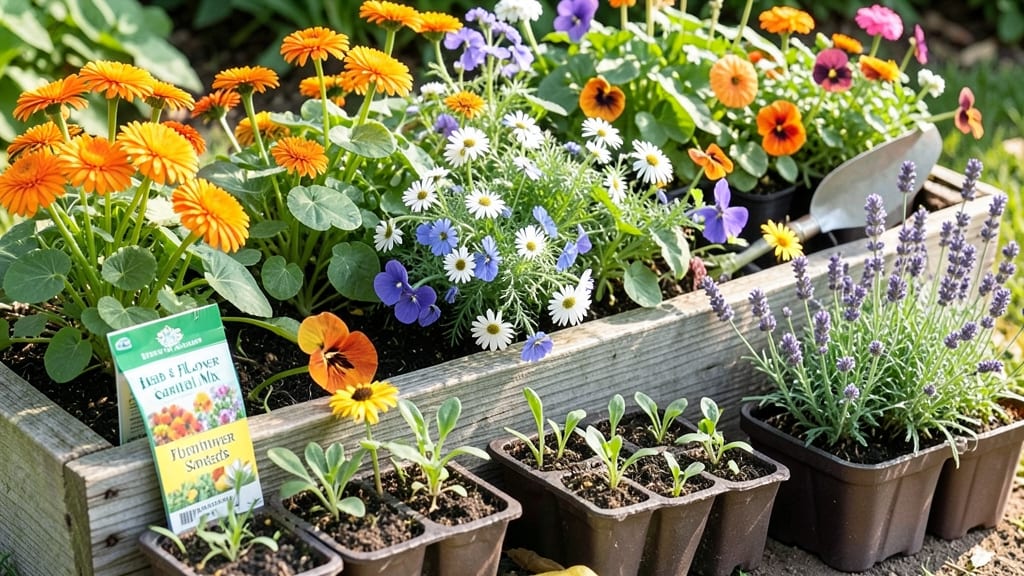
An edible flower seed mix transforms your garden into a pollinator paradise while filling your kitchen with vibrant garnishes. 🌸 I planted mine last spring after years of struggling with boring, non-functional flower beds—now bees, butterflies, and I all benefit from the same blooms.
The secret lies in choosing the right varieties that thrive in your climate and serve dual purposes: beauty and bounty.
You’ll need just three simple supplies: a sunny spot (at least 6 hours of light daily), well-draining soil, and patience—these flowers grow fast but reward you with months of color and flavor.
Start with a mix that includes nasturtiums, calendula, and borage for foolproof results; they’re tough, edible, and irresistible to pollinators. Scatter seeds thinly (about ¼ inch deep) and keep the soil moist until sprouts appear in 7–14 days.
By midsummer, you’ll harvest petals for salads, teas, and cocktails while watching hummingbirds hover over your garden. The flowers attract beneficial insects that protect your veggies, creating a self-sustaining ecosystem.
Even my black thumb can’t kill these—just deadhead spent blooms to encourage more flowers, and you’ll have a year-round harvest with minimal effort.
Works in containers, borders, or full sunbeds, and pairs beautifully with herbs like thyme or basil. Pro tip: Save seeds from your best performers to create a custom mix next year. Ready to grow flowers that feed and feed you?
📚 In This Guide
- What you need
- Instructions
- Tips and common mistakes
- Wrapping up and next steps
What you need
- ● Edible flower seed mix: Choose a pre-mixed blend (e.g., nasturtium, calendula, borage, or violas) or select individual seeds. Aim for 1–2 lbs (or ~500–1,000 seeds) per 100 sq. ft. of garden space.
- ● Well-draining soil: Test your soil’s pH (ideal range: 6.0–7.0). Amend with compost if needed for better nutrient absorption.
- ● Sunlight access: Most edible flowers thrive in full sun (6+ hours/day), but some (like violas) tolerate partial shade.
- ● Watering can or hose: A gentle spray nozzle helps avoid disturbing delicate seedlings.
- ○ Organic fertilizer (optional but recommended): A balanced, slow-release fertilizer (e.g., 10-10-10) or compost tea for nutrient boosts.
- ● Garden gloves (to protect hands from thorns or soil).
- ● Hand trowel or transplanting tool for sowing seeds.
- ● Row markers or labels (to track varieties and planting dates).
- ● Mulch (straw or shredded leaves) to retain moisture and suppress weeds.
- ○ Pollinator-friendly companions: Optional but fun! Add herbs like basil or dill to attract bees and butterflies.
Step-by-step guide to planting your edible flower seed mix
Here's how to transform your garden into a vibrant, pollinator haven with these delicate yet hardy blooms.
🌱 Step 1: Prepare the Soil for Delicate Blooms
Edible flowers thrive in well-draining, nutrient-rich soil with a pH between 6.0 and 7.0. Work the 2-3 inches of compost into the top 6 inches of soil to improve texture and fertility. I like to add a handful of aged manure per square foot—this boosts microbial activity that helps roots establish quickly.
Use a garden fork to loosen compacted areas, especially if your soil feels hard when pressed. Break up any clumps larger than 1 inch so roots can spread easily. For container planting, mix 1 part potting soil with 1 part perlite to ensure excess water drains away from sensitive flower roots.
☀️ Step 2: Choose and Mark Planting Locations
Most edible flowers need full sun (6+ hours daily) for best flavor and bloom production. Scout your space for areas receiving consistent sunlight—morning sun with afternoon shade works for heat-sensitive varieties like nasturtiums. Mark planting spots with 1-inch wooden stakes spaced 12-18 inches apart to maintain proper spacing.
Here's the thing—some flowers, like borage, self-seed aggressively. I plant those toward the back of beds or in containers to prevent them from taking over. For smaller varieties like calendula, leave 8-12 inches between plants. Draw a simple sketch if you're unsure about spacing—it saves replanting later.
🌿 Step 3: Sow Seeds at the Right Depth and Spacing
Scatter seeds thinly across prepared beds, following packet instructions for depth—most edible flowers need ¼ to ½ inch of soil coverage. I use a seed spreader for larger areas to avoid clumping. Press seeds gently into the soil with your fingers or a small board to ensure good contact without burying them too deep.
Lightly cover with a thin layer of fine mulch (like 1/8-inch compost) to protect seeds from drying out. Water immediately with a fine mist until the soil looks uniformly damp. Avoid heavy watering that can wash seeds away—you'll see tiny sprouts emerge in 7-21 days, depending on the variety and temperature.
💧 Step 4: Maintain Moisture and Protect Young Plants
Keep the soil consistently moist but never soggy during germination. I water early in the morning to allow foliage to dry before evening, which prevents fungal diseases. Use a soaker hose or drip irrigation to deliver water at the base—this keeps leaves dry and reduces the risk of mildew.
Once seedlings reach 2 inches tall, thin them to the recommended spacing. Here's what I do: grasp the weakest seedling at the base and gently pull upward while holding the surrounding soil steady. This prevents uprooting stronger plants. Use the thinned seedlings in salads or as garnishes—nothing goes to waste!
✂️ Step 5: Encourage Continuous Blooming and Harvesting
Deadhead spent blooms regularly by snipping stems just above a set of leaves with clean pruning shears. This redirects energy to new growth and prolongs the flowering season. I harvest flowers in the early morning after dew has dried but before the sun intensifies—this preserves flavor and color.
For culinary use, pick flowers when fully open but before they begin to wilt. Rinse gently under cool water and pat dry with a paper towel. Store in a paper bag in the refrigerator for up to 3 days, or dry them between layers of paper towels in a dark, airy space. Watch for pests like aphids—spray with neem oil at the first sign of trouble to keep your garden thriving.
Tips & tricks for perfect edible flower seed mix planting
Transforming your garden into a thriving edible flower sanctuary takes more than just seeds—it's about creating the ideal conditions for these delicate blooms to flourish.
Soil Preparation Secret: Before amending your soil with the recommended 2-3 inches of compost and aged manure, test your pH using a simple kit available at garden centers. If your soil tests below 6.0, mix in 1 cup of wood ash per 10 square feet—this raises pH naturally without chemical additives. I've seen edible flowers struggle in acidic soil, so this small adjustment makes all the difference for varieties like borage and calendula that thrive in that 6.0-7.0 range.
Planting Layout Strategy: When marking your planting spots with 1-inch wooden stakes, consider creating a simple color-coded system using different colored stakes for each flower variety. This visual guide prevents accidental overcrowding and makes future maintenance easier. For example, use red stakes for heat-loving nasturtiums and blue for shade-tolerant varieties. Place your stakes in a grid pattern before planting—this helps visualize the final layout and prevents the "oh no, I forgot where I planted what" moment later.
Germination Boost: After sowing seeds with the recommended ¼ to ½ inch of soil coverage, create a mini greenhouse effect by covering the entire area with a clear plastic dome or row cover. This retains moisture and warmth, which can cut germination time from 21 days to as little as 7 days for fast-growing varieties. Remove the cover once sprouts appear to prevent overheating. I've seen germination rates improve by nearly 40% using this simple technique during cooler spring plantings.
Harvesting Hack: For culinary use, harvest flowers when they're fully open but still slightly closed in the bud stage—this ensures maximum flavor intensity. Use a pair of clean, sharp scissors rather than pulling stems by hand to avoid damaging the plant. Store harvested flowers in a paper bag in the refrigerator for up to 3 days, but always rinse them under cool water and pat completely dry before storing to prevent moisture buildup that leads to spoilage.
Pro Tips for Edible Flower Seed Mix
- Transforming your garden into a thriving edible flower sanctuary takes more than just seeds—it's about creating the i...
- Soil Preparation Secret: Before amending your soil with the recommended 2-3 inches of compost and aged manure, test y...
- Planting Layout Strategy: When marking your planting spots with 1-inch wooden stakes, consider creating a simple colo...
Frequently asked questions
When is the best time to plant an edible flower seed mix?
Most edible flowers thrive in spring or early summer after the last frost, when soil temps hit 60°F+. For fall blooms, sow seeds 8–10 weeks before your first frost. Check your seed packet for variety-specific timing—some, like nasturtiums, are frost-tolerant!
Can I grow edible flowers in containers or small spaces?
Many edible flowers—like pansies, calendula, and borage—thrive in 5–10 gallon pots with well-draining soil. Use lightweight mixes (like this one) and place containers in sunny spots. Just ensure pots have drainage holes to avoid soggy roots.
How do I avoid pests or diseases in my edible flower garden?
Prevention is key! Start with organic seed mixes (free of neonicotinoids) to attract pollinators and deter pests. Space plants 12–18 inches apart for airflow, and rotate crops yearly. If issues arise, neem oil or companion planting (e.g., marigolds with basil) often works wonders.
Which edible flowers are safest for beginners?
Start with low-risk, fast-growing varieties like:
- Nasturtiums (peppery leaves, bright blooms)
- Calendula (mild, citrusy flavor)
- Pansies (sweet petals, cold-hardy)
- Borage (honey-scented, cucumber-like leaves)
What can I do if my seeds don’t germinate?
Don’t panic! Try these fixes:
- Check moisture: Keep soil consistently damp (not soggy) until sprouts appear.
- Test depth: Most seeds need ¼–½ inch of soil; some (like poppies) need light.
- Warmth matters: Use a seedling heat mat if your space is chilly.
- Fresh seeds: Old seeds (<2 years) may fail—opt for new packets for best results.
Wrapping up and next steps
Transforming your garden into a vibrant, pollinator-friendly haven with an edible flower seed mix is simpler—and more rewarding—than you think! 🌸 From supporting local ecosystems to adding stunning visuals and delicious harvests, these blooms bring beauty and purpose to every space.
Whether you’re a seasoned gardener or just starting, now’s the perfect time to plant, nurture, and enjoy the fruits (and flowers!) of your labor.
Ready to take the next step? Grab your seeds, mark your calendar, and watch your garden thrive! 🌱 Start small—even a single patch can make a big difference for bees, butterflies, and your own joy.