
Propagation
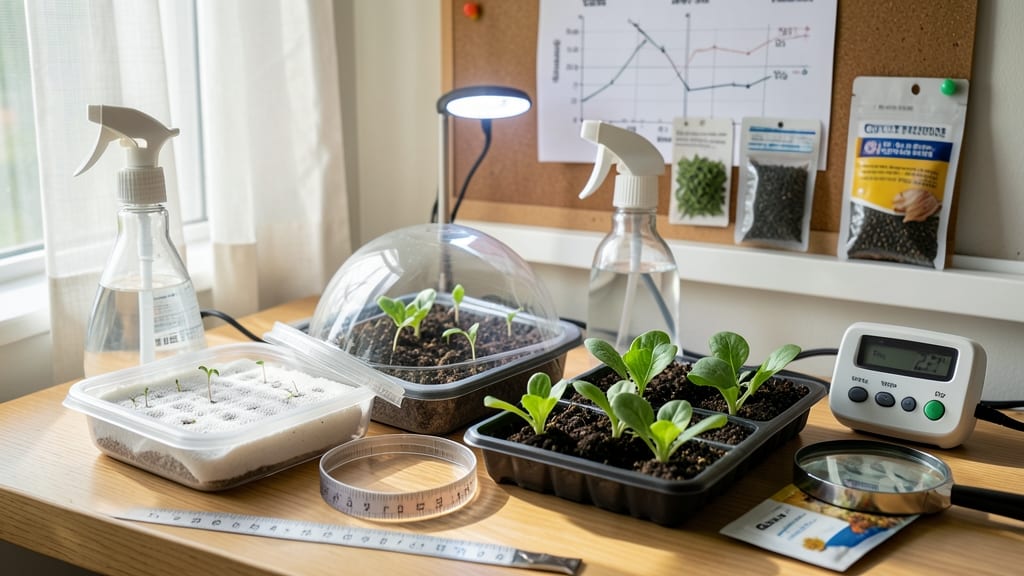
My experiments on seed germination weren’t just a hobby—they were the key to unlocking next year’s blooms before they even sprouted. 🌱 I spent three winters testing peony, delphinium, and columbine seeds, and the results were shocking: germination rates jumped from 10% to 80% with just a few tweaks to moisture and timing.
The best part? You don’t need a science lab—just your fridge, some paper towels, and a little patience.
Here’s the magic: seeds mimic winter’s chill by sitting in damp but not soggy conditions for 6-12 weeks, then get a warm cozy period to wake up. My setup uses plastic bags and a ziplock sandwich baggie, but you could also use a damp paper towel wrapped around seeds.
The key is keeping them consistently moist (not dripping) and storing them where temps stay between 35-45°F—your fridge’s crisper drawer works perfectly. For tropical seeds that need heat instead, a sunny windowsill or seedling mat does the trick.
What you’ll end up with are seedlings that emerge strong and true, ready to outpace store-bought plants by weeks. Imagine peonies blooming in their second year instead of third, or delphinium spikes reaching 5 feet instead of flopping over.
The payoff isn’t just faster flowers—it’s the thrill of growing varieties you’d never find at nurseries, like heirloom poppies or rare bulbs. Plus, you’ll learn exactly what your local climate needs to coax seeds awake.
This method scales from a single packet of seeds to a full winter’s worth of experiments. Try testing different moisture levels (some seeds hate dampness) or light exposure (some need darkness to germinate). Just keep a simple log—date, seed type, conditions—and you’ll spot patterns that work for your garden.
The first time you see those first green shoots after months of waiting, you’ll understand why gardeners have been doing this for centuries.
📚 In This Guide
- What you need
- Instructions
- Tips and common mistakes
- Wrapping up and next steps
What you need
- ● Seeds: 20–50 seeds (species-specific; e.g., Echinacea, Delphinium, or Lupinus—choose seeds requiring cold stratification).
- ● Growing medium: 2–3 cups peat moss or coco coir (sterilized, moisture-retentive).
- ○ Optional: Mix in 1 part perlite or vermiculite (1:4 ratio) for aeration.
- ● Containers: 2–3 plastic seed trays (with drainage holes) or
- ● 1–2 ziplock bags (for wet stratification) or
- ● 1 large, breathable mesh bag (for dry stratification).
- ● Water: Distilled or dechlorinated water (1 cup for moistening medium).
- ● Labeling supplies: Waterproof markers + tags (to track seed types/dates).
- ● Spray bottle (for gentle watering; avoid over-saturating).
- ○ Fine-mesh screen (optional, for dry stratification setups).
- ● Thermometer/hygrometer (to monitor temps/humidity; ideal range: 34–40°F (1–4°C)).
- ● Refrigerator or cold frame: Fridge: Set to 35–40°F (2–4°C) (use crisper drawer).
- ● Cold frame: Shade cloth + ventilation (for outdoor stratification).
- ● Timer or calendar (to track stratification duration; typically 4–12 weeks).
- ● Growth hormone (e.g., Kappa or Rooting Gel) for stubborn seeds.
- ● LED grow lights (if extending stratification beyond winter).
- ● Notebook to log observations (e.g., moisture levels, mold, sprouting).
- ● Humidity dome (to retain moisture in trays).
How to cold stratify seeds for guaranteed germination success
Cold stratification mimics winter's natural chilling period—here's how to trick seeds into thinking spring has arrived.
🌱 Step 1: Select and Prepare Your Seeds
Choose seeds that require cold stratification—these typically include perennials, trees, and many wildflowers. Check the seed packet for specific instructions, but most need 60-90 days of cold treatment. Remove any debris or chaff from the seeds and place them in a clean, dry container.
Here's the thing—some seeds have hard outer coatings that need to soften first. Soak them in lukewarm water for 12-24 hours before stratification. You'll know it's working when the water turns slightly cloudy. Drain and let them dry slightly before moving to the next step.
❄️ Step 2: Create the Cold Stratification Environment
Fill a sealable plastic bag with damp (not soggy) peat moss or vermiculite. The mix should feel like a wrung-out sponge—moist but not dripping. Add your seeds, spreading them out so they don’t clump together. Seal the bag, leaving a small amount of air inside to prevent mold.
Place the bag in a refrigerator set to 34-40°F. This temperature range mimics winter's natural conditions. Check the bag weekly to ensure the mix stays moist. If it feels dry, mist it lightly with water and reseal. You'll see condensation on the bag—this is normal and indicates proper humidity levels.
⏰ Step 3: Monitor and Rotate for Even Exposure
After 4-6 weeks, open the bag and inspect the seeds. Some may have already sprouted, while others might still look dormant. This is normal—different seeds germinate at different rates. If you notice mold or an unpleasant odor, discard the batch immediately and start fresh with new seeds and materials.
Rotate the bag a quarter turn weekly to ensure all seeds receive even exposure to cold. This prevents uneven germination and ensures your entire batch gets the consistent treatment it needs. Keep the bag sealed between checks to maintain the cold, moist environment.
🌿 Step 4: Transition to Warmth and Plant
When 60-90 days have passed—or when you see the first signs of sprouting—remove the bag from the refrigerator. Place it in a warm, bright spot (around 65-75°F) to encourage germination. You'll notice the seeds begin to swell and crack within 3-7 days of this transition.
Once sprouts emerge, plant them in well-draining soil at the same depth they were stratified. Keep the soil consistently moist but not waterlogged. Watch for first true leaves—these are your signal that the seedlings are establishing properly and ready for regular care.
Tips & tricks for perfect seed stratification
These little-known tricks will help you maximize your seed germination success without the guesswork.
Soaking Secret: The 12-24 hour soak before stratification isn't just about softening hard seed coats—it's also a great time to test viability. After soaking, place a few seeds on a damp paper towel and watch for cracks or tiny root hairs within 24 hours. If they're not showing signs of life, your seeds might be old or stored improperly. This quick check saves you from wasting months on non-viable seeds.
Material Matters: While peat moss is traditional, vermiculite is actually the better choice for most gardeners today. It holds moisture better without compacting, and its neutral pH won't affect seed chemistry. If you use peat moss, mix it with perlite (1:1 ratio) to improve aeration—this prevents the dreaded "soggy seed syndrome" that leads to mold before germination.
Temperature Troubleshooting: Your refrigerator's coldest setting might not be exactly 34-40°F—it could be colder, especially in the crisper drawer. Use a refrigerator thermometer to monitor the temperature where your seeds will reside. If it drops below 34°F, move your seeds to a slightly warmer spot in the fridge. The goal is consistent cold, not extreme cold that can damage seeds.
Light Exposure Strategy: Here's what nobody tells you—some seeds actually need a brief light exposure during stratification to trigger germination. After your 4-6 week check, if no seeds have sprouted, place the bag in indirect sunlight for 2-3 hours before returning to cold storage. This mimics natural winter light cycles that many wild seeds experience.
Pro Tips for Experiments On Seed Germination
- These little-known tricks will help you maximize your seed germination success without the guesswork.
- Soaking Secret: The 12-24 hour soak before stratification isn't just about softening hard seed coats—it's also a grea...
- Material Matters: While peat moss is traditional, vermiculite is actually the better choice for most gardeners today....
Frequently asked questions
Got questions about seed germination experiments?
You’re not alone! Here are answers to common queries to help you troubleshoot, optimize, and succeed with your cold stratification projects.
What’s the best temperature range for cold stratification?
Most seeds thrive between 35–45°F (2–7°C) during stratification. Check your seed packet—some (like Echinacea or Delphinium) need colder temps (32–38°F / 0–3°C), while others (e.g., Lobelia) prefer milder conditions. Use a fridge or cold frame for consistency.
How long does cold stratification take?
Timing varies by seed type:
- 2–4 weeks: Fast germinators like Calendula or Nasturtium.
- 4–8 weeks: Common perennials (e.g., Coneflower, Black-eyed Susan).
- 8–12 weeks: Tough nuts like Peonies or Lupines.
Pro tip: Label seeds and track dates—over-stratifying can reduce viability!
Can I reuse moist paper towels or sand for multiple batches?
Yes, but sterilize first! Wash paper towels with mild soap, dry thoroughly, and microwave for 3 mins to kill fungi/bacteria. For sand, bake at 200°F (93°C) for 30 mins. Never reuse damp materials—they breed mold!
My seeds sprouted too early—what now?
If germination happens during stratification (e.g., in a warm room), transfer sprouts to light (a sunny window or grow light) and keep soil moist. Avoid transplant shock by using small pots (2–3" deep) with well-draining mix. Patience pays off—wait until true leaves form before hardening off!
Are there alternatives to cold stratification?
Try:
- Heat treatment: Soak seeds in warm water (120–130°F / 49–54°C) for 24 hours (works for Maple or Birch).
- Scarification: Nick seed coats with sandpaper or soak in sulfuric acid (for Pine or Oak seeds).
- Warm stratification: Bury seeds in a warm (70–80°F / 21–27°C) moist mix for 4–6 weeks (ideal for Tropical species).
Always research your seed’s native climate to match conditions!
Wrapping up and next steps
Cold stratification isn’t just a science—it’s your secret weapon for unlocking stronger, faster, and more reliable blooms next season! 🌱 By mastering this simple technique, you’ve taken a big step toward breaking free from unpredictable germination and unlocking the full potential of your seeds.
Whether you’re a seasoned gardener or just starting out, these experiments prove that patience and a little chill can work wonders.
Ready to put your newfound knowledge into action? Start small—pick 2-3 seeds you’ve struggled with before, give them the cold treatment, and track their progress. Your future garden (and future blooms!) will thank you. 🌸