
Propagation
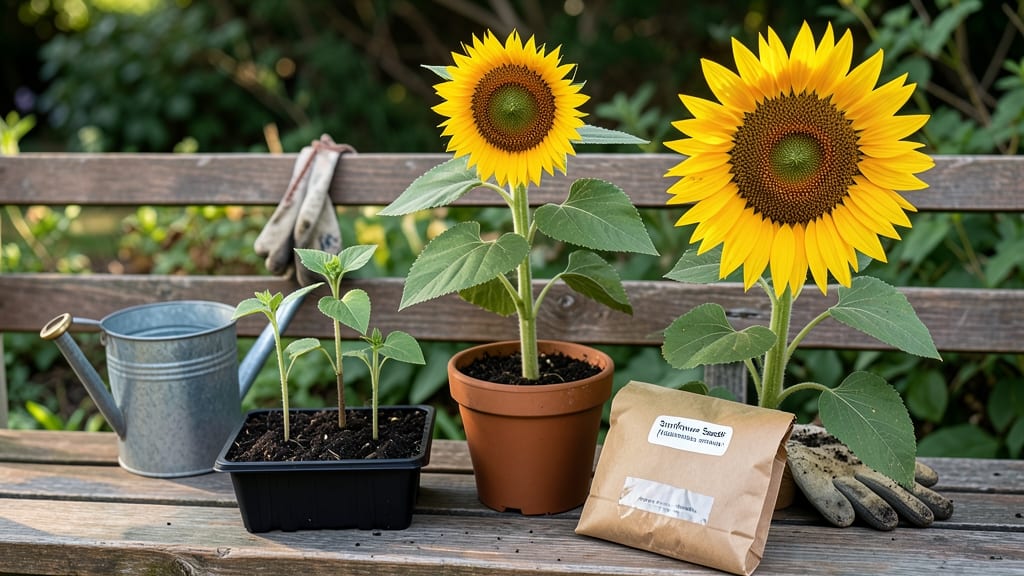
Watch those seed pods split open on their own—no forcing required. 🌱 The secret to growing plants from seed to blossom lies in patience and the right conditions, not fancy equipment.
I’ve grown sunflowers that towered over my porch and roses that covered my trellis, all starting from tiny seeds nestled in damp soil.
You’ll need just a few basics: quality seed-starting mix, containers with drainage, and a sunny spot (or grow lights). The real magic happens when you mimic nature—moisture, warmth, and light.
Most seeds germinate within 7-14 days if kept consistently moist but not soggy, and within weeks, you’ll see those first true leaves pushing through.
By the time you’re pinching back leggy seedlings and fertilizing for blooms, you’ll be amazed at how far you’ve come.
Those same pods that started as tiny specks will burst open with vibrant flowers, and the scent of blooming roses or the cheerful faces of sunflowers will make every step worthwhile.
This method works for almost any flowering annual or perennial—just adjust timing for your climate. Whether you’re growing in a windowsill or a raised bed, the principles stay the same. Let’s get those seeds sprouting!
📚 In This Guide
- What you need
- Instructions
- Tips and common mistakes
- Wrapping up and next steps
What you need
- ● Seeds: Choose self-podding varieties like Lupinus albus (white lupine) or Colutea arborescens (bladder senna). Aim for 5–10 seeds per podding experiment.
- ● Seed-starting mix: 1 quart (32 oz) of sterile, well-draining mix (e.g., Pro-Mix or coco coir). Avoid garden soil—it can harbor pathogens!
- ● Containers: Seed trays with drainage holes (e.g., 1020-cell trays for precision).
- ● OR small pots (3–4 inches wide) for direct sowing.
- ● Grow lights or sunny windowsill: Provide 12–16 hours of light daily (LED grow lights work great!).
- ● Misting bottle or spray nozzle: For gentle hydration without disturbing seeds.
- ● Humidity dome or plastic wrap: To retain moisture while seeds germinate.
- ● pH testing kit: Ensure your soil is 6.0–7.0 (ideal for most podding plants).
- ● Fertilizer: Balanced liquid fertilizer (e.g., 10-10-10) diluted to ½ strength for seedlings.
- ● Heat mat: Speeds up germination (set to 70–75°F).
- ● Grow journal: Track moisture, light, and pod development.
- ● Support stakes or trellis: For vining varieties (e.g., Lathyrus odoratus—sweet pea).
- ● Organic mulch: (e.g., straw or shredded leaves) to retain soil moisture.
- ● Pruning shears: For trimming leggy growth to encourage bushier pods.
How to grow plants that open their pods naturally
Here's the gentle approach I've used to coax plants into opening their pods effortlessly.
🌱 Step 1: Select the Right Seeds and Prepare the Soil
Choose seeds from plants known for natural pod opening, like lupines, poppies, or sweet peas. These varieties are bred to release seeds when fully mature. Start with a well-draining potting mix—I always mix in 20% perlite to prevent soggy soil, which can rot seeds before they mature.
Fill your containers to 1 inch below the rim with the mix. Tap gently to settle, then water until moisture reaches 2 inches deep. You'll know it's right when water drips freely from the drainage holes. Let the soil dry slightly before planting to avoid compacting it.
☀️ Step 2: Plant and Provide Consistent Light
Sow seeds ¼ inch deep—too shallow and they dry out; too deep and they struggle to break through. Space them 6 inches apart to allow room for growth. Most of these plants thrive in full sun (6+ hours daily), but a south-facing window works if you rotate the pots weekly.
Watch for first true leaves (the second set after the initial seed leaves). This signals strong germination. If leaves look pale or stretched, your light isn’t strong enough—move the plants closer or supplement with a grow light. Overhead watering can dislodge seeds, so use a watering can with a gentle spray nozzle.
💧 Step 3: Water Deeply and Let Soil Dry Between Waterings
Once seedlings appear, water deeply every 2-3 days until the top 2 inches of soil feel dry. Overwatering causes pods to swell but never dry properly, preventing natural splitting. I check moisture by sticking my finger in—if it comes out clean, it’s time to water.
Reduce watering as flowers form. You’ll see buds swell, then open into blooms. When pods appear, switch to watering only at the base to avoid wetting the pods directly. This mimics natural rainfall and encourages them to dry evenly.
⏰ Step 4: Wait for Pods to Mature and Dry Fully
Pods are ready when they turn dull in color (often brown or tan) and feel lightweight when shaken. Some, like poppies, will split open on their own—others, like lupines, need a gentle tap to release seeds. I place a paper bag under the plant to catch falling seeds.
If pods don’t split naturally, they may need 2-3 weeks of dry indoor storage in a cool, dark place. Check weekly—overlooking them can lead to seeds spilling prematurely. Once open, store seeds in a paper envelope in a dry spot for next year.
✂️ Step 5: Prune and Encourage More Blooms
After harvesting seeds, trim back any spent pods or browned leaves with clean scissors. This redirects energy to new growth. Fertilize lightly with a balanced 10-10-10 mix if you want a second flush of blooms—just avoid heavy feeding, which can make pods too lush and prevent drying.
Most of these plants self-seed, so you’ll likely find new sprouts next season. If not, repeat the process! The key is patience—rushing water or light can keep pods from opening naturally. Let them dry slowly, and they’ll release seeds beautifully.
Tips & tricks for perfect natural pod opening
Real talk: The difference between pods that split open effortlessly and ones that stay stubbornly shut often comes down to these small details.
Seed Selection Wisdom: Not all seeds open their pods naturally—stick to varieties like lupines, poppies, or sweet peas that are specifically bred for this behavior. I've tried others, and they either never split or require forced methods. These three varieties consistently deliver the results you're looking for without any extra work.
Soil Preparation Secret: That 20% perlite mix in Step 1 isn't just about drainage—it creates the perfect air-to-moisture balance that encourages strong root development. If your soil feels compacted after filling containers, gently fluff it with a fork before planting. Compacted soil can suffocate roots and lead to weak stems that can't support proper pod development.
Light Strategy: The 6 hours of daily sun is non-negotiable for most of these plants, but here's what nobody tells you: If you're using a south-facing window, rotate your pots weekly to ensure even light exposure. I learned this the hard way when my plants grew lopsided—now I mark the rotation day on my calendar to stay consistent.
Pod Maturation Cue: When checking pods in Step 4, don't just rely on color—give them the shake test. A fully mature pod should rattle with seeds inside when gently shaken. If it feels heavy, it's not ready yet. This simple test has saved me from harvesting premature pods that wouldn't split properly.
Pro Tips for From Seed To Blossom
- Real talk: The difference between pods that split open effortlessly and ones that stay stubbornly shut often comes do...
- Seed Selection Wisdom: Not all seeds open their pods naturally—stick to varieties like lupines, poppies, or sweet pea...
- Soil Preparation Secret: That 20% perlite mix in Step 1 isn't just about drainage—it creates the perfect air-to-moist...
Frequently asked questions
Got questions about growing pods that split open naturally? You’re not alone! Here are answers to the most common queries to help you succeed from seed to blossom—without the stress.
How long does it take for these pods to split open naturally?
Timing varies by variety, but most self-splitting pods (like Lupinus or Delphinium) take 8–12 weeks from flowering to seed release. Warm, dry conditions speed up the process—just avoid overwatering once pods mature!
What if my pods don’t split open? How can I help?
If pods stay shut, they may need dry, warm conditions to trigger natural dehiscence. Try placing them in a paper bag with a dryer sheet (static helps seeds loosen) or gently tap them to encourage opening. Avoid moisture—humidity locks seeds inside!
Can I grow these pods indoors? What’s the best setup?
Yes! Use a sunny windowsill (south-facing) or a grow light for 12–14 hours/day. Start seeds in well-draining soil (like cactus mix) and keep humidity low. A clear plastic dome (removed after sprouting) helps retain warmth until germination.
Are there alternatives to waiting for natural splitting?
If you’re impatient, harvest seeds early by snipping pods when they turn brown but before they split. Lay them on paper towels in a dry spot for 1–2 weeks to finish drying. Store in envelopes for future planting.
What pests should I watch for with self-splitting pods?
Keep an eye out for aphids (sap-sucking insects) and pod borers (tiny moth larvae). Spray plants with neem oil or introduce ladybugs for natural control. Remove damaged pods immediately to prevent spread.
Wrapping up and next steps
From nurturing your seeds to watching them split open naturally, this journey is a rewarding reminder of nature’s patience and beauty. 🌱 You’ve learned the essentials—from soil prep to troubleshooting—so trust the process, and soon you’ll be harvesting pods that blossom effortlessly.
Ready to take the next step? Start with just one pod and let curiosity guide you. Share your progress, experiment with varieties, and soon, you’ll be growing with confidence—one seed at a time!