
Propagation
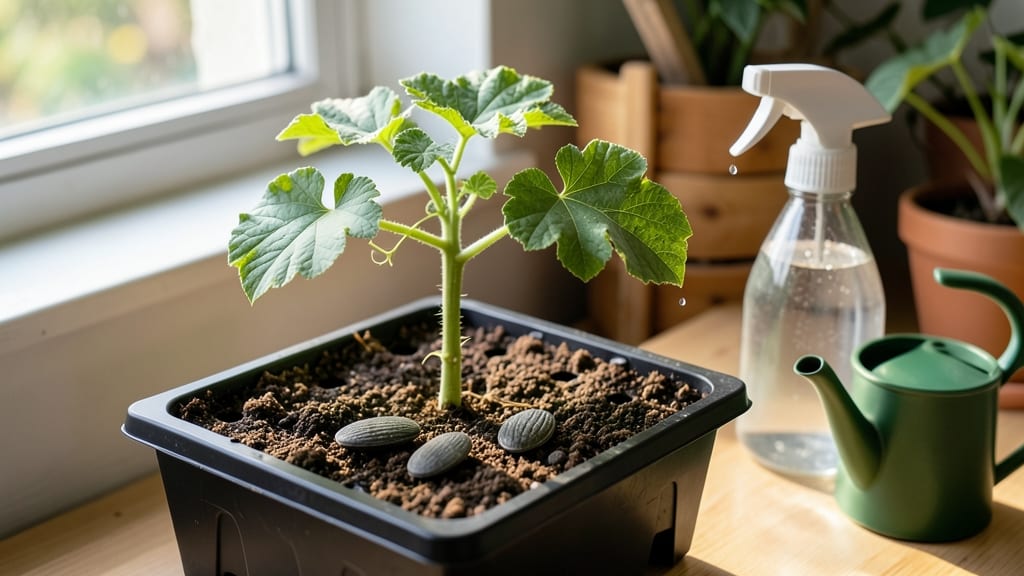
Growing watermelon from seed indoors is faster than you think—3-4 days to germination if you nail the heat and moisture. 🌱 I’ve turned my sunniest windowsill into a mini watermelon nursery, and the secret isn’t fancy equipment—it’s prepping the seeds and soil just right.
Start with quick-germinating varieties like ‘Sugar Baby’ or ‘Black Diamond’ in small pots filled with warm, damp seed-starting mix. Watermelon seeds need 80-85°F soil to sprout, so I use a seedling heat mat under my pots. A south-facing window or grow light keeps them from stretching into sad, leggy shadows.
By week 3, you’ll see vines climbing and tiny leaves unfurling—proof you’re on track. The real magic happens when you transplant them outdoors after the last frost, where they’ll race toward 6-8 foot vines and (with luck) fruit by summer’s end. This method works even in apartments or small spaces.
Just watch for overwatering—watermelon roots hate soggy soil—and be patient with flowering. The payoff? Homegrown watermelon that tastes nothing like store-bought.
📚 In This Guide
- What you need
- Instructions
- Tips and common mistakes
- Wrapping up and next steps
What you need
- ● Watermelon seeds: Choose fast-maturing varieties like 'Sugar Baby' or 'Crimson Sweet' (5–10 seeds per pot).
- ● Seed-starting mix: 2–3 cups of lightweight, sterile potting soil (avoid garden soil—it’s too dense!).
- ● Containers: Small pots (4–6 inches deep) for each seedling, or
- ● A seed tray with individual cells (great for batch starts!).
- ● Grow lights or sunny window: A south-facing window with 6+ hours of sunlight daily, or a full-spectrum LED grow light (12–16 hours/day).
- ● Spray bottle: For gentle watering (avoid over-saturating seeds!).
- ○ Heat mat (optional but helpful): A seedling heat mat (70–80°F) speeds up germination in 3–7 days.
- ● Fertilizer: A balanced, water-soluble fertilizer (5-5-5 ratio) for when seedlings sprout.
- ● Humidity dome or plastic wrap: Keeps moisture in while seeds germinate.
- ● pH tester: Ensures your soil is slightly acidic (6.0–6.8) for optimal growth.
- ● Support stakes or trellis: For vining varieties (if you plan to transplant later).
Step-by-step instructions for growing watermelon from seed indoors
Here’s how to jumpstart watermelon seeds indoors—fast, efficient, and with minimal fuss.
🌱 Step 1: Prep Seedlings for Quick Germination
Watermelon seeds germinate fastest when prepped properly. Soak the seeds in warm water for 12 hours before planting—their thick outer shells slow things down otherwise. I use a shallow bowl of water and a mesh bag to keep them contained. After soaking, place them between damp paper towels and fold the towels over them. Keep them in a warm spot (75-85°F) until they sprout, which usually takes 2-3 days.
Once the seeds have tiny white roots popping out, they’re ready for soil. The reason we soak first is that watermelon seeds need a head start—they won’t tolerate being moved once they’re established. This method ensures they’re strong enough to handle transplanting later.
🪴 Step 2: Plant in Biodegradable Pots with Warm Soil
Use 3-inch biodegradable pots (they dissolve when planted outside) filled with a sterile seed-starting mix. The mix should be warm—watermelons love heat, so I heat my soil mix in the microwave for 1-2 minutes before planting. Press the sprouted seeds ½ inch deep into the soil, just enough to cover them lightly. Two seeds per pot is fine—I’ll thin later if both sprout.
Water gently with a spray bottle until the soil is moist but not soggy. Overwatering now causes rot before the seeds even have a chance. Place the pots in a warm, bright spot—75°F or warmer is ideal. A seedling heat mat helps if your home runs cooler.
☀️ Step 3: Provide Bright Light Immediately
Watermelons need 14-16 hours of light daily from day one. A south-facing window won’t cut it—seedlings stretch toward light and become leggy. I use a full-spectrum LED grow light positioned 2-3 inches above the plants. Raise it as they grow to keep the light just above the leaves. You’ll know the light is right when the seedlings grow stocky and dark green, not tall and pale.
If you don’t have a grow light, supplement with a sun lamp or even a bright shop light. Without enough light, seedlings waste energy reaching for it instead of growing roots. Watch for first true leaves (the second set after the initial seed leaves)—that’s your cue they’re on track.
🌿 Step 4: Thin and Harden Off for Outdoor Transition
Once seedlings have 2-3 true leaves, thin to the strongest one per pot by snipping the weaker at the base. This prevents competition for nutrients. After 3-4 weeks, start hardening them off by placing them outside in partial shade for 1-2 hours the first day. Gradually increase exposure over 10-14 days until they’re out all day. Watermelons hate cold soil, so wait until nighttime temps stay above 55°F before transplanting.
Real talk: Don’t rush this step. Plants shocked by sudden outdoor conditions wilt or even die. A slow transition ensures they’re tough enough for the garden. By the time you’re ready to plant, they’ll be 4-6 inches tall with strong stems—exactly what you want for fast outdoor growth.
Tips & tricks for fast indoor watermelon germination
These key strategies will help you bypass common pitfalls and get those seeds sprouting like clockwork.
The Soak Secret: That 12-hour soak isn't just about speed—it's about breaking dormancy. I've found that using warm distilled water (not tap) prevents mineral buildup that can inhibit germination. After soaking, I give the seeds a quick rinse to remove any residual soap or chlorine that might linger from the mesh bag. The goal is to create the perfect environment where those seeds can focus all their energy on root development rather than fighting off impurities.
Heat Hack for Stubborn Seeds: Watermelon seeds need warmth, but not all warm spots are equal. I've had the most success with a seedling heat mat set to 75-85°F—this consistent bottom heat is more effective than just placing them near a heater. If you don't have a heat mat, try resting the paper towel-wrapped seeds on top of your fridge (not inside) where it naturally stays warm. Pro tip: Place a thermometer near them to monitor—you want that steady warmth, not fluctuating temperatures that can shock the seeds.
Lighting Strategy: Those 14-16 hours of light are non-negotiable, but here's what I've learned about making it work: Position your grow light on a timer if you can't keep it on manually. I use mine from 6am to 10pm to simulate natural daylight cycles. When raising the light as seedlings grow, keep it just above the tallest leaves—this prevents burning while ensuring even growth. Watch for leaves that look "happy" (dark green and slightly cupped) rather than stretched or yellowing. This visual cue tells me the light intensity is perfect.
Transplant Timing: The 3-4 week hardening off period is your safety net against transplant shock. I start by placing my seedlings in a sheltered spot where they'll get morning sun but afternoon shade—this gradual exposure builds their resilience. Pay close attention to nighttime temperatures: If they dip below 55°F, your seedlings will struggle. I've learned the hard way that even a single cold night can set them back weeks in growth. Use a simple thermometer to monitor overnight temps during this critical period.
Pro Tips for Growing Watermelon From Seed Indoors
- These key strategies will help you bypass common pitfalls and get those seeds sprouting like clockwork.
- The Soak Secret: That 12-hour soak isn't just about speed—it's about breaking dormancy. I've found that using warm di...
- Heat Hack for Stubborn Seeds: Watermelon seeds need warmth, but not all warm spots are equal. I've had the most succe...
Frequently asked questions
about growing watermelon from seed indoors—because even the greenest thumbs need a little help!How long does it take for watermelon seeds to germinate indoors?
Most watermelon seeds sprout within 5–10 days when kept warm (70–90°F) and moist. Use a heat mat if your windowsill is chilly—patience is key! If nothing appears after 2 weeks, test seed viability or try fresh seeds.
Can I grow watermelons indoors without a grow light?
Yes, but with caveats! Place seeds near a south-facing window (6+ hours of sunlight daily). For faster growth, supplement with a grow light 12–16 hours/day. Without light, seedlings may stretch weakly (a condition called "legginess") or fail to thrive.
When should I transplant seedlings outdoors (or to a larger pot)?strong>
Wait until seedlings have 3–4 true leaves and nighttime temps stay above 55°F. Harden off plants by gradually exposing them to outdoor conditions (5–7 days). For container growing, use a 5-gallon pot minimum—watermelons need space to sprawl!
Why are my watermelon seedlings dying or turning yellow?
Common culprits:
- Overwatering: Let soil dry slightly between waterings to prevent root rot.
- Underwatering: Wilting or crispy leaves? Water gently at the base.
- Cool temps: Watermelons hate drafts—keep them cozy (70°F+).
- Nutrient deficiency: Yellow leaves? Use a balanced fertilizer (10-10-10) when true leaves appear.
What’s the best watermelon variety for indoor growing?
Choose compact or "bush" types like:
- Sugar Baby (small, sweet, 4–6 lbs)
- Tiny Tim (dwarf, 4–5 inches long!)
- Crimson Sweet (classic, but needs more space)
Wrapping up and next steps
Growing watermelon from seed indoors is a rewarding journey that starts with patience and a little sunshine!
With the right setup—like a warm, sunny spot and consistent care—you’ll soon be watching those tiny seeds sprout into vibrant seedlings. Don’t let challenges discourage you; even experienced gardeners face hiccups, but the joy of harvesting your first homegrown watermelon makes it all worthwhile.
Now that you’re equipped with the know-how, take the next step! Start your seeds this weekend, and before you know it, you’ll be sharing slices of your sweet success with friends and family. Happy growing! 🌱🍉