
Lawn
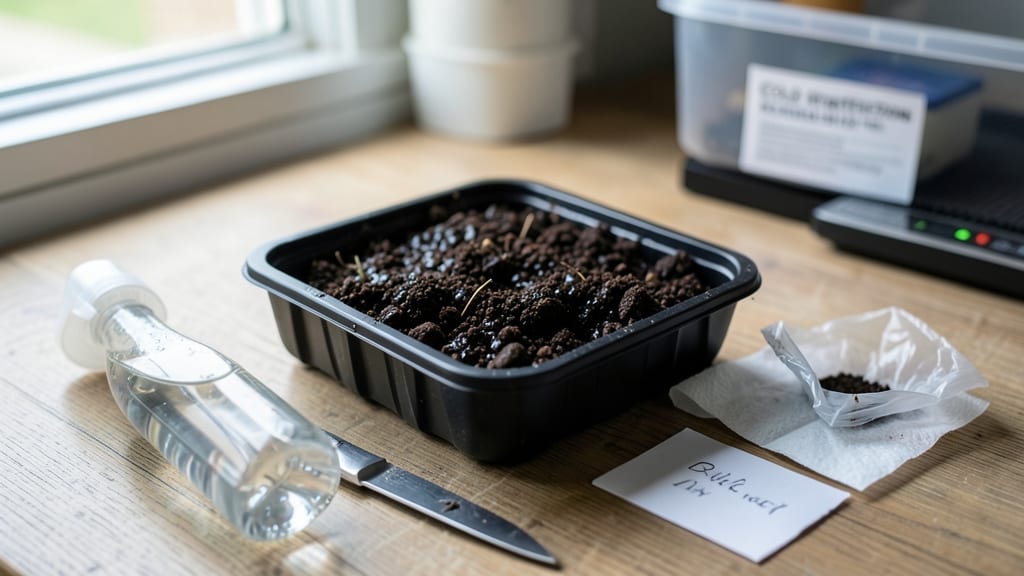
Preparing a cherry seed for planting isn't just about tossing it in soil—it's about tricking nature to break dormancy. 🌱 I learned the hard way that skipping stratification means waiting years (or never) for germination. The secret lies in mimicking winter's chill, which signals seeds it's safe to sprout.
You'll need just three things: the seed itself, a damp paper towel, and your fridge. No fancy equipment—just patience and a freezer-safe container. The process takes about 8-12 weeks, but it's worth it for that first green shoot breaking through.
Once stratified, you'll plant the seeds in well-draining soil, barely covering them. Within 2-4 weeks of planting, you might see tiny roots pushing through—proof your patience paid off. The seedlings will be delicate at first, but with proper care, they'll grow into sturdy young trees.
This method works for both sweet and sour cherry seeds, though results vary. Some seeds may take longer, so don't give up after a few weeks. The reward? A tree that could live for decades—and maybe even produce fruit someday.
📚 In This Guide
- What you need
- Instructions
- Tips and common mistakes
- Wrapping up and next steps
What you need
- ● Fresh cherry pits (seeds): 5–10 clean, undamaged pits from sweet or tart cherries (avoid hybrid varieties—they may not grow true to type).
- ● Paper towels or coffee filters: 2–3 sheets (for moisture retention).
- ● Plastic bag (ziplock or re-sealable): 1 medium-sized (8x10 inches).
- ● Water: Distilled or dechlorinated (to avoid chemical exposure).
- ○ Small container (optional for stratification): A shallow tray or plastic cup (if not using the bag method).
- ● Refrigerator: With a crisper drawer (for cold stratification, ~34–40°F / 1–4°C).
- ● Potting mix: Well-draining seed-starting mix (sterilized, 1–2 quarts).
- ● Small pots or seed trays: 2–3 (3–4 inches deep, with drainage holes).
- ● Spray bottle: For gentle watering (avoids displacing seeds).
- ● Hydrogen peroxide (3% solution): To soak pits for 10–15 minutes (speeds up germination by softening the seed coat).
- ● Label markers & tags: To track seed varieties and planting dates.
- ○ Heating mat (optional): For post-stratification warmth (70–75°F / 21–24°C) to encourage sprouting.
- ● Humidity dome or plastic wrap: Keeps moisture high during germination.
Step-by-step instructions for preparing cherry seeds for planting
Here's the foolproof method I use to break dormancy and coax cherry seeds to sprout reliably.
🌱 Step 1: Extract and Clean the Seeds
Remove the pit from a fresh, ripe cherry—never use dried fruit as the seed will be too old. Crack the hard shell open carefully with a nutcracker or hammer, then extract the single seed inside. Rinse it under cool water to remove any remaining pulp, which can rot during stratification.
I like to soak the seeds in lukewarm water for 24 hours to soften the outer coating slightly. This helps the seed absorb moisture faster during the cold treatment. After soaking, pat them dry with a paper towel—wet seeds will mold if left damp during stratification.
⏰ Step 2: Perform Cold Stratification
Place the cleaned seeds in a resealable plastic bag with a moistened paper towel—just damp enough to feel slightly damp but not dripping. Seal the bag tightly to trap humidity, then place it in your refrigerator's crisper drawer where temperatures stay between 35-40°F. This mimics winter's natural cold period that breaks seed dormancy.
Keep the seeds in the fridge for 8-12 weeks. I check them weekly by pressing the paper towel—if it's dry, add a few drops of water and reseal. The goal is consistent moisture without sogginess. You'll know stratification is working when the seed coat softens and the seed feels slightly swollen to the touch.
🌿 Step 3: Test for Germination Readiness
After 8 weeks, remove one seed from the bag and place it between two damp paper towels in a small container. Keep it in a warm (70-75°F), bright location—this mimics spring conditions. Check daily for signs of sprouting, which typically appears as a tiny white root (radicle) within 7-14 days.
If no sprouts appear after 3 weeks, return that seed to the fridge for 4 more weeks of stratification. I've found some cherry varieties need the full 12 weeks—don't rush this step. Once you see the radicle, your seed is ready for planting. The others can stay in the fridge until you're ready to plant them sequentially.
☀️ Step 4: Plant Stratified Seeds
Fill a small pot (3-4 inches deep) with well-draining potting mix—I mix standard potting soil with 20% perlite to prevent rot. Plant the germinated seed ½ inch deep, with the radicle pointing downward. Gently firm the soil around it and water lightly until the surface feels damp but not wet.
Place the pot in a warm (65-70°F), sunny spot with indirect light for the first week. Cherry seedlings are sensitive to cold drafts and direct sun, which can scorch young leaves. You'll see the first true leaves (not the initial seed leaves) emerge within 2-3 weeks—this is your signal that the seedling is establishing properly.
Tips & tricks for perfect cherry seed preparation
Here's what nobody tells you about getting those stubborn cherry seeds to sprout—these little details make all the difference.
Soaking Secret: The 24-hour soak isn't just about softening the seed—it's about priming it. After soaking, I run the seeds under cool water for 10 seconds to remove any residual sugar from the fruit. This prevents fermentation during stratification, which can actually kill your seeds. Think of it like giving them a fresh start before the cold treatment.
Temperature Matters: While the fridge's crisper drawer maintains 35-40°F, I've found that placing the bag on the middle shelf (not the door) gives more consistent temperatures. The door area can fluctuate wildly when you open it. Also, if your fridge runs colder than 35°F, move the bag to the warmer top shelf—cherry seeds need that specific temperature range to break dormancy properly.
Germination Test: When testing for germination readiness after 8 weeks, I use a clear plastic container with damp paper towels so I can see the seed without disturbing it. The radicle should appear within 7-14 days, but if you're impatient, place the container on a sunny windowsill—warmth speeds up the process. Just don't let the towels dry out, or you'll stall germination completely.
Planting Precision: That ½-inch planting depth might seem shallow, but it's perfect for cherry seeds. Any deeper and they'll struggle to push through the soil. I use my pinky finger as a guide—when I press it into the soil, it reaches about ½ inch. Also, tap the pot gently on the counter after planting to settle the soil around the seed without compacting it too much.
Pro Tips for How Do You Prepare A Cherry Seed For Planting
- Here's what nobody tells you about getting those stubborn cherry seeds to sprout—these little details make all the difference.
- Soaking Secret: The 24-hour soak isn't just about softening the seed—it's about priming it.
- Temperature Matters: While the fridge's crisper drawer maintains 35-40°F, I've found that placing the bag on the middle shelf (not the door) gives more consistent temperatures.
Frequently asked questions
Got questions about germinating cherry seeds? You’re not alone! Here are some of the most common concerns—and their answers—to help you succeed.
How long does cold stratification take for cherry seeds?
Cold stratification for cherry seeds typically takes 6 to 12 weeks in the refrigerator. Place them in a damp paper towel or peat moss, then store them in a sealed bag at 33–41°F (1–5°C). Patience is key—some seeds may need longer, especially if they’re fresh from the fruit.
Can I skip cold stratification and plant cherry seeds directly?
While possible, skipping stratification reduces germination rates drastically. Cherry seeds have a hard outer shell that requires cold, moist conditions to soften. If you plant them directly, expect very few (if any) to sprout. Stratification mimics winter, breaking dormancy naturally.
Do I need to remove the pit’s flesh before planting?
Yes! Clean the seed thoroughly—rinse off any remaining fruit pulp and let it dry before stratification. Leftover flesh can mold or attract pests. A quick scrub with water and a paper towel ensures a fresh start for your seed.
What’s the best time of year to plant stratified cherry seeds?
The ideal window is early spring (March–April) or late summer (August–September). Plant after the last frost when soil temps are at least 60°F (15°C). This gives seedlings time to establish roots before winter. Avoid planting in fall unless your climate is mild.
My cherry seeds aren’t germinating—what went wrong?
Check these common issues:
- Incomplete stratification: Ensure seeds spent at least 6 weeks cold and moist.
- Poor soil: Use well-draining, slightly acidic soil (pH 6.0–6.5).
- Depth: Plant seeds ½ inch deep—too shallow or deep can fail germination.
- Patience: Some seeds take 4–8 weeks to sprout.
Wrapping up and next steps
Preparing a cherry seed for planting is a rewarding process that unlocks the potential for a thriving tree—just like nature intended! 🌱 By mastering cold stratification and following the right steps, you’ll boost germination rates and grow a healthy sapling.
Now that you’re equipped with the know-how, it’s time to roll up your sleeves and give it a try!
Start by gathering your seeds and materials, then follow the step-by-step guide above. Once your seeds complete stratification, plant them in well-draining soil and nurture them with patience and care. Happy planting—your future cherry tree is waiting! 🌟