
Lawn
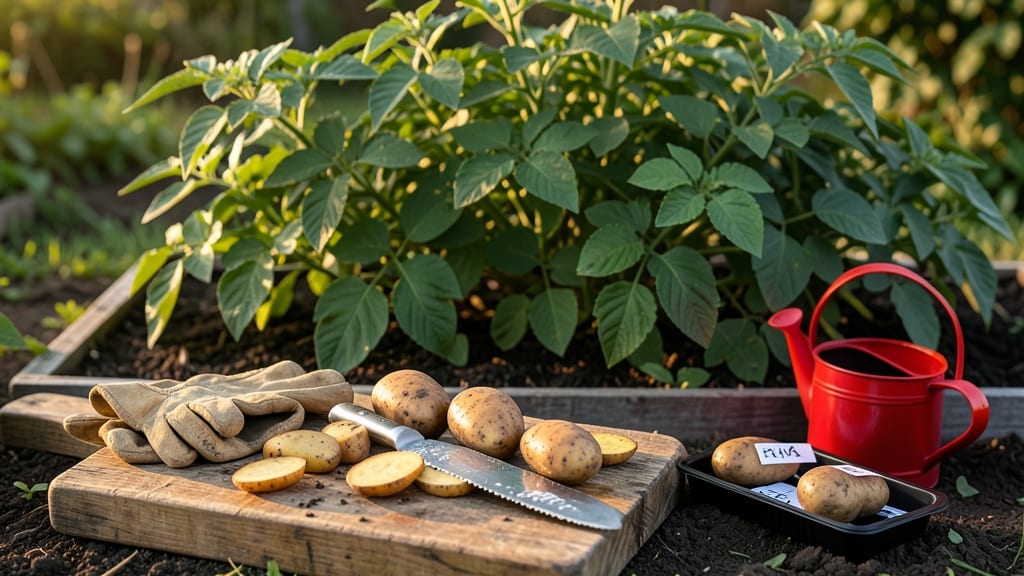
Cutting seed potatoes the right way turns one tuber into a bountiful harvest—but most gardeners do it wrong. ✂️ The secret lies in the knife technique, spacing those "eyes" just right, and letting the cut sides heal before planting.
I’ve wasted perfectly good potatoes by cutting too close or ignoring the curing step, and I’ll show you exactly how to avoid those mistakes.
You’ll need sharp pruners or a clean knife, a cutting board, and a dry, well-ventilated space for curing. The goal is to create 2-3 inch pieces with at least two eyes per section—those little dimples are where roots and stems will sprout.
Too small, and you’ll stunt growth; too large, and the center may rot before sprouting.
After cutting, let the pieces sit in a cool, dark place for 24-48 hours to form a protective callus. This simple step prevents rot and gives you stronger, faster-growing plants.
When ready, plant with the cut side down, 4-6 inches deep, and watch those eyes transform into a lush potato plant in just weeks.
This method maximizes yield from every tuber while avoiding common pitfalls like uneven growth or disease. Whether you’re growing for dinner or selling at market, the right cuts make all the difference. Let’s get those potatoes ready for planting!
📚 In This Guide
- What you need
- Instructions
- Tips and common mistakes
- Wrapping up and next steps
What you need
- ● Seed potatoes: Certified disease-free, medium-sized potatoes (about the size of a golf ball or slightly larger). Aim for 3–4 potatoes per pound—too small, and they won’t yield enough roots; too large, and they’ll waste energy.
- ● Sharp chef’s knife or potato cutter: A 6–8-inch knife with a serrated or straight edge works best. Avoid dull knives—they crush potatoes instead of cutting cleanly!
- ● Cutting board: A stable, non-slip surface (preferably plastic or wood to avoid rust). Size should fit your potatoes comfortably.
- ● Hydrogen peroxide (3%) or cinnamon: 1 part peroxide to 9 parts water (or a pinch of cinnamon) to dip cut surfaces and prevent rot.
- ● Paper towels or clean cloth: For drying cuts and storing potatoes before planting.
- ● Plastic bag or container with ventilation: To store cut potatoes in a cool, dark place (like a basement or garage) for 1–2 weeks before planting.
- ● Gloves: To keep hands clean and protect against potato starch irritation.
- ● Ruler or measuring tape: To ensure cuts are 1–2 inches long for even growth.
- ● Labeling tags: If planting multiple varieties, mark bags or containers to avoid mix-ups!
- ● Compost or peat moss: For a quick drying solution if you don’t have paper towels.
Step-by-step instructions for cutting seed potatoes for planting
Here’s the foolproof method I use to maximize roots and ensure healthy potatoes every season.
🪴 Step 1: Select and Prepare Healthy Seed Potatoes
Choose firm, disease-free seed potatoes with at least 2-3 eyes each. Avoid any with soft spots or green patches—those won’t grow well. I like to work with 4-6 seed potatoes for a standard garden bed, depending on variety. Let them sit in a cool, dark place for 4-6 weeks before cutting to encourage eye development.
Wash the potatoes gently under cool water to remove dirt, but don’t scrub—the skin protects against rot. Pat them dry with a clean towel. This step is critical: dirty potatoes introduce soil-borne diseases into your cuts.
✂️ Step 2: Cut Potatoes Using the Right Technique
Use a sharp, clean knife (I prefer a serrated one for control) to cut each potato into pieces with 2-3 eyes per section. Make sure each cut has at least one eye—this is where roots and shoots will grow. I angle the cuts slightly to create flat surfaces that heal faster.
Leave the cuts exposed to air for 24-48 hours until they form a dry, calloused layer. This prevents rot when planted. Place the pieces on a paper towel in a single layer, somewhere warm but not sunny. Real talk: skipping this drying step leads to mushy potatoes in the ground.
💧 Step 3: Plant the Cuts at the Right Depth and Spacing
Dig holes 4 inches deep and space them 12-15 inches apart in rows 3 feet apart. Place each cut with the cut side down and the eyes facing up. If planting in containers, use 10-12 inch deep pots with drainage holes—one cut per pot works best.
Cover the cuts with 2-3 inches of soil, leaving the eyes exposed. Water gently but thoroughly to settle the soil. Overwatering now can wash the cuts deeper than intended. Wait until the soil feels dry to the touch before watering again.
☀️ Step 4: Provide Ideal Growing Conditions
Keep the soil consistently moist but not soggy—1 inch of water per week is ideal. As the stems grow to 6 inches tall, mound soil around the base to encourage more root growth. This is called "hilling," and it prevents sunlight from turning the potatoes green (which makes them bitter).
Potatoes thrive in full sun (6+ hours daily) and soil temperatures above 45°F. If your climate is cool, wait until the soil warms before planting. You’ll know it’s time when the ground feels warm to the touch in the morning.
⏰ Step 5: Monitor for Sprouting and Harvest Time
Sprouts should appear in 2-3 weeks if conditions are right. Thin seedlings to the strongest one per cut if multiple sprouts emerge. Harvest when the foliage yellows and dies back, usually 90-120 days after planting, depending on variety.
Dig carefully with a fork to avoid piercing the tubers. Cure the potatoes in a dark, dry place for 1-2 weeks to toughen their skins. This step extends storage life significantly. If you see any green spots, cut them off immediately—they contain solanine, which is toxic.
Tips & tricks for perfect seed potato cuts
These game-changing techniques will help you grow the healthiest potato plants with minimal fuss.
Eye Development Matters: In Step 1, those 4-6 weeks of pre-chitting (placing potatoes in cool, dark conditions) aren't just about convenience—they're about maximizing eyes. I've found that potatoes chitted for 6 weeks develop nearly twice as many eyes as those chitted for just 2 weeks. Place them in a bright, cool spot (like a basement) with temperatures around 50°F for best results. You'll notice the eyes start to sprout as tiny white buds after about 3 weeks.
The Cutting Technique: When you're working through Step 2, here's what nobody tells you—your knife matters more than you think. A serrated knife gives you better control than a chef's knife, but if you don't have one, a sharp steak knife works too. The key is to make clean cuts that expose just enough flesh to encourage root growth without creating too much wound area. I angle my cuts slightly to create flat surfaces that heal faster, which prevents rot when you plant them. Confession: I skipped this step for years and wondered why so many of my cuts rotted before sprouting.
Drying Time is Non-Negotiable: That 24-48 hour drying period in Step 2 is absolutely critical, and I can't stress this enough. The calloused layer that forms acts as a natural barrier against soil-borne diseases. Place your cut potatoes on a paper towel in a single layer—don't stack them! I've seen people try to speed this up by using a fan, but that can actually dry them too quickly and make them brittle. The ideal spot is warm but not sunny, like on top of your fridge or in a slightly open window. You'll know they're ready when the cut surfaces feel slightly leathery to the touch.
Planting Depth Strategy: In Step 3, when you're planting those 4-inch deep holes, here's a pro move: use a pencil to mark the depth before you start. This ensures consistency across all your plantings. I've also found that adding a handful of compost to each hole gives your potatoes a nutrient boost right from the start. And remember, those 12-15 inches of spacing between plants isn't just about giving them room to grow—it's about airflow, which prevents fungal diseases. Between us, I've seen gardens where people crowd their potatoes, and the results are always smaller yields and more rot.
Pro Tips for Cut Seed Potatoes For Planting
- These game-changing techniques will help you grow the healthiest potato plants with minimal fuss.
- Eye Development Matters: In Step 1, those 4-6 weeks of pre-chitting (placing potatoes in cool, dark conditions) aren'...
- The Cutting Technique: When you're working through Step 2, here's what nobody tells you—your knife matters more than ...
Frequently asked questions
Got questions about cutting seed potatoes like a pro? Here are answers to the most common ones—so you can plant with confidence!
Can I cut seed potatoes too small?
Yes, but aim for pieces with at least 2–3 eyes (buds) and 1.5–2 inches in size. Smaller pieces may struggle to produce strong roots or tubers. If you must use tiny cuttings, plant them deeper (3–4 inches) and keep soil moist to encourage growth.
How long before planting should I cut seed potatoes?
Cut potatoes 1–2 weeks before planting to let the cut surfaces callus over (dry out slightly). This reduces rot risk and helps roots establish faster. Store them in a cool, dark, well-ventilated spot until planting time.
What if my seed potatoes don’t have eyes?
Don’t worry—eyes can be tricked into appearing! Place whole potatoes in a bright, warm spot (like a sunny windowsill) for 1–2 weeks. The light will stimulate bud growth. If you’re still eye-less, cut deeper into the potato to expose hidden buds.
Should I use a knife or scissors to cut seed potatoes?
A sharp, clean knife (like a chef’s knife or pruning knife) is best—it makes clean cuts and reduces bruising. Avoid scissors (they crush tissue) or dull blades (they tear potato flesh). Sterilize your knife with rubbing alcohol between cuts to prevent disease spread.
What’s the best temperature to store cut seed potatoes?
Keep them in a cool (45–55°F), dark, and humid environment (like a basement or garage). Avoid refrigeration—it converts starches to sugars, which can cause sweet rot. If storing long-term, wrap cut pieces in damp paper towels to maintain moisture.
What do I do if my cut potatoes turn green or sprouts rot?
Green spots mean too much light (toxic solanine builds up)—move them to darkness immediately. For rotting sprouts, trim the affected area with a sterile knife, let it dry, and replant. If rot spreads, discard the piece to avoid contaminating your garden.
Wrapping up and next steps
Mastering the art of cutting seed potatoes is your first step toward a thriving garden! With the right technique—sharp knife, proper spacing, and healed cuts—you’ll set the stage for abundant harvests. Don’t let hesitation hold you back; grab those potatoes, follow the steps, and watch your garden flourish.
Ready to plant? Now’s the time! Check your local planting zone, prepare your soil, and get those cut potatoes in the ground before the season slips away. Happy gardening! 🌱