
Planting
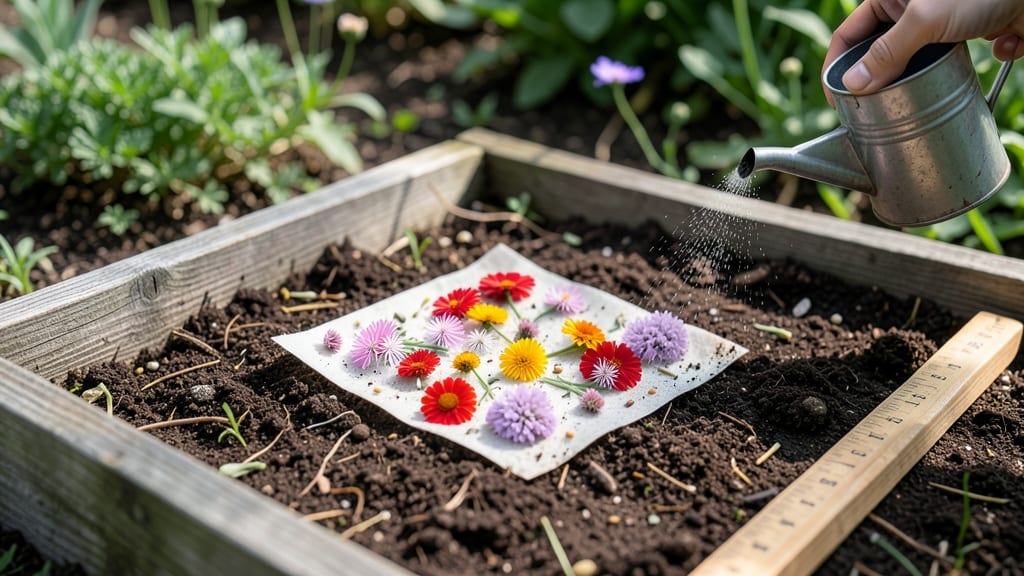
Planting wildflower seed paper is the easiest way to turn bare soil into a buzzing pollinator paradise in just 60 days. 🌸 I’ve used these paper packets to transform neglected corners into vibrant meadows—no digging, no fuss, just scatter and wait.
The secret lies in the right soil prep, planting timing, and a little patience for nature to work its magic. You’ll need a sunny spot (at least 6 hours of light daily), loose soil, and a gentle watering can.
Simply press the seed paper into the ground where you want blooms, then keep it moist for the first 2 weeks. Most varieties germinate within 7-14 days, with flowers appearing in 6-8 weeks. The best part? No weeding—just watch bees, butterflies, and hummingbirds move in.
By summer, you’ll have a low-maintenance wildflower display that thrives with minimal care. The paper dissolves naturally, leaving seeds perfectly positioned for growth. Even city balconies can host these pollinator magnets—just use containers with drainage.
Avoid overwatering (seed paper rots if soggy) and planting too late (spring or early fall works best). With these simple steps, you’ll create a year-round habitat that’s easier than traditional seeding—and far more rewarding.
📚 In This Guide
- What you need
- Instructions
- Tips and common mistakes
- Wrapping up and next steps
What you need
- ● Wildflower seed paper – Choose a size that fits your space (e.g., 4"x6" or 8"x10" sheets). Opt for native wildflower blends to support local ecosystems.
- ● Water – A spray bottle or watering can (for gentle hydration). Aim for 1–2 cups per sheet initially.
- ● Garden soil or potting mix – Well-draining, organic soil (or a mix of 60% topsoil + 40% compost). Avoid heavy clay.
- ○ Gloves (optional but recommended) – Protects hands from dirt and thorns (e.g., nitrile or cotton gardening gloves).
- ● Trowel or small shovel – For digging shallow furrows (¼-inch deep) if planting in ground.
- ● Scissors or knife – To trim seed paper to fit odd-shaped areas (e.g., cracks in sidewalks or hanging baskets).
- ○ Mulch or straw – Light layer (¼-inch thick) to retain moisture (optional but helpful in dry climates).
- ● Stakes or landscape pins – To secure seed paper in windy areas (e.g., 3-inch bamboo stakes).
- ● Sunlight tracker – Confirm your spot gets 4–6 hours of direct sun daily (most wildflowers thrive here!).
- ● Location scouting – Pick a spot with good drainage (avoid soggy areas). Seed paper blooms best in USDA Zones 3–10.
- ● Weather check – Plant on a cloudy day or evening to reduce water evaporation. Avoid frost or extreme heat.
- ● Pollinator prep – Clear debris (rocks, weeds) to give seeds room to sprout. 🐝
Step-by-Step instructions for planting wildflower seed paper
Transform your space into a buzzing pollinator paradise with these simple, foolproof steps.
🌱 Step 1: Prepare Your Planting Site
Choose a location with 6+ hours of sunlight daily—wildflowers thrive where they get plenty of light. Clear the area of weeds by pulling them by hand or using a hoe to avoid disturbing the soil structure. I like to rake the surface lightly to create a fine, crumbly texture—this ensures good seed-to-soil contact.
If your soil is heavy clay or very sandy, mix in 1-2 inches of compost to improve drainage and fertility. Wildflowers are tough but benefit from slightly enriched soil. Water the area thoroughly 24 hours before planting—this helps the seed paper adhere better and prevents it from blowing away.
💧 Step 2: Moisten the Seed Paper
Fill a shallow tray or basin with 1 inch of water and place the seed paper in it, seed-side down. Let it soak for 10-15 minutes—this activates the seeds and ensures they stick to the soil when planted. You’ll see the paper soften and darken slightly as it absorbs moisture.
Gently press the paper into the tray to remove excess water, but don’t wring it out. The goal is a damp, pliable sheet—not dripping wet. If you’re planting in windy conditions, I recommend misting the back of the paper with water before handling to prevent tearing.
☀️ Step 3: Plant the Seed Paper
Unfold the damp seed paper over your prepared area, smoothing it out gently to cover the space evenly. Press it firmly into the soil, working from the center outward to eliminate air pockets. You’ll feel resistance as the seeds make contact with the earth—this is when they’ll begin their journey toward growth.
Use a small rake or your hands to tuck the edges into the soil, ensuring full coverage. Lightly water the area with a fine mist to help settle the paper and keep it in place. Avoid heavy watering at this stage—you want the seeds to stay put without washing away.
🌿 Step 4: Maintain Moisture and Light
Keep the soil consistently moist for the first 2-3 weeks—this is critical for germination. Water gently in the morning to allow the surface to dry slightly by evening, which prevents fungal issues. You’ll see tiny green shoots emerge within 7-14 days, depending on temperature and variety.
Once sprouts reach 2-3 inches tall, reduce watering to once a week—wildflowers are drought-tolerant once established. Avoid stepping on the area or disturbing the soil until the plants are at least 4 inches tall—their roots are delicate at first.
⏰ Step 5: Encourage Pollinator Visits
After 6-8 weeks, when flowers begin to bloom, your pollinator magnet will be ready. Choose a sunny day to plant a small water source nearby—a shallow dish with pebbles and water attracts bees and butterflies. Place it within 3-5 feet of the wildflowers so visitors don’t have to travel far.
Let the wildflowers go to seed at the end of the season—they’ll self-sow and create a permanent, low-maintenance garden. Avoid mowing until after the first frost, as seed heads provide food for birds and shelter for beneficial insects.
Tips & tricks for planting wildflower seed paper
Here's what nobody tells you—these little details make all the difference between a patchy, struggling wildflower bed and a thriving pollinator paradise.
Soil Prep Secret: In Step 1, if your soil is rocky or compacted, go the extra mile by aerating it with a garden fork before raking. This creates tiny air pockets that help seeds establish roots faster. I've found that adding a thin layer of straw mulch after planting helps retain moisture while preventing weeds from competing with your wildflowers.
Seed Paper Handling: During Step 2, resist the urge to rush the 10-15 minute soak time. The seeds need this full window to fully activate—especially in cooler weather. Test readiness by gently lifting the paper: it should feel pliable but not soggy. If it tears easily, it's too wet; if it feels stiff, soak another 5 minutes.
Planting Technique: When pressing the seed paper into soil in Step 3, work in small sections (about 2 feet at a time). This prevents the paper from drying out before you finish. For sloped areas, anchor the edges with small rocks or stakes to prevent erosion during rain. The key is making sure every seed touches soil—no exceptions!
Germination Watch: In Step 4, mark your calendar for the 7-14 day germination window and check daily. Early signs include tiny green specks that look like grass. If you notice mold or fuzzy growth during this time, gently brush it away and improve airflow by spacing out any dense clumps.
Pro Tips for Plant Wildflower Seed Paper
- Here's what nobody tells you—these little details make all the difference between a patchy, struggling wildflower bed...
- Soil Prep Secret: In Step 1, if your soil is rocky or compacted, go the extra mile by aerating it with a garden fork ...
- Seed Paper Handling: During Step 2, resist the urge to rush the 10-15 minute soak time. The seeds need this full wind...
Frequently asked questions
Got questions about planting wildflower seed paper? You’re not alone!
Here are answers to the most common queries to help you grow a thriving pollinator paradise with ease.
When is the best time to plant wildflower seed paper?
The ideal window is late spring to early summer (after the last frost) or early fall (6-8 weeks before the first frost). Seed paper thrives in mild, moist soil—avoid planting in extreme heat or freezing temps. For year-round blooms, check your local frost dates and aim for spring or fall planting for the best results.
Do I need to water seed paper differently than regular seeds?
Yes! Seed paper is designed to soak up water like a sponge, so light, frequent watering (2-3 times daily for the first week) works best. Once sprouted, reduce to deep but infrequent watering (1-2 times weekly) to encourage strong root growth. Avoid overwatering—seed paper can rot if soggy.
Can I plant wildflower seed paper in containers or just gardens?
Seed paper is perfect for containers, hanging baskets, or even window boxes. Just use well-draining soil and ensure the container is at least 6 inches deep. For vertical gardens, attach the paper to a trellis or frame with biodegradable glue or staples (remove staples after planting). Bonus: It’s great for balconies and rooftop gardens too!
Why isn’t my seed paper sprouting after 2 weeks?
Don’t worry—patience is key! Some seeds (like cosmos or sunflowers) may take 3-4 weeks to sprout. Check these troubleshooting tips:
- Soil moisture: Keep the paper damp but not waterlogged.
- Sunlight: Ensure it gets at least 4-6 hours of sun daily.
- Temperature: Ideal germination temps are 60–75°F.
- Seed viability: Store seed paper in a cool, dry place—expired paper may have lower success.
Will seed paper attract bees and butterflies immediately?
Not quite! Most wildflower seed paper varieties bloom in 60–90 days, so you’ll see pollinators within 2–3 months of planting. Fast-blooming species (like zinnia or marigold) may attract visitors sooner, while others (like black-eyed Susan) take a little longer. Pro tip: Plant near existing flowers to lure pollinators faster!
Wrapping up and next steps
Planting wildflower seed paper is a simple, rewarding way to transform your space into a vibrant haven for pollinators—no green thumb required! 🌸 With just a few steps, you’ll enjoy bursts of color and life in as little as 60 days.
Whether you’re a beginner or a seasoned gardener, this eco-friendly project brings beauty and purpose to your yard, balcony, or windowsill.
Ready to dive in? Grab your seed paper and start planting—your local bees, butterflies, and birds will thank you! Next, explore creative ways to display your blooms or share your progress with fellow gardening enthusiasts.