
Picking
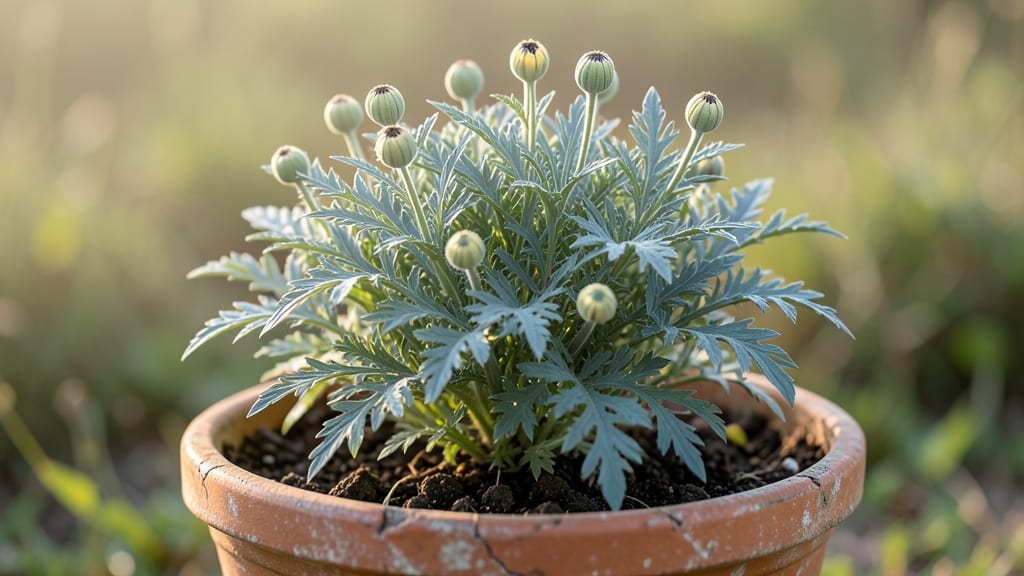
Hungarian breadseed poppy seeds are the easiest way to grow poppies without the frustrating twist pods. 🌻 I've grown these for years, and the secret to a smooth harvest starts with the right soil and spacing—no fancy tricks, just reliable results.
The first step is loose, well-draining soil mixed with compost—poppies hate soggy roots. Plant seeds in full sun (6+ hours daily) and space them 12-18 inches apart to prevent overcrowding.
Water lightly after planting, then only when the top inch of soil feels dry. Germination takes 7-14 days, and seedlings grow fast once they sprout.
By midsummer, you'll have tall, sturdy plants with bold red blooms that last just one day—then the seed pods form. The key to harvesting is patience: wait until pods turn brown and papery before cutting stems.
Dry them completely before cracking open for seeds, and you'll avoid the dreaded twisting pods that ruin harvests.
This method works for both culinary and ornamental use, and the seeds store well for years. Perfect for beginners or anyone tired of poppy-growing frustrations—just follow the simple steps, and you'll have a bountiful harvest every season.
📚 In This Guide
- What you need
- Instructions
- Tips and common mistakes
- Wrapping up and next steps
What you need
- ● Hungarian breadseed poppy seeds: 1–2 oz (30–60g) of high-quality, untreated seeds (ensure they’re labeled for Papaver somniferum var. setigerum).
- ○ Well-draining potting mix: 5–10 gallons (19–38L) of a loose, fertile blend (60% garden soil, 30% compost, 10% perlite or sand). Optional: Add 1 tbsp of lime per gallon to raise pH slightly (ideal: 6.5–7.5).
- ● Containers or garden bed: For containers: 5–7" deep pots (1–2 plants per 12" pot) with drainage holes.
- ● For in-ground: Full sun (6+ hours/day) and loose, well-aerated soil (amend with compost if needed).
- ○ Slow-release fertilizer: 1 tbsp of 10-10-10 or 5-10-10 per square foot of bed (or per pot). Optional: Liquid seaweed extract for a growth boost.
- ● Watering can or hose with gentle nozzle: Poppies hate soggy roots—aim for deep but infrequent watering.
- ○ Twine or small stakes (optional): For tall varieties (3–4 ft), use soft twine to loosely tie stems after flowering to prevent lodging.
- ● Hand trowel or transplanting tool: For sowing seeds ½" deep.
- ● Pruning shears or sharp scissors: For harvesting pods (sterilize with rubbing alcohol!).
- ○ Glove (optional): Latex or cotton gloves to protect hands from milky sap (harmless but sticky!).
- ● Drying rack or mesh screen: To cure pods (hang in a dark, well-ventilated space at 70–75°F).
- ● Patience (and a journal!): Poppies grow fast but need consistent care—track watering and sunlight notes.
Step-by-step guide to growing Hungarian breadseed poppies
Here's how to cultivate these stunning annuals without the frustrating pod-twisting that plagues most growers.
🌱 Step 1: Select the Right Location and Prepare the Soil
Hungarian breadseed poppies thrive in full sun with at least 6-8 hours of direct light daily. Choose a spot where they won't be shaded by taller plants later in the season. The soil should be well-draining but moist—these poppies hate soggy roots but need consistent moisture to prevent those infamous twisted pods.
Amend heavy clay soil with 2-3 inches of compost to improve drainage while retaining moisture. Work the compost into the top 6-8 inches of soil. A slightly alkaline to neutral pH (around 6.5-7.5) works best. You'll know the soil is ready when it crumbles easily between your fingers without clumping.
☀️ Step 2: Plant Seeds Directly in the Garden
Sow seeds ¼ inch deep after the last frost when soil temperatures reach 50°F or warmer. Scatter seeds 12-18 inches apart—they need space to develop those signature 2-inch-wide blooms without crowding. Lightly cover with soil and pat gently to ensure good seed-to-soil contact.
Water gently but thoroughly to settle the soil around the seeds. Avoid soaking the area—overwatering at this stage can cause seeds to rot before germination. You'll see sprouts in 10-14 days, though germination can take up to 21 days in cooler conditions. Thin seedlings to 12 inches apart once they reach 2 inches tall.
💧 Step 3: Maintain Consistent Moisture and Fertility
Water deeply once weekly, providing 1 inch of water per week, but adjust based on rainfall. Let the top 1-2 inches of soil dry out between waterings—this prevents the pods from twisting as they mature. Mulch with 1-2 inches of straw or shredded leaves to retain moisture and suppress weeds without smothering the plants.
Feed lightly with a balanced fertilizer (10-10-10) at planting and again when flowers first appear. Avoid high-nitrogen fertilizers—they promote lush foliage at the expense of blooms. You'll notice healthy plants developing deep green, glossy leaves and sturdy stems capable of supporting those iconic seed heads.
✂️ Step 4: Harvest and Dry the Seed Pods Properly
Collect pods when they turn tan or light brown and begin to split open naturally. Harvest on a dry morning after the dew has evaporated. Cut stems with 6-8 inches of stem attached and bundle them upright in a paper bag. Hang bundles upside down in a dry, well-ventilated area out of direct sunlight.
Pods will fully dry in 2-3 weeks. You'll know they're ready when the seeds rattle inside when shaken. Remove seeds by gently rubbing the dried pods between your hands or rolling them on a clean surface. Store seeds in a cool, dark place in an airtight container—they'll remain viable for 2-3 years.
🌿 Step 5: Prevent Common Problems for Healthy Plants
Watch for aphids on new growth—these pests can distort buds and reduce seed quality. Spray with a strong stream of water to dislodge them or apply neem oil as a preventive measure. Powdery mildew may appear in humid conditions; improve airflow by spacing plants properly and avoid overhead watering.
If pods begin twisting prematurely, it's usually a sign of inconsistent moisture or poor drainage. Adjust your watering schedule to maintain even soil moisture and ensure containers or beds have proper drainage. Healthy plants with straight pods will yield the best quality seeds for baking and crafts.
Tips & tricks for perfect Hungarian breadseed poppy cultivation
Growing these delicate beauties successfully comes down to a few key strategies that prevent the dreaded pod twisting. Here's what I've learned from years of trial and error.
Light and Location Strategy: That 6-8 hours of full sun requirement is non-negotiable—these poppies are sun worshippers. I've found that planting them near a south-facing fence or wall actually gives them an extra boost by reflecting sunlight. If you're in a particularly shady climate, consider using reflective mulch around the base to simulate more sunlight. The key is avoiding any afternoon shade, which can cause those pods to start twisting before they even mature.
Soil Preparation Secret: The 2-3 inches of compost recommendation is perfect, but here's the pro move: mix in a handful of perlite or coarse sand when amending heavy clay soils. This creates tiny air pockets that improve drainage while maintaining moisture—exactly what these poppies need to avoid that frustrating twist. I test soil readiness by squeezing a handful—it should crumble like cookie dough, not stick together like wet clay.
Watering Technique: The once-weekly watering schedule works, but timing matters more than you'd think. I water mine in the early morning so the foliage has all day to dry, preventing fungal issues. That 1-2 inches of dry soil between waterings is crucial—stick your finger in the soil; if it feels damp just below the surface, wait another day. Overwatering at any stage is the #1 cause of twisted pods, so resist the urge to keep the soil soggy.
Harvesting Hack: When those pods turn tan and begin splitting, here's my foolproof method: cut stems with 6-8 inches attached and immediately bundle them upright in a paper bag. The key is to harvest on a dry morning—dew can cause premature splitting. I hang them upside down in my garage (which stays around 70°F) for consistent drying. The 2-3 week drying time is critical; if you rush it, seeds won't separate properly.
Pro Tips for Hungarian Breadseed Poppy
- Growing these delicate beauties successfully comes down to a few key strategies that prevent the dreaded pod twisting...
- Light and Location Strategy: That 6-8 hours of full sun requirement is non-negotiable—these poppies are sun worshippe...
- Soil Preparation Secret: The 2-3 inches of compost recommendation is perfect, but here's the pro move: mix in a handf...
Frequently asked questions
Got questions about growing Hungarian breadseed poppy? You’re not alone! Here are some of the most common concerns—and their straightforward answers—to help you avoid frustration and maximize your harvest.
When is the best time to plant Hungarian breadseed poppy?
Plant seeds in early spring (after the last frost) or late summer for a fall harvest. These poppies thrive in cool weather and bolt (go to seed) quickly in heat—so avoid planting in sweltering months. For a continuous supply, stagger plantings every 2–3 weeks.
How long does it take for Hungarian breadseed poppy to mature?
From seed to harvest, expect 8–12 weeks in ideal conditions (cool temps, full sun, and well-drained soil). Watch for twist pods (a sign of maturity)—they’ll curl and dry before popping open. If pods twist too early, it’s often due to stress (drought, overcrowding, or heat).
Why are my Hungarian breadseed poppy pods twisting but not opening?
Twisted pods can mean immature seeds or environmental stress. Wait 1–2 more weeks—they’ll dry and split naturally. If pods stay stubbornly closed, try hanging them upside-down in a paper bag to encourage drying. Avoid harvesting too early; seeds need full maturity for flavor and viability.
Can I grow Hungarian breadseed poppy in containers?
Use deep containers (12+ inches) with drainage holes and a lightweight potting mix. These poppies have taproots, so avoid transplanting after germination. Containers work well for balconies or small spaces—just ensure they get 6+ hours of sun daily.
What’s the best way to store harvested poppy seeds?
Clean seeds thoroughly, then store them in an airtight container (glass jars or vacuum-sealed bags) in a cool, dark place (like a pantry). They’ll stay fresh for 1–2 years. For baking, toast seeds lightly (350°F for 5–10 mins) to enhance nuttiness—perfect for bread, muffins, or sprinkling on salads!
What can I do if my poppies attract pests like aphids?
Hungarian breadseed poppies are pest-resistant, but aphids may still appear. Blast them off with a hose or introduce ladybugs (natural predators). For prevention, space plants 12–18 inches apart to improve airflow. Avoid chemical sprays—they can harm beneficial insects!
Wrapping up and next steps
Growing Hungarian breadseed poppy is a rewarding journey that brings beauty and practicality to your garden—no twisty pods in sight! 🌱 With the right soil, spacing, and patience, you’ll enjoy a bountiful harvest of vibrant seeds perfect for baking, crafts, or even bird feeders. Now that you’re armed with tips and tricks, why not share your success with fellow gardeners or experiment with creative uses for your poppy seeds?
🌟 Next Steps:
- Plant your seeds! Follow your prep work and watch them thrive.
- Document your progress. Snap photos of your poppies blooming—it’s a great way to track growth and celebrate wins!
- Explore recipes or DIY projects. From poppy seed cakes to homemade birdseed mixes, the possibilities are endless!