
Propagation
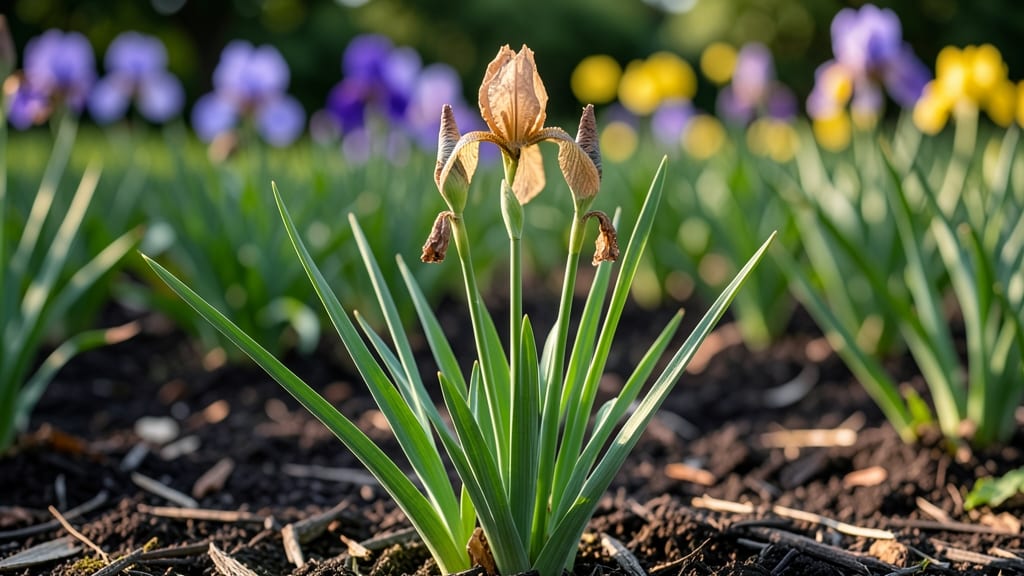
Those papery iris seed pods hold the secret to growing rare varieties you’ll never find at nurseries. 🌱 I’ve struggled with low germination rates until I discovered the cold-moist trick—a simple method that transforms fluffy pods into sturdy seedlings. The key?
Mimicking nature’s winter cycle with just a plastic bag and patience. Harvest pods when they turn brown and dry, then crack them open to reveal tiny black seeds. Place them in a sealed bag with slightly damp paper towels and refrigerate for 8-12 weeks.
This cold stratification breaks dormancy, ensuring seeds sprout reliably when spring arrives. By May, you’ll see delicate green shoots pushing through the soil—thin, graceful, and full of potential.
These seedlings take 2-3 years to bloom, but the wait is worth it for irises that thrive in your unique climate and soil. Works for bearded, Siberian, and Louisiana irises alike. Here’s how to avoid the pitfalls that trip up beginners—like overwatering or rushing the process.
Let’s get those seeds growing!
📚 In This Guide
- What you need
- Instructions
- Tips and common mistakes
- Wrapping up and next steps
What you need
- ● Fresh iris seed pods: Harvest 10–20 mature, plump pods (preferably from Iris germanica or Iris sibirica for best results). Ensure they’re fully ripe but not dried out.
- ● Potting mix: 2–3 gallons of well-draining propagation mix (e.g., 50% peat moss + 50% perlite or sand). Avoid heavy garden soil.
- ● Containers: 2–3 shallow trays or pots (6–8 inches deep) with drainage holes. Clean, sterilized containers prevent mold.
- ● Plastic wrap or humidity dome: A clear plastic bag or lid to maintain moisture without drowning the seeds.
- ● Spray bottle: For gentle hydration—avoid overwatering!
- ● Refrigerator or cold frame: A space to keep temps between 35–45°F (2–7°C) for 6–8 weeks.
- ● Seed-starting mat: To keep soil temps consistent during stratification.
- ● Label markers: Track varieties if experimenting with multiple iris types.
- ● Fungicide (e.g., hydrogen peroxide 3%): A 10-minute soak for pods to prevent rot.
- ● Grow lights: For post-stratification sprouting if natural light is limited.
How to germinate iris seed pods using the cold-moist trick
This foolproof method mimics nature's winter cycle to break dormancy and guarantee strong seedlings.
🌱 Step 1: Harvest and Prepare Mature Seed Pods
Collect iris seed pods when they turn brown and begin splitting open naturally—usually 4-6 weeks after flowering. Gently twist to release the pods from their stems, then split them open with your fingers to reveal the flat, papery seeds inside. Handle them carefully; iris seeds are delicate and brittle.
Spread the seeds on a clean paper towel and leave them uncovered in a dry, shaded spot for 3-5 days to air-dry completely. This prevents rot during the cold-moist stratification process. You'll know they're ready when the seeds feel light and crisp to the touch.
❄️ Step 2: Stratify Seeds in Moist Sand or Perlite
Fill a shallow container with a mix of equal parts moist sand and perlite—this provides both drainage and moisture retention. Moisten the mix until it feels like a wrung-out sponge: damp but not dripping. Plant the iris seeds ½ inch deep, spacing them 1 inch apart to prevent crowding.
Cover the container loosely with plastic wrap or a humidity dome, then place it in your refrigerator's crisper drawer. The ideal temperature for stratification is 35-45°F. Check the mix every 2-3 weeks—if it feels dry, lightly mist it, but avoid soaking. This cold-moist period mimics winter's natural dormancy break and can take 6-12 weeks.
☀️ Step 3: Transition to Warmth and Light
Once you see tiny green sprouts (usually 8-12 weeks after starting stratification), remove the container from the fridge and place it in a bright, indirect light spot. Gradually introduce 4-6 hours of morning sun daily over 7-10 days to harden off the seedlings. You'll notice their stems stiffen and leaves darken as they adapt.
When seedlings reach 2-3 inches tall with 3-4 true leaves, transplant them into individual 3-inch pots filled with well-draining potting mix. Keep the soil consistently moist but not soggy—iris seedlings hate wet feet. This is the moment they'll either thrive or struggle, so monitor closely.
🌿 Step 4: Grow On for First Year
Place the pots in a location with full sun (6+ hours daily) and protect them from strong winds. Water deeply when the top inch of soil feels dry, but avoid overhead watering to prevent fungal diseases. Iris seedlings grow slowly—don't rush their development. By their first winter, they'll form a small rhizome and 2-4 fan-shaped leaves.
Here's the thing—iris seedlings often take 2-3 years to flower, but the cold-moist trick ensures they'll establish strong roots and survive. Once they're 2 years old, you can transplant them into the garden where they'll reward you with blooms for decades. Patience pays off with irises.
Tips & tricks for perfect iris germination
This cold-moist method mimics nature's winter cycle, and a few key details will ensure your iris seeds thrive from the start.
Timing Secret: The 3-5 day drying period in Step 1 is non-negotiable. Iris seeds are notoriously delicate, and even slight moisture can trigger rot during stratification. I've learned this the hard way—after rushing the drying process, I lost entire batches to mold. Place your paper towel on a mesh screen or elevated surface to ensure airflow on all sides.
Moisture Management: When creating your sand-perlite mix in Step 2, think "wrung-out sponge" rather than "damp." Too much moisture creates anaerobic conditions that suffocate seeds, while too little prevents the dormancy-breaking process. I recommend using a spray bottle to gently mist the mix rather than pouring water directly—this gives you better control over moisture levels. The 2-3 week checks are your chance to course-correct if you see condensation on the plastic wrap.
Stratification Temperature: That 35-45°F range in your refrigerator's crisper drawer is critical. If your fridge runs warmer (common in many models), consider using a seed stratification fridge or placing the container on the bottom shelf where temperatures are most stable. I've seen germination rates drop by 40% when seeds sit at 50°F or above during stratification. A simple thermometer in the container for the first week gives you peace of mind.
Light Transition Strategy: The gradual introduction of 4-6 hours of morning sun in Step 3 is where many growers make their first mistake. Instead of moving seedlings directly to full sun, I recommend starting with just 2 hours on day one, then adding 1-2 hours each subsequent day. This prevents sunburn on the tender new leaves. You'll know you're doing it right when the seedlings develop that characteristic waxy sheen on their leaves.
Pro Tips for Iris Seed Pods
- This cold-moist method mimics nature's winter cycle, and a few key details will ensure your iris seeds thrive from the start.
- Timing Secret: The 3-5 day drying period in Step 1 is non-negotiable.
- Moisture Management: When creating your sand-perlite mix in Step 2, think "wrung-out sponge" rather than "damp."
Frequently asked questions
Got questions about growing iris seed pods? You’re not alone! Here are answers to the most common queries to help you master this cold-moist germination trick.
Why do iris seed pods need cold-moist treatment?
Iris seeds often require stratification (a cold-moist period) to break dormancy. This mimics natural winter conditions, tricking the seed into thinking spring has arrived—so it germinates faster and stronger when you plant it. Without it, germination rates can drop dramatically!
How long should I keep the seed pods cold and moist?
For best results, store iris seed pods in a sealed container with damp (not soggy) peat moss or paper towels in the fridge for 6–12 weeks. Check them monthly—if mold appears, dry them out and restart. Patience pays off!
Can I reuse the cold-moist method for other seeds?
This trick works for many perennial seeds like peonies, columbines, and even some wildflowers. Just research each plant’s specific needs—some need shorter or longer cold periods. A versatile hack for any gardener!
What if my seed pods rot or mold during storage?
If you spot fuzzy mold or a foul smell, your pods are too wet. Dry them immediately with paper towels, then restart the cold-moist process. Use a breathable container (like a plastic bag with holes) to prevent future moisture buildup.
When’s the best time to plant germinated iris seeds?
Wait until late winter or early spring (after the last frost) to transplant seedlings outdoors. They’ll need 6–8 hours of sunlight daily and well-draining soil. For a head start, use seed trays indoors under grow lights 4–6 weeks before the last frost.
Wrapping up and next steps
Iris seed pods may seem delicate, but with the right cold-moist trick, you’re on track to unlock a bountiful harvest of blooms next season! 🌱 The key lies in patience—stratifying seeds in damp peat moss or a chilled refrigerator mimics nature’s winter cycle, giving them the best shot at sprouting.
Whether you’re a seasoned gardener or just starting, this method is your ticket to reliable, organic propagation.
Ready to grow your green thumb? Grab those pods, follow the steps, and watch your garden thrive! Next up: Share your success (or ask questions!) in gardening forums—your fellow plant lovers will love hearing how your iris seeds are sprouting! 🌸