
Lawn
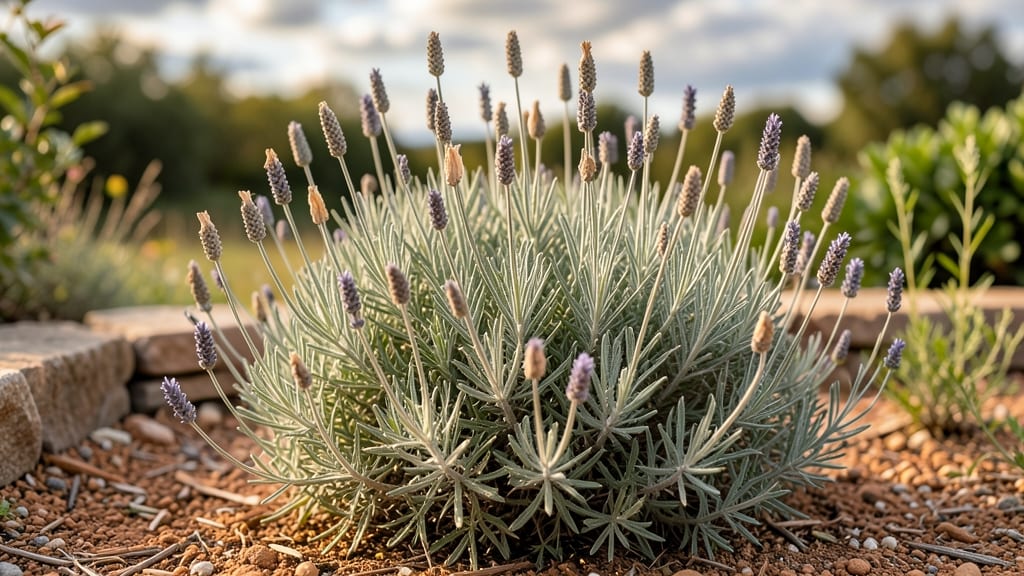
Cold-stressed lavender blooms reveal their secret seeds when handled just right. 🌿 I’ve spent years perfecting the art of harvesting lavender seed pods, and the key is timing—waiting for those papery brown pods to split open naturally after a frost.
This method ensures higher germination rates than buying seeds, plus you get varieties perfectly suited to your climate. The process starts with a sharp pair of pruners and a dry day.
Snip the mature seed heads when they’ve turned golden-brown and begin cracking open, then lay them out on a screen or mesh bag in a warm, dry spot. Within 2-3 weeks, the seeds will rattle free inside their pods—ready to sow or store for next spring.
You’ll end up with delicate lavender seedlings that smell like summer from their first leaves. The trick is patience: these seeds germinate slowly (sometimes taking 4-6 weeks), but the payoff is worth it—hardy plants that thrive in your garden for years.
Just avoid damp conditions, or you’ll risk mold. This method works best for English and French lavender varieties. If you’re impatient, cuttings are faster—but there’s something magical about growing lavender from seed, especially when those first tiny sprouts push through the soil, smelling like sunshine.
📚 In This Guide
- What you need
- Instructions
- Tips and common mistakes
- Wrapping up and next steps
What you need
- ● Lavender seed pods: 10–20 pods (ensure they’re fully dried and harvested from mature lavender plants).
- ● Seed-starting mix: 1–2 gallons of sterile, well-draining potting soil (avoid garden soil—it can compact and suffocate seeds!).
- ● Containers: 2–4 small pots (4–6 inches deep) with drainage holes or a seed tray with individual cells.
- ● Grow lights or sunny windowsill: A south-facing window or a full-spectrum LED grow light (12–16 hours of light daily).
- ● Misting bottle or spray nozzle: For gentle watering (lavender seeds hate soggy soil!).
- ● Plastic wrap or humidity dome: To create a mini greenhouse effect until germination.
- ● Scissors or pruners: For harvesting seed pods (sterilize with rubbing alcohol first!).
- ● Labeled markers or tags: To track planting dates and varieties (lavender seeds are tiny—keep things organized!).
- ● Heating mat: Speeds up germination (lavender seeds germinate best at 60–70°F).
- ● Fertilizer: A balanced, water-soluble fertilizer (diluted to half-strength) for young seedlings.
- ● Garden twine or stakes: To support seedlings as they grow (lavender can get leggy!).
- ● Outdoor space: A sunny, well-drained garden bed (full sun, 6+ hours daily) for transplanting.
- ● Glove or tweezers: For handling tiny seeds without losing them!
Step-by-Step guide to growing lavender from seed pods
Cold-stressed blooms and natural seed pod opening make lavender a rewarding challenge—here's how to coax those fragrant stems from tiny seeds.
🌱 Step 1: Collect and Prepare Mature Seed Pods
Harvest lavender seed pods in late summer after they've turned brown and papery but before they release seeds naturally. I like to collect them on a dry day when the pods are fully mature but still intact. Store them in a paper bag for 2-3 weeks in a cool, dry place to complete drying—this mimics winter's natural stratification process.
Once fully dry, gently crush the pods between your fingers over a clean sheet of paper. The tiny seeds will spill out while the chaff remains behind. You'll need about 20-30 pods to get enough seeds for 4 plants. Sift through the seeds to remove any remaining debris—lavender seeds are so light they'll float away if you're not careful.
💧 Step 2: Cold-Stratify Seeds for Maximum Germination
Lavender seeds require a cold period to break dormancy. Place the seeds in a small container with a damp paper towel, then seal it in a plastic bag with a few small holes for airflow. I store mine in my refrigerator's crisper drawer for 4-6 weeks—this cold treatment mimics winter's natural conditions and significantly improves germination rates.
Check the seeds weekly. The paper towel should stay lightly moist but never soggy. If condensation forms inside the bag, open it for 30 minutes to let excess moisture escape. After 4 weeks, you can transfer the seeds to the freezer for an additional 2 weeks if you're impatient for spring planting.
☀️ Step 3: Sow Seeds in Well-Draining Soil
Fill small pots or seed trays with a mix of 50% potting soil and 50% perlite or coarse sand to ensure excellent drainage—lavender hates wet feet. I use 2-inch pots for each seed to prevent overcrowding. Press the soil down lightly but don't compact it too much; lavender roots need air around them.
Sprinkle the cold-stratified seeds on the soil surface—don't cover them. Lavender seeds need light to germinate, so pressing them just 1/8 inch deep is plenty. Mist the soil gently with water until it's evenly moist but not wet. Place the pots in a warm spot (65-75°F) with bright, indirect light.
🌿 Step 4: Provide Consistent Care for Young Seedlings
Germination can take 2-4 weeks, so be patient. Once seedlings appear, move them to a sunny windowsill or under grow lights for 12-14 hours daily. I keep my lights 4-6 inches above the seedlings to prevent leggy growth. Water gently from the bottom of the pot to avoid disturbing the delicate roots—overwatering is the #1 killer of young lavender.
When seedlings have 2-3 sets of true leaves (not just the initial cotyledons), transplant them into slightly larger pots. Handle them carefully—they're still fragile. After 6-8 weeks, you can begin hardening them off by placing them outside in a sheltered spot for 1-2 hours daily, gradually increasing their time outdoors.
⏰ Step 5: Plant Outdoors After Frost Danger Passes
Wait until all chance of frost has passed in your area before transplanting lavender outdoors. Choose a location with full sun and well-draining soil—lavender won't tolerate soggy conditions. Dig holes slightly larger than the pots and space plants 12-18 inches apart to allow for air circulation, which helps prevent fungal diseases.
Water the plants thoroughly after transplanting, then reduce watering significantly. Lavender is drought-tolerant once established, so only water when the soil is completely dry. You'll know they're thriving when they develop that classic silvery foliage and begin producing those familiar fragrant spikes in their second year.
Tips & tricks for perfect lavender seed pod growth
These simple strategies will help you turn those delicate lavender seeds into thriving plants with minimal fuss.
Pod Collection Timing: Harvest your seed pods when they're fully brown but still firmly attached to the stems. If you wait too long, the pods will release seeds naturally, and you'll miss the chance to control germination. I've found that harvesting on a dry, sunny afternoon helps prevent mold during the drying process in Step 1.
Cold-Stratification Hack: For the 4-6 week cold treatment in Step 2, I place my seed containers in a plastic bag with a few holes to prevent moisture buildup. This mimics natural winter conditions perfectly. The key is maintaining that damp-but-not-wet paper towel—lavender seeds need moisture but will rot if submerged.
Lighting Secret: When seedlings appear in Step 4, I use a simple LED grow light on a timer for 12-14 hours daily. Position it just 4-6 inches above the seedlings to prevent leggy growth. Natural sunlight works too, but cloudy days might require supplemental lighting to maintain consistent growth.
Transplanting Tip: When moving seedlings to larger pots after 6-8 weeks, I use a small spoon to gently loosen the roots before transferring. This reduces transplant shock. Handle them by their leaves rather than the delicate stems—you'll get better results and fewer broken plants.
Pro Tips for Lavender Seed Pods
- These simple strategies will help you turn those delicate lavender seeds into thriving plants with minimal fuss.
- Pod Collection Timing: Harvest your seed pods when they're fully brown but still firmly attached to the stems.
- Cold-Stratification Hack: For the 4-6 week cold treatment in Step 2, I place my seed containers in a plastic bag with a few holes to prevent moisture buildup.
Frequently asked questions
Got questions about growing and harvesting lavender seed pods? You’re not alone! Here are some of the most common queries—plus quick answers to help you navigate the process like a pro.
How long does it take for lavender seed pods to mature?
Lavender seed pods typically take 60–90 days to mature after flowering, depending on your climate. In cooler regions, they may need extra time (up to 4 months). Watch for pods to turn from green to brown and papery—that’s your cue to harvest! Pro tip: Deadhead spent blooms early to encourage new growth and seed development.
Can lavender seed pods survive frost?
Yes, but with caution! Lavender is cold-hardy (USDA Zones 5–9), but immature seed pods can crack or split in freezing temps. If frost is forecasted, harvest pods early or cover plants with frost cloth. Mature, dry pods are more resilient—just avoid handling them when wet.
What if my lavender seed pods won’t open naturally?
Sometimes pods stay closed due to high humidity or lack of drying time. Try these fixes:
- Dry them indoors: Spread pods on a screen in a well-ventilated area for 1–2 weeks.
- Gently tap or shake pods over paper to release seeds.
- Avoid moisture: Store harvested pods in a paper bag (not plastic) to prevent mold.
Are there alternatives to growing lavender from seed pods?
If seed pods aren’t your thing, consider:
- Cuttings: Take 3–4 inch tips from healthy stems, dip in rooting hormone, and propagate in soil.
- Nursery plants: Buy established lavender (like English or French varieties) for faster blooms.
- Division: Split mature lavender bushes in early spring for free plants!
Why are my lavender seed pods turning black or moldy?
Black spots or mold usually mean overwatering or fungal issues. To fix it:
- Reduce watering: Lavender hates soggy soil—water only when the top 1 inch is dry.
- Improve drainage: Amend soil with sand or gravel if planting in containers.
- Remove affected pods and treat with neem oil if mold spreads.
Wrapping up and next steps
Growing lavender seed pods is a rewarding journey that brings fragrant beauty to your garden—even in cooler climates! 🌿 With patience and the right care, you’ll enjoy their delicate blooms and unique seed pods that open naturally.
Whether you’re a seasoned gardener or just starting, this guide gives you everything you need to succeed.
Ready to take the next step? Start by selecting your favorite lavender variety and plant those seeds this season. Your garden—and your senses—will thank you! 🌸