
Lawn
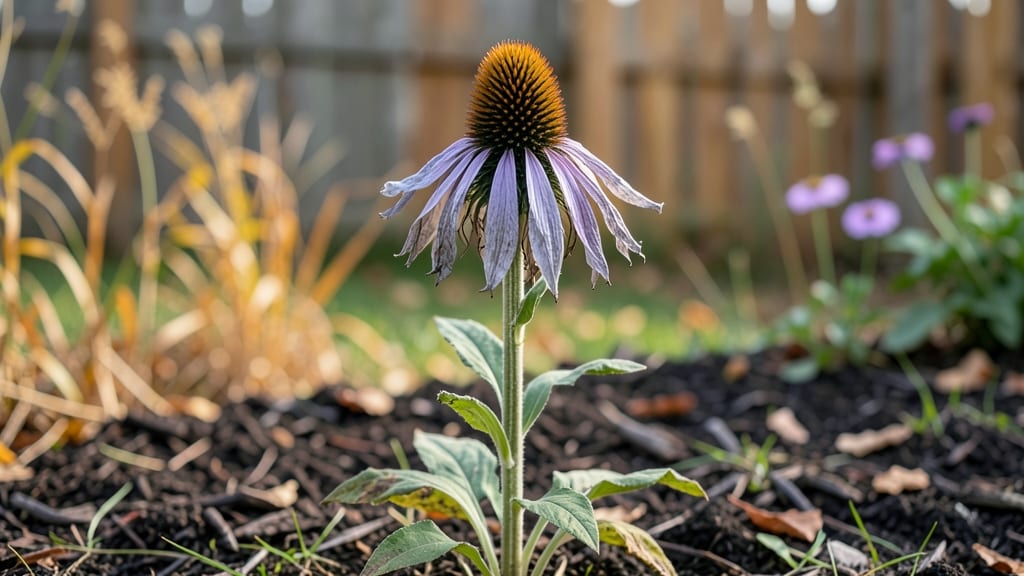
Those dry, papery coneflower seed heads are the secret to next year’s showstopper blooms—and they’re far more useful than you might think. 🌻 I’ve learned that leaving them too long or cutting them back too early can mean fewer flowers in spring, but with the right timing, you’ll have both wildlife visitors and a garden packed with purple cones by summer.
Here’s the trick: wait until late fall (after the first frost) to cut back the stems. Leave the seed heads intact on the plant until then—they feed birds, provide shelter for insects, and look stunning in winter arrangements.
Once frozen, snip the stems at the base, shake out any remaining seeds, and bundle the heads upside-down to dry completely.
What you’ll end up with is a stash of dried seed heads perfect for crafting, winter bouquets, or even pressing into bookmarks. The plants themselves reward your patience with stronger roots and bigger blooms the following season—because those seed heads are basically nature’s fertilizer factory.
Bonus: Save a few seed heads to plant next spring. Scatter the dried seeds directly into garden beds in early spring, and you’ll have volunteer coneflowers popping up everywhere. Just don’t overdo it—these tough perennials spread easily on their own.
📚 In This Guide
- What you need
- Instructions
- Tips and common mistakes
- Wrapping up and next steps
What you need
- ● Mature coneflower seed heads – Harvest when fully brown and dry (late summer to early fall). Aim for at least 5-10 healthy heads for a reliable seed source.
- ● Pruning shears or clean scissors – Sharp tools prevent damage to stems and ensure clean cuts.
- ● Brown paper bags or breathable mesh bags – 2-3 bags (one per 3-4 seed heads) to allow airflow and prevent moisture buildup.
- ○ Newspaper or cardboard – For a flat drying surface (optional but helpful for larger batches).
- ● Twine or rubber bands – To secure seed heads in bags and keep them upright.
- ● Labeling tags and markers – To note varieties (e.g., "Purple Coneflower – 2024") if growing multiple types.
- ● Fan or dehumidifier – For faster drying in humid climates.
- ● Glass jars with lids – For long-term seed storage (quart-sized jars work well).
- ● 💡 Dry, well-ventilated space – A garage, shed, or indoor area with low humidity (below 50%) is ideal.
- ● 🌤️ Sunny weather (for outdoor drying) – If hanging seed heads outside, choose a warm, dry day to avoid mold.
- ● 📅 Patience! – Drying takes 2-4 weeks, depending on conditions.
Step-by-step guide to drying coneflower seed heads
Here’s how to preserve those striking seed heads for next year’s garden—no fancy tools required.
🌿 Step 1: Harvest at the Right Stage
Wait until the seed heads turn a mature brown, but before any seeds scatter in the wind. You’ll know they’re ready when the petals have fully fallen away, leaving just the spiky central cone. Use clean, sharp scissors or pruners to cut the stems at a 45-degree angle, about 2-3 inches below the seed head. This prevents water from pooling at the cut and encourages new growth from the base.
Harvest on a dry morning after any morning dew has evaporated. Wet stems can harbor mold, and you want the seed heads to start drying immediately. If you’re working with multiple stems, bundle them loosely with twine to keep them upright—this prevents the heads from touching each other and reduces the risk of mildew.
⏰ Step 2: Air-Dry in a Controlled Space
Choose a spot with indirect sunlight and good airflow, like a covered porch or a well-ventilated room. Avoid direct sunlight, which can bleach the seed heads and make them brittle. Hang the bundles upside down from a hook or lay them flat on a mesh screen, ensuring the heads aren’t touching any surface.
Check the seed heads every 2-3 days. They’re ready when the cones feel dry and papery to the touch, and the stems snap cleanly when bent. If you notice any signs of mold (fuzzy spots or musty smells), remove those stems immediately and adjust the drying location to a drier, better-ventilated spot.
🪴 Step 3: Store Properly for Long-Term Use
Once fully dry, gently separate the seed heads from their stems and store them in paper envelopes or breathable fabric bags. Avoid plastic containers—they trap moisture and encourage mold. Label each envelope with the coneflower variety and the year, so you don’t lose track of your favorites.
Store the seed heads in a cool, dry place, like a closet or pantry, where the temperature stays between 50-70°F. Check them once a month to ensure no moisture has accumulated. If stored correctly, these seed heads can remain viable for 1-2 years, ready to scatter in your garden for next season’s blooms.
✂️ Step 4: Prepare for Planting Next Season
When you’re ready to plant, open the envelope and gently shake the seed heads over your prepared garden bed. The wind will carry the lightweight seeds away, but you can also use a small funnel or your fingers to distribute them evenly. Lightly rake the soil to cover the seeds with a ¼-inch layer of dirt—this protects them from birds and ensures good soil contact for germination.
Water the area lightly but don’t soak it. Coneflower seeds need moisture to sprout, but too much water can wash them away or cause them to rot. Keep the soil consistently moist until the seedlings emerge, which typically takes 2-4 weeks. Once they’re up, thin them to 12-18 inches apart to give each plant room to grow.
Tips & tricks for perfect coneflower seed head preservation
Preserving coneflower seed heads properly ensures vibrant blooms next season—here’s how to avoid common pitfalls and elevate your drying process.
Timing Secret: Harvest in the early morning after dew has evaporated, but before seeds scatter. The 2-3 inch cut below the seed head isn’t just about aesthetics—it prevents water pooling at the stem base, which can rot the cut and introduce mold. I’ve seen gardeners skip this detail and end up with moldy batches after just a few days of drying.
Airflow Matters: The instructions emphasize indirect sunlight, but airflow is equally critical. If you’re drying in a room, position a small fan nearby to create gentle circulation. I’ve dried seed heads in a closed garage once and ended up with fuzzy mold within 48 hours—don’t make my mistake! The 2-3 day check-ins are your best defense against hidden moisture.
Storage Wisdom: Paper envelopes or breathable fabric bags are non-negotiable—they allow moisture to escape while protecting the seeds. I’ve tried plastic containers (thinking they’d be more airtight) and ended up with condensation that ruined entire batches. Store in a cool, dry spot between 50-70°F, and label each envelope with the variety and date. This simple habit saved me from planting the wrong seeds last spring!
Planting Precision: When scattering seeds next season, that ¼-inch soil coverage is crucial. Too deep, and they won’t germinate; too shallow, and birds will snatch them up. I’ve found that using a small funnel or even a folded piece of cardboard helps distribute seeds evenly without overcrowding. Lightly rake the soil to create a fine, even layer—this mimics natural seed dispersal patterns.
Pro Tips for Coneflower Seed Heads
- Preserving coneflower seed heads properly ensures vibrant blooms next season—here’s how to avoid common pitfalls and elevate your drying process.
- Timing Secret: Harvest in the early morning after dew has evaporated, but before seeds scatter.
- Airflow Matters: The instructions emphasize indirect sunlight, but airflow is equally critical.
Frequently asked questions
Got questions about saving and using coneflower seed heads? You’re not alone! Here are some of the most common inquiries—plus quick, practical answers to keep your garden thriving.
How do I know when coneflower seeds are fully mature?
Coneflower seeds are ready for harvest when the seed heads turn brown and papery (not just tan or green). Gently squeeze a seed pod—if it crumbles easily, it’s time! Wait too long, and seeds may scatter. Aim for late summer to early fall, depending on your climate. Pro tip: Harvest on a dry day to prevent mold.
Can I dry coneflower seed heads indoors?
Yes! Bundle 3–5 seed heads together with twine and hang them upside down in a warm, dry, well-ventilated spot (like a closet or attic). Avoid direct sunlight or heat sources—think low and slow, like a slow-cooker on “warm.” It’ll take 2–4 weeks. Alternative: Place them in a single layer on a screen tray for faster drying.
Will birds or squirrels steal my seed heads before I can collect them?
Birds love coneflower seeds, and critters will snack on them if given the chance. To outsmart them, harvest seed heads early (before they fully open) or cover them with fine mesh bags. If you’re late to the game, check for empty seed pods—those are bird buffet leftovers! Bonus: Leave a few seed heads for wildlife if you’re okay sharing.
How should I store dried coneflower seeds?
Once fully dry, remove seeds from the heads by rubbing them between your palms or gently crushing the pods. Store seeds in a paper envelope or airtight container with a desiccant packet (like silica gel) to absorb moisture. Label with the date—coneflower seeds stay viable for 2–3 years if kept cool and dry. Warning: Avoid plastic bags to prevent mold.
What if my coneflower seed heads won’t dry, even after weeks?
Humidity or damp conditions can stall drying. If seed heads stay sticky or moldy, act fast! Move them to a dehumidifier or fan-cooled area and separate any mushy pods. If mold appears, discard those seeds—fungal spores can harm future blooms. Prevention: Harvest during dry spells or use a small fan to speed up airflow.
Wrapping up and next steps
Coneflower seed heads aren’t just charming—they’re nature’s way of ensuring next year’s vibrant blooms! 🌻 By mastering the art of drying them properly, you’re setting the stage for a stunning garden comeback. Whether you’re a seasoned gardener or just starting, these tricks will make your coneflowers thrive year after year.
Ready to put your newfound knowledge to work? Grab those dried seed heads, find a cozy spot in your garden, and plant them this fall! Your future blooms will thank you—happy gardening! 🌱