
Lawn
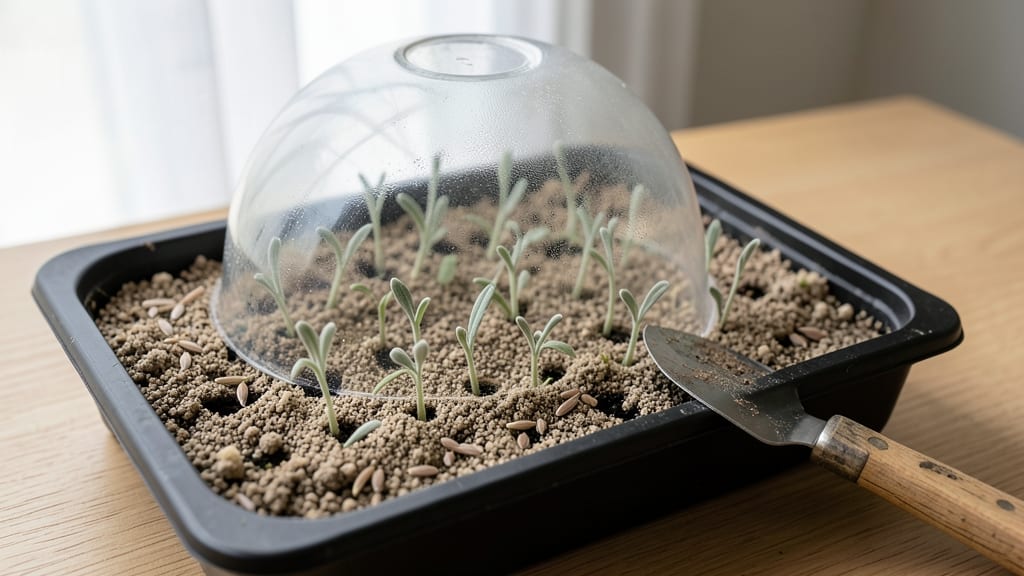
Growing the lavender seed sprouts means cold-stressed germination is your secret weapon for hardier plants. ✨ That chilly step mimics winter conditions lavender needs to thrive, and it’s what separates floppy seedlings from plants that stand tall through drought and heat.
I’ve tried the standard warm-start method—it works, but these cold-treated seeds develop roots that dive deep and stay put, just like their mature cousins.
You’ll need a few simple supplies: fresh lavender seeds (not those old packets from the garage), a shallow tray, damp paper towels, and a plastic bag to trap moisture. The trick is patience—these seeds won’t rush.
After 2-3 weeks in the fridge, move them to a sunny windowsill or under grow lights. Too much heat or light too soon, and you’ll get leggy, weak sprouts that flop over like overwatered weeds.
Once those first pale green shoots appear—usually in 2-4 weeks—you’ll want to keep the soil barely moist, not soggy. Overwatering is the fastest way to invite damping off, that sad fungal rot that turns seedlings to mush overnight.
A spray bottle keeps roots happy without drowning them, and a south-facing window gives them the gentle light they crave before transplanting.
Here’s the game-changer: these cold-stressed seedlings handle transplant shock like pros. By the time they’re ready to move to pots, they’ll be stocky, dark green, and ready to face the elements—no coddling required. That’s how you grow lavender that lasts, not just survives. Let’s get those seeds sprouting right.
📚 In This Guide
- What you need
- Instructions
- Tips and common mistakes
- Wrapping up and next steps
What you need
- ● Lavender seeds: 1–2 tbsp (organic, non-hybrid if possible for best results).
- ● Seed-starting mix: 2–3 cups of sterile, well-draining potting soil (avoid garden soil—it’s too dense!).
- ● Small containers: 2–4 biodegradable pots (3–4 inches deep) or a seed tray with drainage holes.
- ● Plastic wrap or humidity dome: To retain moisture during germination.
- ● Spray bottle: For gentle watering (avoid over-saturating the soil!).
- ● Refrigerator or cold frame: To mimic winter conditions (40–50°F for 2–4 weeks).
- ● Grow lights: LED or fluorescent (12–14 hours/day) for post-cold-stress growth.
- ○ Heating mat (optional): If your space is chilly (<50°F), to maintain warmth after germination.
- ● pH test kit: To ensure soil pH is between 6.0–7.0 (lavender prefers slightly alkaline soil).
- ● Fertilizer (mild): A balanced, water-soluble fertilizer (5-5-5 or 10-10-10) for young sprouts.
- ● Pruning shears: For trimming leggy sprouts later in growth.
Step-by-step instructions for cold-stressed lavender germination
Here's how to coax stubborn lavender seeds into strong, resilient sprouts using cold stratification.
🌱 Step 1: Soak Seeds to Soften the Hard Coat
Lavender seeds have tough outer shells that need softening before germination. Place the seeds in a bowl and cover them completely with lukewarm water for 24 hours. This mimics natural winter moisture and breaks dormancy. I like to use a small mesh bag so the seeds stay contained while soaking.
After soaking, drain the water completely. The seeds should feel slightly softer to the touch but still intact. If any seeds break apart, they're too old or damaged—discard them. This step ensures even moisture distribution during the cold treatment phase, which is critical for uniform germination.
❄️ Step 2: Cold-Stratify for 4-6 Weeks
Fill a sealed plastic bag with damp but not soggy peat moss or coconut coir (about 1/3 cup per bag). Add the soaked seeds and seal the bag tightly, squeezing out excess air. Place the bag in your refrigerator's crispier drawer where temperatures hover around 35-40°F.
Check the bag weekly—condensation should form inside but the moss should never feel wet. If moisture builds up, open the bag for 10 minutes to air it out. Cold stratification mimics winter conditions, breaking dormancy while preventing rot. You'll know it's working when tiny white roots appear after 3-4 weeks.
🌿 Step 3: Prepare Germination Trays
Fill 4-inch seed trays with a light, sterile seed-starting mix (avoid garden soil—it's too dense). Moisten the mix until it feels like a wrung-out sponge. Press the surface lightly to create a firm seedbed, then make shallow 1/4-inch deep furrows with your finger.
Space the furrows 1 inch apart to prevent crowding. Lavender seedlings are delicate, so avoid compacting the soil further. Place the trays in a cool, bright location (like a north-facing windowsill) where temperatures stay between 60-65°F during the day. This gradual warmth transition prevents shock after cold stratification.
💧 Step 4: Sow and Maintain Moisture
Remove the seeds from cold storage and gently place them in the furrows, spacing them 1/2 inch apart. Cover lightly with a thin layer of mix—just enough to obscure the seeds. Mist the surface with a spray bottle until the top inch feels evenly moist but not saturated.
Cover the trays with a clear plastic dome or plastic wrap to retain humidity. Check daily and remove the cover for 10 minutes to prevent fungal growth. Germination typically takes 14-28 days, with some seeds taking longer. You'll see the first true leaves emerge as small, rounded cotyledons—this is your signal to reduce humidity gradually over 5 days.
☀️ Step 5: Transition to Light and Air
Once 50% of seeds have sprouted, remove the dome completely and move trays to a location with bright, indirect light for 1 week. Gradually introduce direct sunlight by placing them near an east-facing window for 2 hours daily, then increase exposure by 1 hour daily until they tolerate 6+ hours of sun.
Water from the bottom by placing trays in 1/2 inch of water for 10 minutes, then drain excess. This prevents stem rot while keeping roots consistently moist. You'll know the seedlings are adapting when they develop deep green leaves and sturdy stems—ready for transplanting after 6-8 weeks.
Tips & tricks for perfect lavender germination
Cold-stratification isn't just a method—it's an art that transforms stubborn lavender seeds into thriving plants. Here's how to master each critical step.
Soaking Precision: The 24-hour soak is your first opportunity to set the stage for success. Use lukewarm water—not hot—that stays between 85-95°F to avoid shocking the seeds. I've found that placing the bowl in a sink with 2 inches of water creates a stable bath temperature. After draining, pat the seeds gently with a paper towel to remove surface moisture; this prevents mold during cold stratification. The goal is to soften the seed coat without compromising its integrity.
Cold Stratification Secrets: The 4-6 week cold treatment is where magic happens, but consistency is key. I've learned the hard way that using a refrigerator's crispier drawer (around 35-40°F) gives the most reliable results—avoid the freezer or door shelves where temperatures fluctuate. Place a small thermometer inside the bag to monitor conditions. If you notice condensation forming on the bag's exterior, it's a sign the moisture balance is correct. The tiny white roots that appear after 3-4 weeks are your first visible reward for patience.
Light Transition Strategy: The gradual light introduction in Step 5 is often where beginners rush things. Start with bright, indirect light for that full week—north-facing windows are ideal—before moving to direct sun. I've seen seedlings scorch when moved too quickly to south-facing windows. For indoor growers, a simple LED grow light on a timer (12 hours on/12 hours off) can replicate natural daylight cycles perfectly. Watch for the seedlings to develop deep green leaves; this is your signal they're adapting well to their new environment.
Pro Tips for Lavender Seed Sprouts
- Cold-stratification isn't just a method—it's an art that transforms stubborn lavender seeds into thriving plants. Her...
- Soaking Precision: The 24-hour soak is your first opportunity to set the stage for success. Use lukewarm water—not ho...
- Cold Stratification Secrets: The 4-6 week cold treatment is where magic happens, but consistency is key. I've learned...
Frequently asked questions
Got questions about growing lavender seed sprouts?
You’re not alone! Here are answers to the most common queries—from timing to troubleshooting—to help you cultivate hardier lavender plants with confidence.
How long does it take for lavender seed sprouts to appear?
Lavender seeds are notoriously slow to germinate—often taking 2 to 4 weeks (or even longer!) under ideal conditions. Cold-stratification (chilling) is key: plant seeds in fall or use a fridge for 4–6 weeks before sowing. Patience pays off—don’t give up if sprouts don’t show immediately!
Why is cold-stratification necessary for lavender seeds?
Cold-stratification mimics winter, breaking seed dormancy and improving germination rates. Without it, lavender seeds may never sprout. Simply mix seeds with moist sand, seal in a bag, and refrigerate for 4–6 weeks. This trick mimics nature’s way of preparing seeds for spring growth.
Can I grow lavender from seed indoors before transplanting?
Yes! Start seeds in small pots with well-draining soil (like a mix of perlite and potting soil) under grow lights. Keep soil consistently moist but not soggy, and transplant seedlings outdoors after the last frost when they’re 2–3 inches tall. Harden them off gradually to avoid shock.
What should I do if my lavender sprouts turn yellow or wilt?
Yellowing or wilting often signals overwatering or poor drainage. Lavender hates soggy roots—ensure pots have drainage holes and soil dries between waterings. If mold appears, reduce moisture and improve airflow. Pro tip: Use a spray bottle for gentle watering instead of soaking the soil.
Are there faster alternatives to growing lavender from seed?
If you’re eager for lavender, consider cuttings or buying established plants. Cuttings (from healthy stems) root in 2–4 weeks with a rooting hormone. Nursery plants skip the slow seed phase but may cost more. For seed growers, patience (and cold-stratification) is your best friend!
Wrapping up and next steps
Growing lavender seed sprouts through cold-stressed germination is a rewarding way to cultivate hardier, more resilient plants—perfect for your lawn or garden! 🌱 By mastering this technique, you’re not just nurturing seeds; you’re building a foundation for thriving lavender that can withstand cooler climates.
Ready to take the next step? Start by experimenting with small batches of seeds, then gradually expand your lavender patch for a fragrant, low-maintenance landscape.
Your green thumb is all it takes—happy planting! 🌿