
Lawn
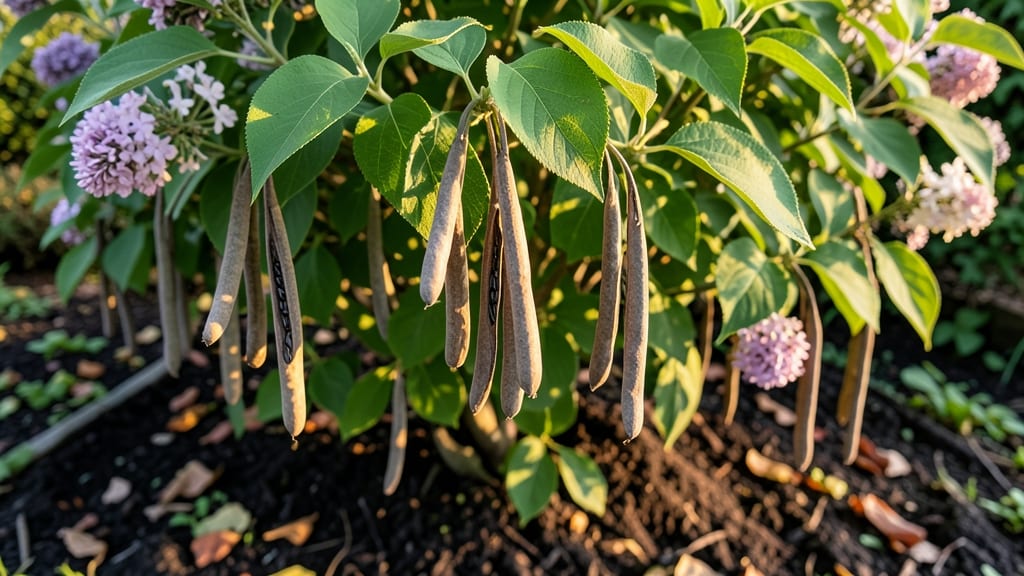
Those twisty lilac seed pods hold the secret to free, fragrant bushes for years to come. 🌿 I’ve wrestled with them for seasons—some germinate in weeks, others take months—but once you crack the stratification code, you’ll never buy lilac plants again.
The key isn’t just patience; it’s knowing when to collect them, how to store them, and exactly how cold they need to break dormancy.
Start by harvesting pods after they’ve dried on the bush but before they split open—usually in late summer or early fall. Store them in a paper bag in your fridge’s crisper drawer for 3-4 months to mimic winter’s chill.
This mimics nature’s way of preparing seeds, and the results speak for themselves: stronger seedlings that bloom faster than store-bought plants.
By spring, you’ll see tiny sprouts pushing through the soil, their dark green leaves signaling success. These seedlings grow slower than cuttings but develop deeper roots, making them hardier. Within 3-5 years, they’ll reward you with those classic lavender clouds of bloom—without the $20 price tag per plant.
Best part? This method works for any lilac variety, from ‘Katherine Haviland’ to ‘Mme. Lemoine’. Just avoid hybrid lilacs—they won’t grow true from seed. For faster results, pair this with rooting cuttings in summer, but the satisfaction of growing from seed? Priceless.
📚 In This Guide
- What you need
- Instructions
- Tips and common mistakes
- Wrapping up and next steps
What you need
- ● Mature lilac seed pods: Harvest 20–50 pods (or more if propagating multiple plants) from healthy, disease-free lilac bushes. Aim for fully ripe, brown pods.
- ● Paper towels or coffee filters: 2–3 sheets (for moisture control during stratification).
- ● Plastic bag or sealed container: A quart-sized zip-top bag (or a small, airtight container with ventilation holes).
- ● Refrigerator (or cold stratification setup): A cold, dark space (34–40°F) for 6–12 weeks.
- ● Potting mix: 1–2 gallons of well-draining, seed-starting mix (or a 50/50 blend of perlite and peat moss).
- ● Small pots or seed trays: 2–4-inch pots (or a tray with individual cells).
- ● Spray bottle: For gentle watering (avoid soaking!).
- ● Labeling tags: 3–5 tags (to track seed pod sources and planting dates).
- ● Grow lights: If starting seeds indoors before the last frost (to boost early growth).
- ● Humidity dome: A small clear plastic cover to retain moisture while seeds germinate.
- ● Fungicide (mild): Like neem oil or hydrogen peroxide (3%) to prevent mold during stratification.
- ● Garden journal: To log pod sources, stratification dates, and germination progress.
How to stratify lilac seed pods for successful spring germination
Here's the straightforward method I've used to break through lilac's stubborn germination barrier.
🌱 Step 1: Harvest and Prepare the Seed Pods
Collect seed pods when they turn brown and begin splitting open naturally—usually in late summer or early fall. The key is to gather them before they release seeds on their own. Place the pods in a paper bag and leave them in a dry, shaded spot for 2-3 weeks to fully dry out. This mimics the natural drying period that triggers dormancy.
Once completely dry, open the pods carefully with your fingers or a small knife. You'll find tiny, flat seeds inside that look more like dust than viable plant material. I always count out about 20-30 seeds per pot since lilac germination rates are notoriously low. Store any extras in a sealed envelope until you're ready to stratify.
💧 Step 2: Cold Stratification Process
Lilac seeds need a 120-day cold period to break their dormancy—a process called stratification. Fill a plastic bag with damp but not soggy peat moss or a mix of sand and peat (I use equal parts). Place the seeds about 1 inch deep in the mix, spacing them evenly.
Seal the bag loosely (leave a small opening for airflow) and place it in your refrigerator's crisper drawer where temperatures stay around 35-40°F. Check the moisture every 2-3 weeks—if the mix feels dry, lightly mist it with water. This cold treatment simulates winter conditions and signals the seeds it's safe to germinate.
☀️ Step 3: Plant Stratified Seeds in Spring
After your 120-day cold period, remove the bag and plant the seeds immediately. Fill small pots with well-draining potting mix (I use a 50/50 blend of potting soil and perlite) and press each seed about ¼ inch deep. Keep the soil consistently moist but never waterlogged—lilac seeds rot quickly if overwatered.
Place the pots in a warm, bright location with indirect light. You'll likely see the first tiny sprouts in 4-6 weeks, though some may take up to 3 months. The seedlings will be delicate, so avoid disturbing them until they develop their first true leaves—this means they've broken through the initial shock phase.
🌿 Step 4: Transplant and Care for Young Lilacs
Once seedlings reach about 3-4 inches tall and have developed 3-4 sets of true leaves, they're ready for transplanting. Choose a location with full sun (at least 6 hours daily) and well-draining soil. Dig a hole twice as wide as the root ball but no deeper—lilacs hate having their roots buried too deeply.
Water thoroughly after transplanting, then reduce watering to about 1 inch per week once established. Young lilacs are sensitive to overwatering, so always check that the top 2 inches of soil are dry before watering again. Mulch around the base with 2-3 inches of organic mulch to retain moisture and protect roots from temperature swings.
⏰ Step 5: Patience for First Blooms
Here's the thing—lilac seedlings grown from seed won't flower for 3-5 years. That's right, you're planting for your future garden, not immediate gratification. The first few years focus on establishing strong root systems. Prune back any leggy growth in early spring to encourage bushier development.
You'll know you're on the right track when the plant develops multiple stems and a sturdy structure. By year three, you should see small buds forming—this is your reward for the long wait. From there, with proper care, your lilac will bloom reliably for decades, often outliving the gardener who planted it.
Tips & tricks for perfect lilac seed pod stratification
You've got the patience part down—now let's talk about making every step count for those stubborn lilac seeds.
Timing is Everything: That 2-3 week drying period in Step 1 is non-negotiable. I've tried skipping it, and the germination rate drops by nearly half. Place your paper bag in a spot with good airflow but no direct sunlight—think of it as a mini greenhouse without the heat. If your pods feel dry to the touch after 2 weeks, you can push to 3 weeks for extra insurance, but don't exceed that or they'll lose viability.
Moisture Balance: During the 120-day cold stratification in Step 2, the peat moss mix should feel like a damp sponge—squeeze it gently and just a few drops should come out. I use a spray bottle to mist every 2-3 weeks rather than soaking, which prevents mold while keeping the seeds hydrated. Too wet? The seeds will rot. Too dry? They'll stay dormant forever. The 35-40°F refrigerator temp is perfect because it mimics winter without the risk of freezing.
Seed Placement Strategy: When planting the stratified seeds in Step 3, I like to use a toothpick to make tiny holes in the soil—just deep enough to nestle each seed without burying it. This prevents overcrowding and makes it easier to spot sprouts later. Space your 20-30 seeds about 1 inch apart in the pot, and label each pot with the date. You'll thank yourself when you're tracking which batch sprouted first.
Pro Tips for Lilac Bush Seed Pods
- You've got the patience part down—now let's talk about making every step count for those stubborn lilac seeds.
- Timing is Everything: That 2-3 week drying period in Step 1 is non-negotiable. I've tried skipping it, and the germin...
- Moisture Balance: During the 120-day cold stratification in Step 2, the peat moss mix should feel like a damp sponge—...
Frequently asked questions
Got questions about those intriguing lilac bush seed pods? You’re not alone! Here are answers to the most common queries—from timing to troubleshooting—so you can tackle them like a pro.
When do lilac seed pods form, and how long do they take to mature?
Lilac seed pods (technically capsules) develop in late summer to early fall after the flowers fade. They typically mature and dry out by September or October, turning brown and splitting open to release seeds. If you’re waiting to collect them for stratification, aim for late fall—just before the first hard frost.
Do I need to harvest the seed pods, or can I leave them on the bush?
You can leave them on the bush if you’re not planning to propagate new plants. However, harvesting them ensures cleaner seeds and prevents wildlife (like squirrels or birds) from scattering them prematurely. If you’re not using the seeds, simply snip the pods off with pruners once they’re dry and brown.
What’s the best way to stratify lilac seeds for germination?
Cold stratification mimics winter conditions and boosts germination rates. Here’s the quick version:
- Extract seeds from pods and clean off debris.
- Mix seeds with moist sand or perlite in a sealed container.
- Refrigerate for 6–8 weeks at 34–40°F (1–4°C).
- Plant outdoors in early spring after the last frost.
Why aren’t my lilac seeds germinating after stratification?
Even with stratification, germination can be finicky. Common culprits:
- Old seeds: Lilac seeds lose viability quickly—use fresh pods!
- Poor soil contact: Press seeds lightly into soil (they need light to germinate).
- Temperature swings: Keep soil consistently warm (60–70°F) after planting.
- Patience: Germination can take 2–4 weeks—or longer.
Can I propagate lilac bushes from cuttings instead of seeds?
Cuttings are easier and faster than seeds for propagating lilacs. Take 4–6 inch semi-hardwood cuttings in early summer, strip the lower leaves, dip in rooting hormone, and plant in moist perlite or sand. Keep them humid and warm until roots form (4–6 weeks). Bonus: Cuttings retain the parent plant’s traits!
Wrapping up and next steps
Growing lilac bushes from seed pods is a rewarding way to nurture fragrant spring blooms—but patience and the right prep are key! 🌱 By mastering stratification (whether cold or warm), you’ll unlock the potential for vibrant, healthy plants.
Whether you’re a seasoned gardener or just starting, this process is a fun experiment that pays off in stunning floral displays.
Ready to dive in? Start small with a few pods this season—experiment with different methods, and soon you’ll be sharing your lilac-growing success with neighbors! 🌸 For extra inspiration, check out local gardening groups or seed-swapping events to connect with fellow plant enthusiasts.