
Propagation
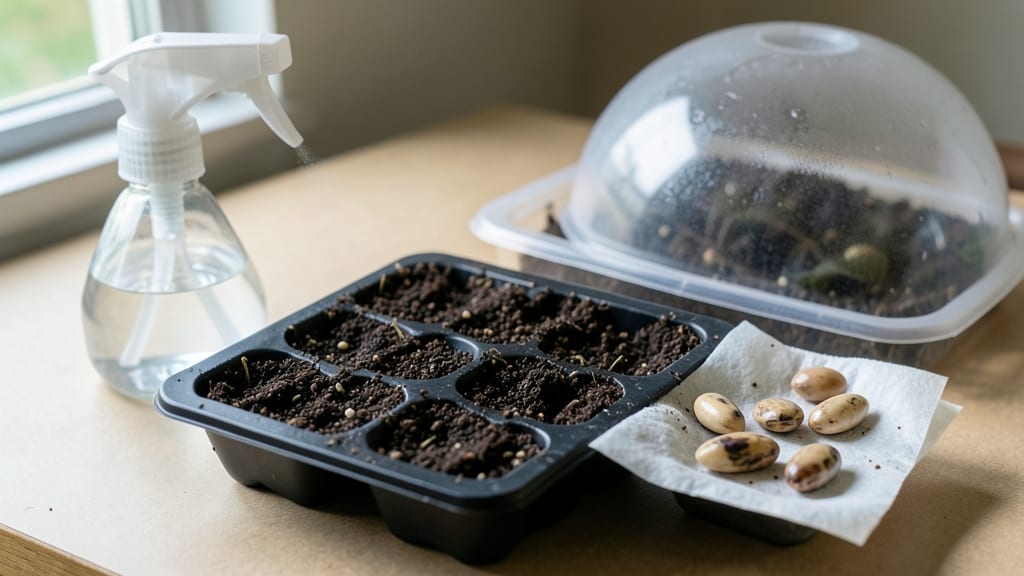
Lupine seed germination needs a pre-chill trick to wake up—three months of cold stratification mimics their natural winter dormancy and unlocks faster, more reliable sprouting. 🌱 I learned this the hard way after struggling with stubborn seeds that refused to germinate until I replicated their alpine growing conditions at home.
The process is simple but requires patience: place seeds in a damp paper towel, seal them in a plastic bag, and refrigerate for 90-120 days. This cold treatment breaks their dormancy so they'll burst through soil within 7-14 days after planting—no more waiting months for germination.
The key is consistency: check moisture weekly and avoid letting the towel dry out.
Once chilled, sow seeds ½ inch deep in well-draining soil kept at 60-70°F. Lupines thrive in full sun and lean soil, so mix in sand or perlite if your garden stays heavy.
You'll see those first pale green shoots within two weeks, signaling you've cracked the code for growing these striking perennials.
Common challenges include mold (from over-moisture) or slow sprouting (under-chilling). If seeds still resist after stratification, try nicking the tough seed coat with sandpaper—just don't damage the embryo. With this method, even first-time gardeners can expect 80%+ germination rates and lush lupine blooms by next summer.
📚 In This Guide
- What you need
- Instructions
- Tips and common mistakes
- Wrapping up and next steps
What you need
- ● Lupine seeds: 10–50 seeds (depending on your project scale; choose hard-coated varieties for best results).
- ● Germination container: A sealed plastic bag (quart or gallon size) with a zip-top closure, or
- ● A glass jar with a tight-fitting lid (e.g., a mason jar with a rubber seal).
- ● Moistened paper towels or germination mat: 2–3 sheets (cut to fit your container) or 1 pre-moistened mat.
- ● Spray bottle: With water (for gentle misting).
- ● Refrigerator: With a crisp producer drawer or a space where temperature stays between 34–41°F (1–5°C).
- ● Notebook & pen: To track germination progress (dates, seed count, observations).
- ● Seedling heat mat: For post-chill warmth (65–75°F / 18–24°C) if your home runs cool.
- ● Humidity dome: To maintain moisture during the warm-up phase.
- ● Grow lights: If sprouting in low-light conditions (12–16 hours/day).
- ● Labeling tags: To mark seed varieties and chill dates.
- ● Fine-mist sprayer: For even moisture distribution.
Step-by-step lupine seed germination with pre-chill technique
Here's how to break through lupine's natural dormancy for reliable, speedy sprouting.
🌱 Step 1: Prepare Seeds with Cold Stratification
Lupine seeds require a 6-8 week cold treatment to mimic winter conditions and trigger germination. Place seeds in a resealable plastic bag with a moistened paper towel—just enough dampness to feel slightly damp when squeezed, not dripping. Seal the bag and refrigerate at 34-40°F for the full period.
Check weekly to ensure the towel remains moist. If it dries out, add a few drops of water and reseal. This cold stratification period is critical—skipping it results in stubborn seeds that may never sprout. I like to label the bag with the date to track progress accurately.
⏰ Step 2: Monitor Seed Development During Stratification
After 4-6 weeks in cold storage, you'll notice the seeds begin to plump slightly and develop a small white root (radicle) breaking through the seed coat. This is your signal that stratification is working. Don't open the bag yet—wait until you see clear root growth before proceeding.
If seeds show mold or an unpleasant smell, discard them immediately. This indicates too much moisture or contamination. Healthy seeds will maintain a clean appearance while developing roots. The goal is to create an environment where seeds think winter has passed and spring has arrived.
🪴 Step 3: Sow Stratified Seeds in Prepared Soil
Fill 4-inch pots with well-draining seed-starting mix (never garden soil—it's too dense). Plant seeds ½ inch deep, spacing them 1 inch apart in each pot. Lupines appreciate a slightly acidic mix, so I often add ½ teaspoon of sulfur per gallon of mix for optimal pH.
Water gently until the soil surface feels evenly moist but not soggy. Place pots in a humidity dome or cover with plastic wrap to maintain consistent moisture levels. The key here is patience—lupines won't rush to sprout, but they'll reward you with strong, healthy seedlings.
☀️ Step 4: Provide Warmth and Light for Germination
Move pots to a warm location (around 65-70°F) with bright indirect light immediately after sowing. Lupines need warmth to complete germination, which typically occurs in 14-21 days after planting. Avoid direct sunlight at this stage—it can overheat the soil and damage delicate sprouts.
You'll know germination is successful when small green leaves (cotyledons) emerge. At this point, remove the humidity cover and provide 12-14 hours of light daily. If seedlings appear leggy or pale, they need more light—move them within 2 inches of a grow light or to a sunnier window.
🌿 Step 5: Thin and Harden Off Seedlings
Once seedlings develop 2-3 sets of true leaves (not just the initial cotyledons), thin to the strongest seedling per pot. Use scissors to snip unwanted seedlings at soil level—this prevents disturbing roots of remaining plants. Lupines grow quickly, so don't delay thinning or you'll risk overcrowding.
Begin hardening off seedlings 2 weeks before transplanting by placing them outside in partial shade for 1-2 hours daily, gradually increasing exposure. Lupines are sensitive to transplant shock, so take your time with this process. By the time you're ready to move them outdoors, they'll be tough enough to handle garden conditions.
Tips & tricks for perfect lupine seed germination
Lupine seeds are stubborn—here's how to turn that challenge into reliable, speedy sprouting success.
Cold Stratification Precision: The 6-8 week cold treatment at 34-40°F is non-negotiable for lupines. I place my seeds in a resealable bag with a moistened paper towel and store them in the crisper drawer of my refrigerator—this maintains the most consistent temperature. The key is keeping that towel just damp, not wet; squeeze it occasionally to check. Too much moisture causes mold, too little halts germination entirely. Think of it as mimicking a winter chill that signals to seeds, "Spring is coming!"
Monitoring Seed Development: After those crucial 4-6 weeks, you'll notice the seeds plump slightly and develop tiny white roots. This is your green light to proceed—don't rush it! I've learned the hard way that opening the bag too soon can shock the seeds. Wait until you see clear root growth before planting. If you spot mold or an unpleasant smell, discard those seeds immediately—this is your body telling you the environment went wrong.
Soil Preparation Strategy: Lupines despise dense garden soil, so use a well-draining seed-starting mix in 4-inch pots. The slight acidity boost from ½ teaspoon of sulfur per gallon of mix makes all the difference. I always water gently until the surface feels evenly moist but not soggy—lupines hate soggy conditions. The humidity dome or plastic wrap keeps moisture levels perfect while preventing overwatering. Remember, patience is your ally here; these seeds won't rush, but they'll reward you with strong seedlings.
Light and Temperature Balance: Once planted, move your pots to a warm spot (65-70°F) with bright indirect light. I use a south-facing window with sheer curtains to diffuse harsh sunlight. Lupines need that warmth to complete germination, which typically happens in 14-21 days. If your seedlings start looking leggy or pale, they're begging for more light—move them within 2 inches of a grow light. The goal is to give them enough warmth to germinate but enough light to grow strong without burning.
Pro Tips for Lupine Seed Germination
- Lupine seeds are stubborn—here's how to turn that challenge into reliable, speedy sprouting success.
- Cold Stratification Precision: The 6-8 week cold treatment at 34-40°F is non-negotiable for lupines.
- Monitoring Seed Development: After those crucial 4-6 weeks, you'll notice the seeds plump slightly and develop tiny white roots.
Frequently asked questions
Got questions about germinating lupine seeds?
Here are the most common ones—plus clear, actionable answers to help you succeed with your pre-chill technique!
Do lupine seeds need a pre-chill treatment to germinate?
Lupine seeds are hard-coated, meaning they require a cold stratification period (typically 4–6 weeks in the fridge) to break dormancy. Skipping this step can lead to slow or uneven germination. Think of it as a "wake-up call" for the seed—just like how a good winter helps bulbs bloom in spring!
How long does it take for lupine seeds to germinate after pre-chilling?
After your 4–6 week cold treatment, germination usually kicks in within 7–21 days once planted in warm, moist soil. Patience is key—some seeds may take longer, especially in cooler conditions. Keep the soil consistently moist (not soggy) and maintain temperatures above 60°F (15°C) for best results.
Can I speed up germination without pre-chilling?
While pre-chilling is the gold standard for lupines, you can try scarification (lightly sanding or nicking the seed coat) as an alternative. Soak seeds in warm water for 24 hours first, then plant. However, results may vary—pre-chilling still yields the most reliable and consistent sprouting.
Why aren’t my lupine seeds germinating after pre-chilling?
If your seeds aren’t sprouting, check these common culprits:
- Inconsistent moisture: Keep soil damp (like a wrung-out sponge).
- Temperature issues: Too cold (<50°F/10°C) slows growth; too hot (>85°F/29°C) can kill seeds.
- Old seeds: Lupines lose viability over time—use fresh seeds for best results.
- Poor soil contact: Ensure seeds are planted 1/4 inch deep for proper root development.
Can I grow lupines indoors from seed?
Yes! Start seeds indoors 8–10 weeks before your last frost using the pre-chill method. Use a seed-starting mix in pots with drainage holes, and place them under grow lights (14–16 hours of light daily). Once seedlings have 2–3 true leaves and soil warms, transplant them outdoors—just be gentle with the roots!
Wrapping up and next steps
Mastering the pre-chill technique for lupine seed germination can transform your propagation success—turning stubborn seeds into thriving plants in just weeks! 🌱 With the right materials, patience, and a little cold therapy, you’re well on your way to a lush garden or sustainable harvest.
Now that you’re armed with the know-how, grab those seeds and start experimenting—whether you’re a seasoned gardener or a curious beginner, every sprouted lupine is a victory!
Ready to take the next step? Try scaling up your setup or exploring other cold-stratification methods for different seed varieties. Happy growing! 🌿