
Planting
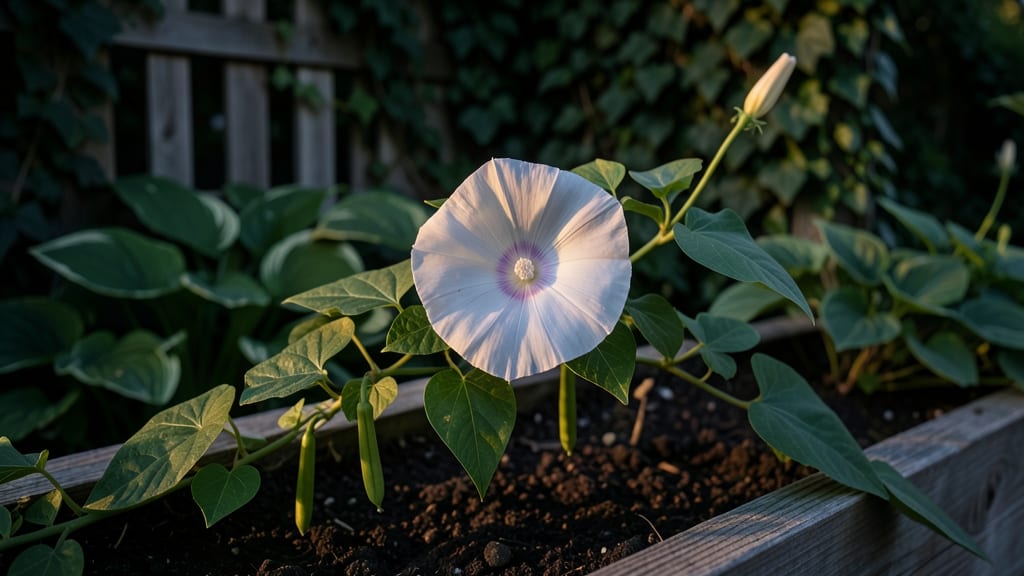
Moon plant seed pods need a cold-moist trick to break dormancy—something I learned after my first batch of seeds sprouted unevenly. 🌱 These tropical beauties refuse to germinate right away; they demand patience and the right conditions before they’ll even think about sending up those first pale green shoots.
The secret lies in mimicking their natural cycle: a chilly, damp rest period that prepares them for spring growth.
Here’s the game-changer: store your seed pods in a sealed container with slightly damp paper towels, then refrigerate for 6-8 weeks. This cold-moist stratification tricks the seeds into thinking winter’s passed, so they’ll burst into action when you finally plant them.
No fancy equipment—just a plastic bag, some patience, and a fridge. Most gardeners skip this step and end up with stubborn, slow-to-start seedlings.
Once you pull them from the fridge, you’ll see the difference immediately—faster germination, stronger roots, and plants that reach for the sky instead of struggling. The first leaves unfurl in 2-4 weeks, and by summer, you’ll have vines climbing toward your porch lights.
It’s the kind of transformation that makes you feel like you’ve cracked a secret code.
Works for both indoor growers and outdoor gardeners—just adjust the timing based on your last frost date. The same trick revives old seeds too, so don’t toss those dried-up pods. Let’s get those moon plants growing!
📚 In This Guide
- What you need
- Instructions
- Tips and common mistakes
- Wrapping up and next steps
What you need
- ● Moon plant seed pods: 10–20 pods (ensure they’re fresh or properly stored).
- ● Plastic storage bag: 1 gallon-sized with a zipper seal (or a resealable bag).
- ● Water: Distilled or dechlorinated (to avoid chemical exposure).
- ● Paper towels or dampened coffee filters: 2–3 sheets (for moisture retention).
- ● Rubbing alcohol (70% isopropyl): 1 small bottle (for sterilization).
- ● Small container or tray: 1 shallow dish (for post-stratification planting).
- ● Potting mix: 1 bag of well-draining, seed-starting mix (or coco coir).
- ● Spray bottle: For gentle moisture control.
- ● Plastic wrap: To create a mini greenhouse effect.
- ● Labeling tags: To track seed pods and dates.
- ○ Thermometer (optional): To monitor cold stratification temps (32–40°F ideal).
- ● A cool, dark space (like a fridge or unheated garage) for 4–8 weeks.
- ● Patience! Cold-moist stratification takes time but pays off big.
Step-by-Step instructions for cold-moist stratifying moon plant seed pods
Here's how to break dormancy and ensure strong germination next spring.
🌱 Step 1: Harvest and Prepare the Seed Pods
Collect mature moon plant seed pods when they turn brown and begin splitting open naturally. You'll know they're ready when the pods crack open slightly—this means the seeds inside are fully developed but haven't yet lost viability. Gently twist the pods from the stems and place them in a paper bag to dry for 3-5 days in a cool, dry spot.
Once dry, open the pods carefully and remove the seeds. Moon plant seeds are tiny and dark brown, often covered in a fine dust. I like to spread them on a clean paper towel to inspect for any debris or empty seed coats. Remove any seeds that look shriveled or discolored—these won't germinate. Store the viable seeds in an envelope labeled with the harvest date.
💧 Step 2: Create the Cold-Moist Stratification Setup
Line a shallow container (like a plastic takeout container) with a damp paper towel or a thin layer of peat moss. The moisture should feel like a wrung-out sponge—damp but not dripping. Sprinkle the moon plant seeds evenly across the surface, spacing them about ½ inch apart. Cover them lightly with another damp paper towel or a thin layer of peat moss, just enough to keep them in place.
Place the container in a sealed plastic bag to retain humidity, then refrigerate it. The goal is to keep the seeds at a steady 35-40°F for 6-8 weeks. Check the seeds every 2 weeks—if the paper towels or peat moss feel dry, mist them lightly with water. Overly wet conditions can cause mold, while dry conditions break dormancy too quickly.
⏰ Step 3: Monitor and Transition to Warmth
After 6-8 weeks, remove the container from the fridge and place it in a warm, bright spot indoors. You'll see the first signs of germination within 1-2 weeks—tiny green sprouts pushing through the paper towels or peat moss. This is your cue that the cold-moist stratification worked. Keep the container covered with a clear plastic lid or wrap to maintain humidity until the seedlings develop their first true leaves.
Once the seedlings have 2-3 sets of true leaves, it's time to transplant them into individual pots filled with well-draining potting mix. Handle the seedlings gently—their roots are delicate after stratification. Water them lightly after transplanting to help settle the soil around the roots, and place them under a grow light or in a sunny window.
☀️ Step 4: Harden Off and Prepare for Outdoor Planting
About 2 weeks before your last frost date, start hardening off the seedlings by placing them outside in a sheltered spot for 1-2 hours the first day. Gradually increase their outdoor time over 10-14 days, exposing them to more sunlight and cooler temperatures. This process helps them adjust to outdoor conditions and reduces transplant shock.
When the seedlings are ready, plant them outdoors in a location with partial shade to full sun, depending on your climate. Moon plants thrive in well-draining soil, so amending the soil with compost before planting gives them a strong start. Water the seedlings deeply after planting to help them establish their roots in the new environment.
Tips & tricks for perfect moon plant seed germination
Here's what nobody tells you about getting those stubborn moon plant seeds to sprout reliably.
Timing Secret: The 3-5 day drying period in Step 1 is critical—don't rush it! I've seen seeds that dried too quickly develop hard outer shells that resist moisture during stratification. Place your paper bag in a spot where airflow circulates gently (like near a fan on low) to prevent uneven drying. This ensures the seeds are properly prepared for the cold-moist phase ahead.
Temperature Matters: That 35-40°F range in Step 2 is your magic window, but not all refrigerators maintain consistent temps. If your fridge runs cooler, place the container on the middle shelf where temps are most stable. For warmer fridges, try the crisper drawer—it's often the coldest spot. Pro tip: Use a refrigerator thermometer to confirm your exact temp before committing to the full 6-8 weeks.
Visual Cues for Germination: In Step 3, when you're checking for those first sprouts, look for tiny white roots breaking through first—this happens before you'll see green shoots. I've found that if you wait for green sprouts to appear before transplanting, you risk damaging those delicate root systems. The moment you see those white roots, it's time to start preparing your pots.
Harden Off Gradually: That 2-week hardening off period in Step 4 can't be skipped, but you can make it easier on your seedlings. Start with just 1 hour on day one, then add 30 minutes each subsequent day. I've had seedlings that got too much sun too soon develop sunburned leaves—gradual exposure is key. Also, avoid placing them in direct afternoon sun during this period, as the intensity can shock their systems.
Pro Tips for Moon Plant Seed Pods
- Here's what nobody tells you about getting those stubborn moon plant seeds to sprout reliably.
- Timing Secret: The 3-5 day drying period in Step 1 is critical—don't rush it! I've seen seeds that dried too quickly ...
- Temperature Matters: That 35-40°F range in Step 2 is your magic window, but not all refrigerators maintain consistent...
Frequently asked questions
How long do I need to keep the seed pods in cold, moist conditions?
For optimal results, store your moon plant seed pods in a cold, moist environment (like a damp paper towel in the fridge) for 8–12 weeks. This mimics winter stratification and tricks the seeds into breaking dormancy. If you’re impatient, 6 weeks might work, but longer = higher germination rates!
Can I germinate moon plant seed pods indoors without a fridge?
Yes! If you lack fridge space, use a seed germination chamber (like a DIY setup with a heat mat and humidity dome) or a cool basement (keep temps between 35–45°F). Just monitor moisture—dampness is key, but avoid soggy pods. A seedling heat mat can help regulate temps if your space is too warm.
What if my seed pods mold or rot during cold storage?
Mold or rot means too much moisture or poor airflow. To fix it:
- Pat pods dry with a sterile paper towel.
- Store them in a breathable container (like a mesh bag or paper towel in a sealed bag with a tiny air gap).
- Check weekly—discard any slimy or fuzzy pods.
Pro tip: Spritz lightly with water every 2 weeks instead of soaking.
Are there alternatives to cold-moist stratification for moon plant seeds?
While cold-moist is the gold standard for moon plants, you can try:
- Sand stratification: Mix pods with damp sand in a pot, refrigerate for 6–8 weeks.
- Outdoor winter sowing: Plant pods in containers with moist soil outdoors in fall—nature handles the cold!
- Heat treatment: Soak pods in warm water (100°F) for 24 hours (less reliable but works for stubborn seeds).
Wrapping up and next steps
Growing moon plant seed pods with the cold-moist trick is your ticket to a thriving garden next season! 🌱 By mimicking nature’s winter stratification, you’ll boost germination rates and enjoy lush, healthy plants—without the guesswork. Whether you’re a seasoned gardener or just starting, this simple method makes success feel effortless.
Ready to take the next step? Start your moon plant seeds now—store them in the fridge for 6-8 weeks, then plant them in well-draining soil come spring. Your future garden will thank you!