
Planting
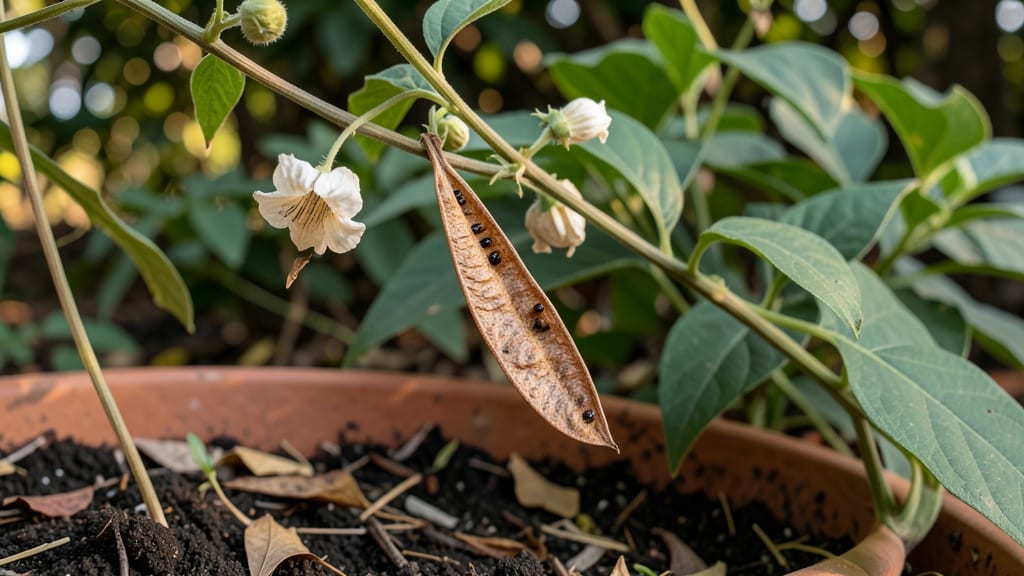
That first crisp morning in October, when the moonflower plant seed pod turns papery and splits open, is your cue to harvest. 🌙 Cold-stressed germination is the secret weapon for breaking moonflower seeds' stubborn dormancy—what most gardeners miss when their seeds just sit there, refusing to sprout.
I learned this the hard way after three seasons of empty seed packets, but now I get reliable blooms every year.
The process starts with collecting mature pods—wait until they're completely dry and brown, then gently twist them open to reveal the flat, dark seeds inside. Store them in a cool, dry place until you're ready to plant, which should be 4-6 weeks before your last frost.
That cold treatment mimics winter conditions, tricking the seeds into thinking they've survived the cold and can now grow.
By spring, you'll have fast-growing vines with those iconic white, moon-shaped blooms lighting up your garden at dusk. The key is patience: these seeds need consistent moisture but no soaking, and they'll sprout within 7-14 days of that cold treatment.
No more empty pots or wasted seed packets—just reliable, dramatic blooms that turn heads.
Works in containers or trellises, and even in partial shade. Here's how to make it foolproof—no more guessing games with these beautiful but finicky seeds.
📚 In This Guide
- What you need
- Instructions
- Tips and common mistakes
- Wrapping up and next steps
What you need
- ● Moonflower seed pods: 3–5 mature, dried pods (harvested from a healthy plant or purchased from a reputable supplier).
- ● Biodegradable seed-starting pots: 3–5 small pots (2–3 inches in diameter) with drainage holes.
- ● Seed-starting mix: 1 bag (1–2 quarts) of lightweight, sterile potting soil (avoid garden soil—it’s too dense!).
- ● Spray bottle: 1 (for gentle watering to avoid disturbing seeds).
- ● Plastic wrap or humidity dome: 1 (to create a mini greenhouse effect).
- ○ Heat mat (optional but recommended): 1 (set to 70–75°F for consistent warmth).
- ● Grow lights or sunny windowsill: Access to 6–8 hours of indirect light daily (south-facing window or LED grow lights work best).
- ○ Small fan (optional): 1 (for light airflow to prevent damping-off disease).
- ● Permanent markers or labels: 1–2 (to mark pots and track germination dates).
- ● Refrigerator: A cold, dark space (40–50°F) for 1–2 weeks (your fridge’s crisper drawer works!).
- ● Small plastic bag or airtight container: 1 (to store seeds before cold treatment).
- ● Timer or calendar: To track the 14-day cold period precisely.
- ● Fertilizer: 1 bottle of diluted fish emulsion or compost tea (add after sprouts emerge).
- ● Growth regulator (like GA3): 1 small bottle (to boost germination if needed—use sparingly!).
- ● Transplant trays: 1 (for upgrading seedlings before outdoor planting).
- ● Garden journal: 1 (to log progress, soil temps, and bloom timelines).
Step-by-step instructions for cold-stressed moonflower germination
Here’s how to break dormancy and coax those delicate moonflower seeds into vigorous growth—guaranteed to deliver reliable blooms.
🌱 Step 1: Stratify Seeds for Cold Exposure
Moonflower seeds require 60-90 days of cold stratification to mimic winter conditions and trigger germination. Place them in a perforated seedling tray filled with moistened peat moss or coconut coir—never garden soil, as it compacts and suffocates tender roots. Spread seeds ½ inch apart and cover lightly with an additional ¼ inch of the same medium.
Seal the tray in a ziplock bag and refrigerate at 35-40°F for 8-12 weeks. Check weekly—if the medium dries out, mist lightly with room-temperature water (cold water shocks seeds). You’ll see nothing yet, but this cold period is non-negotiable for breaking dormancy. Skipping it results in weak, slow, or no germination.
💧 Step 2: Transition to Warmth for Germination
After cold treatment, remove the tray and place it in a warm, bright location (70-75°F). Use a seedling heat mat if your home runs cooler—moonflowers need warmth to push through the soil. Water gently from the bottom by setting the tray in ½ inch of water for 10 minutes, then drain excess. Never soak the tray; soggy conditions invite rot.
Germination takes 14-30 days—longer than many annuals because moonflowers are finicky. Keep the medium evenly moist (not wet) and cover the tray with clear plastic wrap to retain humidity. Remove the wrap once 50% of seeds sprout to prevent damping-off. You’ll notice tiny white roots first, followed by cotyledons (the first true leaves) emerging in 7-10 days after sprouting begins.
☀️ Step 3: Provide Optimal Light and Airflow
As soon as seedlings appear, move them under full-spectrum grow lights (12-14 hours daily) or to a south-facing window. Moonflowers need bright, indirect light—direct sun scorches delicate leaves. Position lights 2-3 inches above seedlings and raise them weekly to maintain distance. You’ll see leggy growth if light is insufficient; strong seedlings have bold green leaves and compact stems.
Once seedlings have 2-3 sets of true leaves, transplant them into 4-inch pots filled with well-draining potting mix. Harden off for 7-10 days by gradually increasing outdoor exposure (start with 1 hour/day in shade, then 2 hours, etc.). Plant outdoors after the last frost when soil reaches 60°F—moonflowers hate cold soil and will rot if transplanted too early.
⏰ Step 4: Monitor Growth and Prepare for Blooming
Moonflowers grow 3-5 feet per season and need full sun (6+ hours daily) once established. Water at the base (avoid wetting leaves) and fertilize lightly with balanced 10-10-10 every 4-6 weeks during active growth. You’ll see vine-like stems with heart-shaped leaves—prune leggy growth to encourage bushier plants. Stake or trellis early to support their rapid climb.
Blooms appear 60-90 days after transplanting, triggered by long daylight hours. Flowers open only at night (hence the name) and close by mid-morning. Deadhead spent blooms to redirect energy to new flowers. If vines yellow or wilt, check for powdery mildew (common in humid climates)—spray with neem oil at first sign. With proper care, you’ll enjoy months of nocturnal blooms and self-seeding for next year.
Tips & tricks for perfect moonflower germination
Moonflower seeds are stubborn little dreamers—they need just the right conditions to wake up from their cold slumber. Here’s how to give them the best shot at thriving.
Cold Stratification Precision: The 8-12 week cold treatment is your secret weapon. Use a refrigerator thermometer to confirm your fridge stays between 35-40°F—some models fluctuate. Place the tray on the crisper drawer shelf where temps are most stable. If your fridge runs warmer, extend the stratification to 12 weeks to compensate. The key is consistency: seeds need this steady chill to break dormancy, not just any cold exposure.
Medium Moisture Balance: Moonflower seeds hate soggy conditions, but they also won’t germinate if their medium dries out. The trick is to mist the peat moss or coconut coir until it’s damp like a wrung-out sponge—not dripping, not bone-dry. I use a spray bottle with room-temperature water and check weekly. If the top layer feels dry to the touch, give it a light mist. Overwatering here is the #1 killer of moonflower seeds during stratification.
Light Transition Strategy: When moving from cold to warmth in Step 2, don’t rush it. Let the tray sit at room temperature for 12 hours before placing it in your warm location (70-75°F). This gradual adjustment prevents seed shock. I also recommend using a clear plastic dome or cloche over the tray during the first 3-5 days of warm germination—this creates a mini greenhouse effect that helps delicate seedlings establish before you remove the plastic wrap.
Harden Off Like a Pro: The 7-10 day hardening process is where most beginners fail. Start with just 30 minutes of shade exposure on day 1, then increase by 30 minutes daily. By day 5, they should handle 2 hours of morning sun. I take mine outside in the early morning when temps are mildest, then bring them back in before the afternoon heat hits. This gradual approach builds their resilience without shocking the tender plants.
Pro Tips for Moonflower Plant Seed Pod
- Moonflower seeds are stubborn little dreamers—they need just the right conditions to wake up from their cold slumber....
- Cold Stratification Precision: The 8-12 week cold treatment is your secret weapon. Use a refrigerator thermometer to ...
- Medium Moisture Balance: Moonflower seeds hate soggy conditions, but they also won’t germinate if their medium dries ...
Frequently asked questions
Got questions about moonflower seed pods? You’re not alone—germinating these delicate blooms can feel like a high-stakes gardening puzzle! Here’s a quick guide to the most common concerns, from timing to troubleshooting, so you can grow those dreamy night-blooming flowers with confidence.
How cold does it need to be for moonflower seed pods to germinate?
Moonflower seeds thrive in cold stratification, meaning they need a chilly kickstart! Aim for temperatures between 35–45°F (2–7°C) for 2–4 weeks. Place them in a sealed bag with moist peat moss or a damp paper towel, then refrigerate. Pro tip: Avoid freezing—just keep them consistently cool, not icy!
How long does it take for moonflower seed pods to sprout?
Patience is key! After cold stratification, germination can take 10–30 days, depending on warmth and moisture. Once sprouted, keep soil consistently moist (but not soggy) and expect tiny seedlings to emerge slowly. Troubleshooting: If nothing happens after 4 weeks, check for mold or dryness—adjust conditions and try again!
Can I plant moonflower seed pods directly in the ground?
Yes, but timing matters! Sow seeds outdoors 4–6 weeks before your last frost in well-draining soil. Cold stratification happens naturally in the ground, but for faster results, pre-chill seeds indoors first. Alternative: Start indoors in biodegradable pots 8–10 weeks before transplanting.
What do I do if my moonflower seed pods rot or mold?
Overwatering or poor drainage is usually the culprit. Use a mix of 50% potting soil and 50% perlite, and water only when the top inch feels dry. If mold appears, remove affected seeds, improve airflow, and consider a fungicide spray. Preventative tip: Sterilize containers with a 10% bleach solution before planting!
Are there alternatives if moonflower seeds won’t germinate?
Try night-blooming jasmine (Cestrum nocturnum) or evening primrose for similar night-scented flowers. For moonflowers specifically, check seed freshness—older seeds (over 1 year) may lose viability. Bonus: Buy pre-stratified seeds from reputable sellers to skip the cold treatment!
Wrapping up and next steps
Growing moonflower seed pods from cold-stressed seeds is a rewarding way to unlock vibrant, reliable blooms—even in cooler climates! 🌙✨ By following the right techniques, you’ll enjoy lush vines and stunning night-blooming flowers with minimal fuss.
Now that you’re armed with the blueprint, why not give it a try this season? Start by gathering your supplies, then take the first step: chill those seeds and watch your garden transform!
Next up:
- 🌱 Plant your prepped seeds in well-draining soil.
- 💧 Monitor moisture and sunlight for optimal growth.
- 🎉 Enjoy the magic of moonflowers lighting up your evenings!