
Lawn
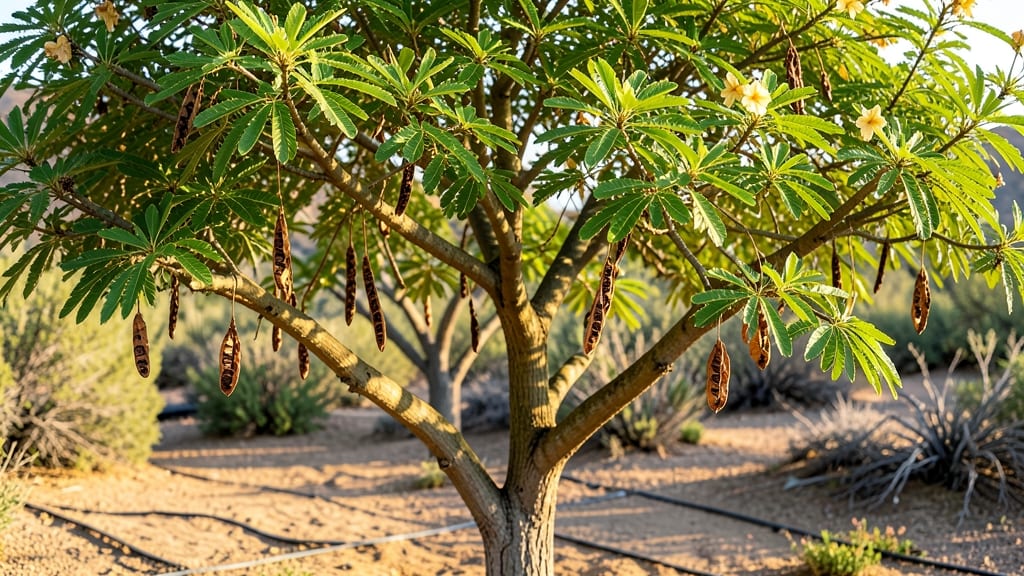
Cold stratification turns those flat, papery Palo Verde seed pods into vigorous seedlings in just 60 days—no fancy equipment needed. 🌱 I’ve watched these desert natives go from collected pods to thriving saplings using nothing but a freezer, patience, and a sunny spot.
The key? Mimicking the natural winter chill they need to break dormancy before spring planting.
Start by harvesting mature pods in late fall—they should rattle when shaken, signaling ripe seeds inside. After extracting them, mix with slightly damp sand and refrigerate for 4-6 weeks. This cold treatment tricks the seeds into thinking winter’s passed, so they’ll sprout faster once planted.
Most gardeners skip this step and wait years for germination, but stratification cuts that time dramatically.
Once stratified, sow seeds in well-draining soil under grow lights or in a warm, bright window. Keep the soil consistently moist (not soggy) and expect seedlings in 2-4 weeks.
Young Palo Verde trees love full sun and dry conditions—just like their desert relatives—so harden them off before transplanting to avoid shock.
Perfect for arid climates (Zones 8-11), these drought-tolerant trees mature into stunning shade providers with vibrant green bark. Even if you’re not in their native range, container growing works well—just use a fast-draining mix. The payoff? A tree that thrives with almost no care once established.
📚 In This Guide
- What you need
- Instructions
- Tips and common mistakes
- Wrapping up and next steps
What you need
- ● Palo Verde seed pods: 10–20 fresh, mature pods (harvested in late summer/fall). Ensure they’re dry but not brittle!
- ● Cold stratification supplies: 1 large resealable plastic bag (quart-sized or larger)
- ● 1 cup sand (coarse, clean, and sterile—like horticultural sand)
- ● 1 cup peat moss or coconut coir (moisture-retentive but well-draining)
- ● Planting containers: 2–4 small pots (4–6 inches deep) with drainage holes, or a single large tray with individual cells.
- ● Potting mix: 1 bag of well-draining cactus/succulent mix (or add perlite to regular potting soil for aeration).
- ● Spray bottle: For gentle watering (avoid soaking!).
- ● Labels & marker: To track seed pods and stratification dates.
- ● Grow lights: If your space lacks bright, indirect sunlight (e.g., LED full-spectrum bulbs).
- ● Humidity dome: To retain moisture during early germination.
- ● Heat mat: For faster stratification (set to ~60–70°F if your climate is chilly).
- ● Fungicide: A light dose (like neem oil) to prevent mold if pods stay damp.
- ● Camera/phone: Document progress—these trees are adorable as sprouts!
Step-by-step guide to germinating palo verde seed pods
Cold stratification is the secret to breaking dormancy—here's how to get your seeds ready in just 60 days.
🌱 Step 1: Harvest and Prepare Mature Seed Pods
Collect pods when they've turned brown and papery, usually in late summer or early fall. The seeds inside should rattle when shaken—this means they're mature and ready for processing. I like to spread them on a clean towel to air-dry for 2-3 days in a warm, dry place. This prevents mold from developing during stratification.
Once dry, crack open the pods carefully with a nutcracker or hammer. Remove the seeds and discard any that look shriveled or discolored. Store the viable seeds in a paper envelope—plastic traps moisture and encourages rot. Label it with the harvest date, since fresh seeds germinate more reliably.
❄️ Step 2: Cold Stratify Seeds for 60 Days
Place the seeds in a sealed plastic bag with a damp paper towel. I use a ratio of 1 part water to 3 parts paper towel—just enough to keep it moist, not soaked. Seal the bag and refrigerate it for 60 days at 35-40°F. This mimics winter conditions and tricks the seeds into thinking spring has arrived.
Check the bag weekly to ensure the towel stays damp but not dripping. If condensation forms, open the bag for 10 minutes to let excess moisture escape. After 60 days, the seeds should look plump and firm—this means stratification worked. If they're still shriveled, extend the process by another 10 days.
🌱 Step 3: Sow Stratified Seeds in Germination Mix
Fill small pots with a sterile seed-starting mix—never garden soil, as it can harbor fungi that kill tender seedlings. Moisten the mix until it holds together when squeezed but doesn't drip. Plant seeds ¼ inch deep, spacing them 1 inch apart in the pot. Two seeds per cell works well, but thin to the strongest seedling later.
Cover the pots with plastic wrap or a humidity dome to retain moisture and warmth. Place them in a warm spot, ideally 70-75°F, until germination. A seedling heat mat speeds this up, but even a sunny windowsill works. You’ll see sprouts in 10-21 days—patience is key, as some seeds take longer to break dormancy.
☀️ Step 4: Transplant Seedlings to Individual Pots
Once seedlings have 2-3 true leaves (not just the initial seed leaves), transplant them to 3-inch pots with fresh potting mix. Handle them gently—they’re delicate at this stage. Bury them just deep enough so the soil line is level with the base of the stem. Water lightly after transplanting to settle the soil.
Place the pots under bright, indirect light for the first week to help them recover. After that, gradually introduce morning sun for 2-3 hours daily, increasing exposure over 10-14 days. Palo verde seedlings thrive in full sun but need time to acclimate. You’ll know they’re adjusting when new leaves appear and the stems firm up.
🪴 Step 5: Harden Off and Prepare for Outdoors
Two weeks before your last frost date, start hardening off seedlings by placing them outside in a sheltered, shaded spot for 1-2 hours the first day. Gradually increase their outdoor time by 1 hour daily, exposing them to direct sun and wind over 10-14 days. This toughens their stems and leaves, preventing shock when planted.
Before transplanting, soak the pots in water for 10 minutes to ensure roots are hydrated. Plant seedlings 6-8 inches apart in well-draining soil, mimicking their desert origins. Water deeply after planting, but avoid overwatering—they’re drought-tolerant once established. Mulch lightly with ¼ inch of gravel to retain moisture without suffocating roots.
Tips & tricks for perfect palo verde seed germination
These game-changing strategies will help you maximize your success rate with this desert native—especially when working with tricky seed dormancy.
Seed Selection Tip: The maturity of your palo verde seeds makes all the difference. Look for pods that are completely brown and papery—when you shake them, you should hear seeds rattling inside. If you're unsure about maturity, test one pod by cracking it open: the seeds should be plump and firm, not shriveled or hollow-sounding. I've found that seeds harvested in late fall often have higher viability than those collected earlier in the season.
Stratification Environment: While the instructions specify refrigeration at 35-40°F, I've discovered that consistency matters more than exact temperatures. If your fridge runs cooler, place the sealed bag on the top shelf where it's slightly warmer. The key is maintaining that damp-but-not-soaked paper towel—condensation is your enemy. I recommend using a small Ziploc bag with a tiny hole punched in it for ventilation, which prevents mold while keeping humidity levels perfect.
Germination Lighting Hack: Palo verde seedlings are light-sensitive, but they need the right kind of light at the right time. After sowing, place your pots under a grow light on a 14-hour cycle (lights on at dawn, off at dusk) for the first two weeks. This mimics natural daylight conditions and prevents leggy growth. Once you see true leaves appear, you can transition to natural sunlight, starting with just 2-3 hours of morning sun daily as specified in Step 4.
Transplanting Timing: The 2-3 true leaves stage is crucial—don't rush it! I've seen many gardeners transplant too early, which stresses the delicate seedlings. Wait until you can clearly see two sets of true leaves (the first pair will be smaller and different in shape from the second). At this point, the seedlings have developed enough root mass to handle the transplant shock. When you do move them to individual pots, bury them just slightly deeper than they were in the seedling tray—this stabilizes them and encourages stronger root growth.
Pro Tips for Palo Verde Seed Pods
- These game-changing strategies will help you maximize your success rate with this desert native—especially when worki...
- Seed Selection Tip: The maturity of your palo verde seeds makes all the difference. Look for pods that are completely...
- Stratification Environment: While the instructions specify refrigeration at 35-40°F, I've discovered that consistency...
Frequently asked questions
Got questions about working with palo verde seed pods? You’re not alone! Here are answers to the most common queries to help you succeed with germination and growing these unique trees.
When do palo verde seed pods ripen and fall?
Palo verde seed pods typically ripen in late summer to early fall (August–October in most regions). They turn from green to brown and dry out before dropping naturally. If you’re impatient, you can harvest them early—just ensure they’re fully dried and papery to the touch for best germination results.
How long does cold stratification take for these seeds?
Cold stratification for palo verde seeds usually takes 60–90 days in the fridge (34–40°F). Place them in a damp paper towel or sand mix, then check for sprouting every 2–3 weeks. If you’re in a hurry, soak seeds in warm water for 24 hours before stratification to kickstart the process.
Can I grow palo verde trees from store-bought pods, or do I need fresh ones?
Store-bought pods can work, but fresh pods (harvested from mature trees) have higher germination rates. If using dried pods from a nursery, soak them in water for 48 hours to soften the outer shell. Avoid pods that smell musty or feel moldy—these won’t sprout.
What should I do if my palo verde seeds aren’t germinating?
If seeds stay dormant after stratification, try these fixes:
- Check moisture: Keep the medium damp (not soggy) during stratification.
- Test viability: Cut open a seed—if it’s hard and shriveled, it’s likely dead.
- Adjust timing: Extend stratification by 30 more days or try a quick heat treatment (70°F for 7 days).
- Use a fungicide: Drench the soil with a mild solution to prevent mold.
How deep should I plant palo verde seeds outdoors?
Plant seeds ½ inch deep in well-draining soil, spaced 6–12 inches apart. In hot climates, sow in early spring or fall to avoid heat stress. Mulch lightly with straw to retain moisture, but avoid piling it directly on seeds—this can cause rot.
Wrapping up and next steps
Palo verde seed pods are a fantastic way to grow these drought-resistant trees from scratch—just with a little patience and the right technique! 🌱 By mastering cold stratification, you’ll unlock faster germination in just 60 days, giving your yard a hardy, low-maintenance addition.
Whether you’re a gardening newbie or a seasoned pro, these steps make it simple and rewarding.
Ready to green up your space? Grab those pods, follow the guide, and watch your palo verde thrive! For extra inspiration, check out local nurseries or online forums to swap tips with fellow gardeners. Happy planting! 🌳✨