
Lawn
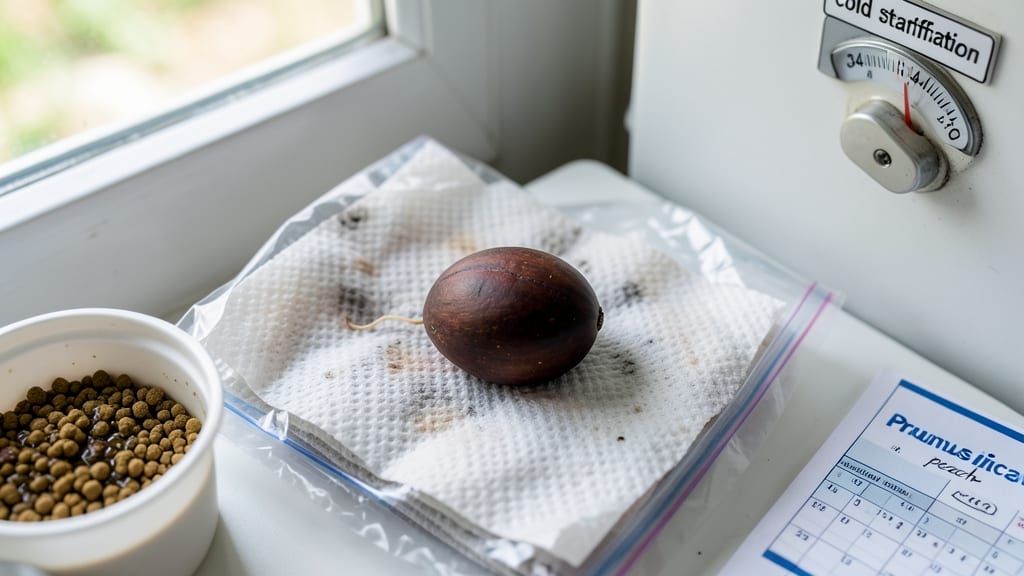
That peach seed stratification is the secret to breaking peach seeds' stubborn dormancy—without it, you'll wait years for germination. 🌱 I learned the hard way when my first batch of seeds sat dry and lifeless for months, until I finally dug into the science.
The trick isn't just cold, but the right balance of moisture and time that mimics nature's slow preparation for spring.
You'll need peach pits (fresh is best), coarse sand (or perlite), a ziplock bag, and a refrigerator—no fancy equipment, just patience. The process takes 8-12 weeks, with seeds nestled in damp sand at 35-40°F, mimicking winter's gentle thaw.
Most gardeners quit here, but the real magic happens when you move them to warmth, where roots and shoots race to break through.
By spring, you'll have vigorous seedlings ready for transplanting, though fruit-bearing varieties may take 5-7 years to produce peaches. The payoff? Trees with deep roots and resilience you won't find in nursery stock. Just don't rush—this method rewards those who wait.
For best results, stratify seeds in fall to align with natural cycles, and use one-year-old pits for higher success. If mold appears, air out your bag; uneven sprouting just means some seeds needed more time. Patience is the only tool you can't skip.
📚 In This Guide
- What you need
- Instructions
- Tips and common mistakes
- Wrapping up and next steps
What you need
- ● Peach seeds: 3–5 fresh, viable seeds (harvested from organic, non-hybrid peaches—avoid store-bought varieties if possible). Pro tip: 💡 Rinse seeds thoroughly to remove fruit residue before use.
- ● Stratification medium: Option 1: 2 cups moistened perlite or vermiculite (sterilized, not dry).
- ● Option 2: 1 cup peat moss + 1 cup coarse sand (mixed and dampened to wring-out moisture).
- ● Containers: 2–3 small plastic bags (resealable, 1-gallon size) or
- ● 2–3 shallow trays with drainage holes (6"x6" or larger).
- ● Plastic wrap or breathable lid: To seal containers and retain humidity.
- ● Labeling supplies: Masking tape + marker (to track seed varieties and stratification dates).
- ● Refrigerator: With a consistent temperature range of 35–45°F (2–7°C) (most home fridges work!).
- ● Humidity dome or clear lid (to monitor moisture levels).
- ● Small fan (for gentle airflow if using trays).
- ● Grow light or sunny windowsill (for post-stratification germination).
- ● Seedling pots (2–3" size) + potting mix (for transplanting sprouted seeds).
Step-by-step guide to peach seed stratification
Here's how to break dormancy and boost germination rates using nature's cold-moisture trick.
🌱 Step 1: Extract and Clean the Seeds
Remove the pit from a ripe peach and crack it open carefully with a nutcracker or hammer. You'll find the seed inside—it's the large, flat, brown nut-like structure. Clean off any remaining fruit flesh using a paper towel, as residual sugars can encourage mold during stratification.
Peach seeds have a hard outer shell that needs to soften slightly for successful germination. Place the cleaned seeds in a bowl of lukewarm water for 24 hours. This initial soak helps break down some of the seed coat's natural resistance, making it more permeable to moisture during the cold treatment.
❄️ Step 2: Prepare the Cold-Moist Stratification Medium
Fill a resealable plastic bag with 2-3 inches of dampened sphagnum moss or a mix of sand and peat moss (equal parts). The medium should feel like a wrung-out sponge—moist but not dripping. Add the soaked seeds, spacing them about 1 inch apart to prevent mold from spreading between them.
Seal the bag loosely, leaving a small opening for airflow. Place it in a refrigerator (not the freezer) where temperatures stay between 35-45°F. This mimics winter's natural cold-moisture cycle, which peach seeds require to break dormancy. Check the bag weekly—if the moss dries out, lightly mist it with water.
⏰ Step 3: Monitor and Maintain Conditions for 6-12 Weeks
After 4-6 weeks, gently open the bag and check for signs of sprouting. You'll see tiny white roots emerging first—this is your signal that stratification is working. If no roots appear after 8 weeks, extend the cold treatment for another 2-4 weeks, but don't exceed 12 weeks total.
Keep the bag in consistent darkness during stratification. Light exposure now can trigger premature germination, which weakens seedlings. If you notice any mold growth, remove affected seeds immediately and replace the moss with fresh, damp medium. The goal is to maintain a sterile, cold-moist environment.
☀️ Step 4: Transition to Warm Germination Conditions
Once roots appear, transfer the seeds to small pots filled with seed-starting mix. Plant them ½ inch deep, covering lightly but not burying completely. Place the pots in a warm spot (around 70-75°F) with indirect light. Germination typically occurs within 7-21 days after removing them from cold treatment.
Water gently to keep the soil moist but not soggy. Peach seedlings are delicate—avoid overwatering, which can cause damping-off. When the first true leaves appear (not the initial seed leaves), you can gradually introduce them to brighter light. This is the moment they'll start growing rapidly, so keep the soil consistently moist.
Tips & tricks for perfect peach seed stratification
This natural process mimics winter's conditions—here's how to optimize every step for reliable germination.
Soaking Strategy: The 24-hour lukewarm water soak isn't just about hydration—it's the first critical step in breaking the seed's natural dormancy. Use water that's warm enough to feel comfortable to the touch (around 90°F), but not hot. If you notice any seeds floating, they're likely non-viable and should be discarded. This pre-treatment creates microscopic cracks in the hard outer shell, allowing moisture to penetrate during the cold period.
Medium Selection: While sphagnum moss is ideal, you can substitute with a mix of vermiculite and peat moss if moss isn't available. The key is maintaining consistent moisture without creating anaerobic conditions. I've found that using a 50/50 mix of sand and peat moss works well for gardeners who prefer a more mineral-rich medium. Just be sure to keep the mix moist like a wrung-out sponge—this balance is crucial for preventing both mold and dehydration.
Temperature Consistency: The 35-45°F range in your refrigerator is perfect for stratification, but every fridge varies. If your refrigerator's temperature fluctuates significantly, consider using a dedicated seed stratification fridge or even a basement storage area if temperatures remain consistently cool. The goal is to simulate natural winter conditions where peach seeds would experience prolonged cold without freezing. A simple fridge thermometer can help you monitor and adjust if needed.
Light Management: Complete darkness during stratification is non-negotiable—even minimal light exposure can trigger premature germination. If your refrigerator has a light that turns on when opened, consider placing the bag in a dark corner or using an opaque container. Once you transfer the sprouted seeds to pots, you'll gradually introduce light, but during the cold treatment, darkness is essential for proper dormancy breaking.
Pro Tips for Peach Seed Stratification
- This natural process mimics winter's conditions—here's how to optimize every step for reliable germination.
- Soaking Strategy: The 24-hour lukewarm water soak isn't just about hydration—it's the first critical step in breaking...
- Medium Selection: While sphagnum moss is ideal, you can substitute with a mix of vermiculite and peat moss if moss is...
Frequently asked questions
Got questions about peach seed stratification? You’re not alone! Here are answers to the most common concerns—whether you're a first-timer or a seasoned gardener looking for troubleshooting tips.
How long does peach seed stratification take?
Most peach seeds need 6–12 weeks of cold, moist stratification to break dormancy. Start in late fall (around October) for spring planting. If your climate is mild, extend the process to 12 weeks. Patience pays off—rushing can lead to poor germination!
Can I skip stratification and plant seeds directly?
Not recommended! Peach seeds have a hard, impermeable coat that requires cold-moist treatment to soften. Without stratification, germination rates drop dramatically (often below 10%). If you’re in a hurry, try scarification (nick the seed coat with sandpaper) as a backup, but stratification is still the gold standard.
What’s the best time to start stratification?
Ideal timing is late fall (October–November), mimicking winter’s natural conditions. If you’re in a warm climate, refrigerate seeds in a sealed container with damp paper towels. For northern regions, bury seeds outdoors in a protected spot (like a cold frame) to let nature handle the process.
My seeds are moldy after stratification—what went wrong?
Mold is a red flag! It usually means too much moisture or poor airflow. To fix it:
- Drain excess water immediately.
- Rinse seeds with hydrogen peroxide (3%) for 5 minutes to kill mold.
- Dry seeds thoroughly before restarting stratification in fresh, damp paper towels.
Will stratified peach seeds grow into true peach trees?
Not guaranteed! Peach seeds are heirloom varieties—often unpredictable in size, flavor, or cold hardiness. For consistent results, graft onto a rootstock or buy named cultivars. Still, experimenting with seeds can be fun (and educational!) for gardeners willing to embrace surprises.
Wrapping up and next steps
Peach seed stratification is your secret weapon for unlocking vibrant spring blooms—no more guessing games with germination! By mimicking nature’s cold-wet cycle, you’re giving those tiny seeds the best shot at thriving.
Whether you’re a patient gardener or a curious beginner, this method is simple, rewarding, and packed with potential.
Ready to turn those dormant seeds into lush peach trees? Start small—try a few seeds this fall and watch your garden transform next spring. Happy planting! 🌱✨