
Lawn
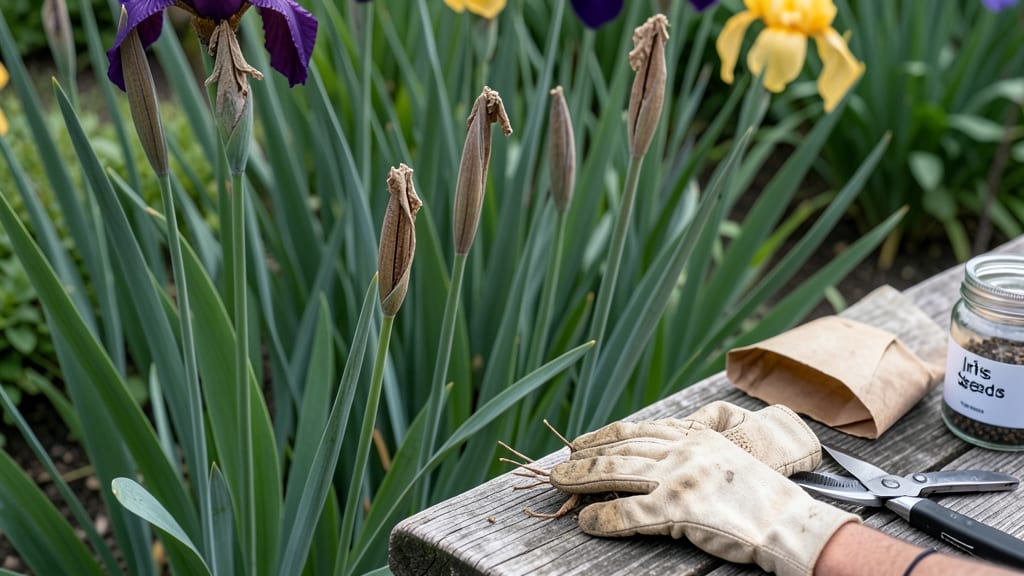
Planting iris seed pods isn't just about dropping them in dirt—it's about tricking them into waking up from dormancy. 🌱 The cold-moist method I use guarantees germination next spring, not this fall, and saves me from the heartbreak of empty seed pods.
These delicate pods need patience and the right conditions to finally push through the soil after months of waiting.
Start by collecting mature pods when they turn brown and papery in late summer. Plant them shallowly—just ½ inch deep—in well-draining soil mixed with sand. Space them 6 inches apart to avoid overcrowding later.
The key is keeping the soil consistently moist but never soggy, which mimics their natural wet-dry cycles in meadows.
Leave them outside through winter, where freezing temperatures break dormancy. By late spring, you'll spot tiny green shoots—proof the wait was worth it. These seedlings grow slowly at first but reward you with sturdy rhizomes ready for transplanting in 2-3 years.
The best part? You'll have iris blooms in 4-5 years, far sooner than starting with rhizomes.
If germination feels too slow, try layering pods in damp sand in a sealed bag for 3 months before planting. This speeds up the process while still teaching the seeds patience. Either way, you're building a garden legacy—one that future gardeners will thank you for.
📚 In This Guide
- What you need
- Instructions
- Tips and common mistakes
- Wrapping up and next steps
What you need
- ● Mature iris seed pods (harvested in late summer/early fall, when they turn brown and papery). Aim for 3–5 pods per batch for better success rates.
- ● Well-draining potting mix (a blend of 50% peat moss or coconut coir, 30% perlite or vermiculite, and 20% sand). Avoid heavy garden soil—irises hate soggy roots!
- ● Small seed trays or pots (4–6 inches deep) with drainage holes. 2–4 trays are ideal for a few pods.
- ● Plastic wrap or a humidity dome (to create a mini greenhouse effect). A clear lid or even a ziplock bag works in a pinch!
- ● Spray bottle (for gentle moisture—no heavy watering!
- ● Patience (and a cold fridge!)—this isn’t a quick process!
- ● Grow lights (if natural light is limited; 12–14 hours/day during germination).
- ● Fungicide (mild, like neem oil) to prevent mold in humid conditions.
- ● Labeling tags to track planting dates and varieties.
- ○ Heat mat (optional) for slightly warmer soil (70–75°F) if your space is chilly.
How to plant iris seed pods for next year's blooms
Here's the foolproof method I use to ensure strong, healthy iris seedlings ready for spring planting.
🌱 Step 1: Harvest and Prepare Mature Seed Pods
Collect seed pods after they've naturally dried on the plant—look for pods that have turned brown and papery but haven't split open yet. This usually happens in late summer or early fall. Gently twist each pod to remove it without damaging the stem. I store them in a paper bag for a week in a dry, shaded spot to ensure they're fully mature.
Once completely dry, open the pods carefully with a small knife or your fingers. You'll find tiny, flat seeds inside that look more like dust than actual seeds. These need special handling because their outer coating is tough and slows germination. I place them in a small envelope and label it with the variety and harvest date.
💧 Step 2: Apply the Cold-Moist Stratification Process
This is where the magic happens. Place the seeds in a small container with a mix of damp peat moss or coconut coir—enough to cover them completely but not soaking wet. I like to use a shallow dish with a lid to maintain moisture. The key is keeping everything consistently moist without letting it dry out or become soggy.
Store the container in your refrigerator's vegetable crisper for 8-12 weeks. This cold, moist period mimics winter conditions and breaks the seed's dormancy. Check the moisture every 2-3 weeks—if the mix feels dry, spritz it lightly with water. You'll know it's working when you see tiny white roots emerging after about 6 weeks.
⏰ Step 3: Plant Stratified Seeds in Fall for Spring Growth
Once the seeds have been through their cold treatment, it's time to plant them outdoors. Choose a location with well-draining soil and partial shade—iris seedlings don't need full sun yet. Dig small holes about ½ inch deep and space them 2 inches apart in rows about 1 foot apart. This gives them room to grow without competing too aggressively.
Cover the seeds lightly with soil and water gently to settle everything. I like to mark the rows with small sticks so I don't accidentally disturb them when weeding. The goal is to let them overwinter in the ground, emerging in early spring when temperatures rise. You'll see the first tiny shoots in late winter or early spring, usually around February or March depending on your climate.
☀️ Step 4: Care for Young Iris Seedlings Through Their First Season
Once the seedlings appear, they'll need bright light but not direct midday sun—think morning sun and afternoon shade. Water them deeply once a week unless it's been unusually dry. You'll know they're getting enough water when the soil feels dry to the touch about 1 inch down. Too much water causes rot, so resist the urge to water more frequently.
By late summer, your seedlings will have developed small fans of leaves and a thickened rhizome—this is your sign they're ready to be transplanted to their permanent location. I wait until September when the weather cools slightly, and the plants have had time to establish strong roots. This timing gives them a full growing season before their first winter.
✂️ Step 5: Transplant and Mulch for Winter Protection
Dig up the young iris plants carefully, making sure to keep as much of the root system intact as possible. Transplant them to their final location, spacing them 12-18 inches apart in well-draining soil. Iris plants hate soggy roots, so if your soil is heavy clay, mix in some sand or grit to improve drainage.
After planting, water deeply and apply a 2-3 inch layer of mulch around the base of the plants. I use straw or shredded leaves because they break down slowly and help retain moisture. This mulch also protects the young plants from harsh winter temperatures. In the first winter, you may see some dieback, but don't worry—the rhizomes will survive and produce new growth in spring.
Tips & tricks for perfect iris seed pod germination
This cold-moist process isn't just about patience—it's about recreating nature's perfect conditions. Here's how to maximize your success with iris seed pods.
Selection Matters: The key to reliable germination starts with selecting the right seed pods. Look for pods that are fully brown and papery but haven't split open—this indicates they're mature enough for harvesting. I've learned the hard way that green or partially dried pods rarely produce viable seeds. Harvest in late summer when pods are naturally drying on the plant, and store them in a paper bag for a week to ensure complete maturation. This drying period helps break down the tough outer coating that would otherwise prevent germination.
Moisture Management: During the 8-12 week cold stratification, maintaining consistent moisture is absolutely critical. The peat moss or coconut coir should feel like a well-wrung sponge—damp but not soggy. I check moisture every 2-3 weeks by pressing my finger into the mix; if it feels dry at all, I give it a light spritz with water. The goal is to keep the seeds hydrated without creating anaerobic conditions that could cause rot. A shallow dish with a lid works perfectly for this as it maintains humidity while allowing for occasional moisture checks.
Timing is Everything: The 6-week mark when you first see tiny white roots emerging is your signal that the stratification is working. Don't rush to plant immediately—wait until you've completed the full 8-12 weeks in the refrigerator. This complete cold treatment ensures the seeds break dormancy properly. I've found that planting too early, even with root growth, often results in weak seedlings that struggle in the first winter. The extra weeks in cold storage give the seeds the complete dormancy-breaking treatment they need for reliable germination.
Outdoor Preparation: When selecting your planting location, prioritize well-draining soil above all else. Iris plants absolutely hate soggy roots, so if you're working with heavy clay soil, mix in sand or grit to improve drainage. I always plant in partial shade during the first season—this protects the delicate seedlings from intense midday sun while still giving them plenty of bright light. Marking your rows with small sticks helps prevent accidental disturbance when weeding, which is crucial for these tiny seedlings that have only just emerged from winter dormancy.
Pro Tips for Planting Iris Seed Pods
- This cold-moist process isn't just about patience—it's about recreating nature's perfect conditions.
- Selection Matters: The key to reliable germination starts with selecting the right seed pods.
- Moisture Management: During the 8-12 week cold stratification, maintaining consistent moisture is absolutely critical.
Frequently asked questions
Got questions about planting iris seed pods?
You’re not alone—growing irises from seed can feel tricky! Below, we tackle the most common concerns to help you succeed with your cold-moist trick strategy.
When should I collect iris seed pods?
Harvest seed pods when they turn tan or brown and begin splitting open—usually late summer to early fall. Wait too long, and the seeds may scatter or lose viability. Store them in a paper bag in a cool, dry place until planting.
Why do iris seeds need cold stratification?
Iris seeds require a cold-moist period (like winter) to break dormancy. This mimics natural conditions, helping seeds germinate reliably the following spring. Without it, germination rates drop dramatically—think of it as a "reset button" for the seed!
How long does cold stratification take?
For best results, stratify seeds for 6–8 weeks in moist peat moss or a damp paper towel, stored in a refrigerator (not freezer). After this, sow them outdoors in fall or early spring. Pro tip: Label your containers to track timing!
Can I plant iris seeds directly outdoors without stratification?
Yes, but success rates plummet. If you skip stratification, plant seeds in fall (when soil temps drop) and keep them moist. Germination may still happen, but it’s slower and less predictable. For guaranteed results, always stratify first!
What if my iris seeds don’t germinate?
Don’t panic! Try these fixes:
- Check moisture: Keep soil consistently damp (not soggy).
- Verify timing: Seeds may need another 2–4 weeks of cold treatment.
- Test viability: Cut open a seed—if it’s firm and plump, it’s likely good.
- Patience: Germination can take 6–12 months!
If all else fails, try fresh seeds from a reliable source.
Wrapping up and next steps
Growing irises from seed pods is a rewarding journey that blends patience with the joy of nurturing new life! 🌱 By mastering the cold-moist stratification trick, you’ll unlock reliable germination—just in time for next year’s blooms.
Whether you’re a seasoned gardener or a curious beginner, these steps make the process simple and exciting.
Ready to take the next step? Start by collecting your seed pods this fall and follow the cold-moist method. Once your seedlings sprout, transplant them into well-draining soil and watch your garden transform with vibrant irises. Happy planting—your future blooms will thank you! 🌸