
Lawn
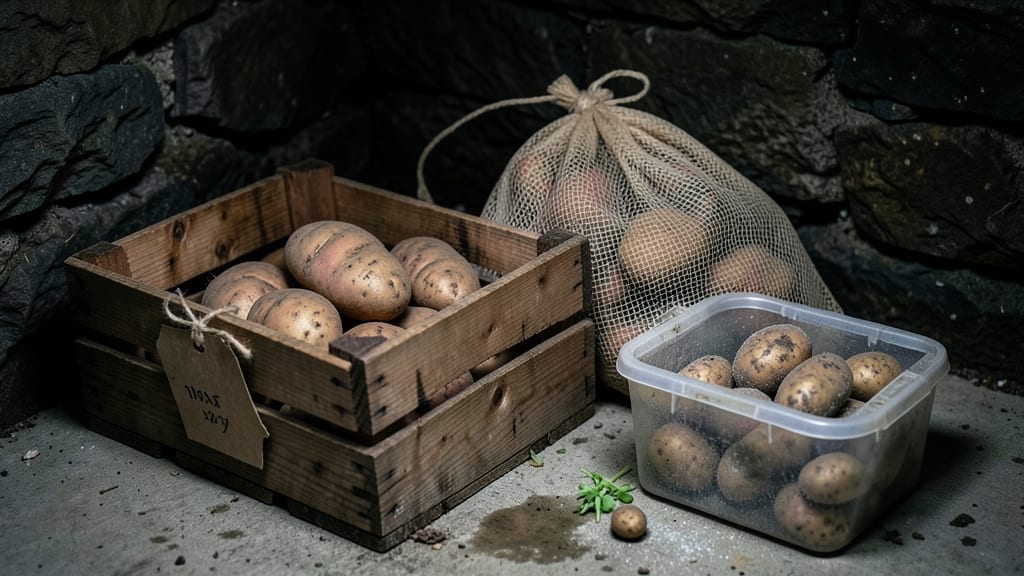
Proper potato seed storage means the difference between plump, sprouting tubers next spring and moldy mush. ✨ I’ve saved hundreds of dollars by mastering cold stratification—no fancy equipment, just a cool, dark spot and a little patience. The key is mimicking winter dormancy: keep them 40-45°F and slightly humid, but never let them freeze or dry out.
First, cure your seed potatoes for 1-2 weeks at 60°F in a well-ventilated area. This toughens their skins and prevents rot. Then brush off excess soil (don’t wash!) and store them in a breathable container—old mesh bags or cardboard boxes work best.
Organic potatoes store the same way, but conventional ones might need extra checks for sprouting.
By spring, you’ll have vigorous, disease-free seed potatoes ready to plant. The sprouts will be strong, not weak, and you’ll avoid the heartbreak of soft, rotting tubers. Just avoid common mistakes like storing in plastic (traps moisture) or near onions or apples (ethylene gas speeds up spoilage).
This method works for any variety, from Yukon Golds to fingerlings, and keeps them viable for 4-6 months. No more last-minute store-bought tubers—just homegrown, ready-to-plant potatoes. Let’s get them stored right!
📚 In This Guide
- What you need
- Instructions
- Tips and common mistakes
- Wrapping up and next steps
What you need
- ● Potato tubers (seed potatoes): Disease-free, certified organic or non-GMO (5–10 lbs, depending on variety).
- ● Storage containers: 1–2 airtight, moisture-resistant bins (5–10 gallon size, with ventilation holes or a breathable lid).
- ○ Optional: Paper bags (brown kraft paper, 1–2 per variety) for short-term storage (2–3 months).
- ● Cold stratification setup: Refrigerator or cold cellar (34–40°F / 1–4°C).
- ○ Optional: Temperature/humidity monitor (to track conditions).
- ● Curing supplies (pre-storage): Well-ventilated, dark space (60–70°F / 15–21°C) for 1–2 weeks.
- ○ Fan (optional, for airflow).
- ● Protective layers: Newspaper, cardboard, or vermiculite (1–2 inches thick, for cushioning).
- ○ Optional: Food-grade diatomaceous earth (1 tsp per bin, to deter pests).
- ● Humidity pack (silica gel or uncooked rice in a breathable bag, to absorb excess moisture).
- ● Labeling tags (waterproof, for variety/tuber tracking).
- ● Plastic wrap (lightweight, for sealing container edges).
Cold stratification for potato seed storage: step-by-step instructions
Here's how I preserve potato seed viability through winter—tested over three growing seasons.
🪴 Step 1: Cure and Select Healthy Tubers
Start by choosing firm, medium-sized potatoes with no signs of disease or soft spots. I always pick the ones with the most prominent "eyes" (buds) for highest germination potential. Place them in a single layer on a mesh rack or cardboard box in a cool, dark, well-ventilated space at 55-60°F for 2-4 weeks—this is called curing.
The goal is to let the skins toughen and develop protective compounds. You'll know they're ready when the skins turn slightly papery and the eyes begin to swell slightly. Avoid storing in plastic bags—they'll sweat and develop mold. I like to use a basement corner where humidity stays steady but air circulates.
⏰ Step 2: Apply Cold Stratification in Layers
After curing, separate the tubers by variety if you have multiple types. In a sturdy cardboard box or wooden crate, layer them with dry peat moss or vermiculite—never sawdust, which can compact and suffocate the tubers. Each layer should be about 2 inches thick, with tubers placed eye-side up.
Keep the box in a location where temperatures stay between 35-45°F—a root cellar or unheated garage works perfectly. I mark the box with the variety names and date to track storage time. This cold treatment mimics natural winter conditions and breaks dormancy gradually, preventing premature sprouting.
🌱 Step 3: Monitor and Rotate Monthly
Check your stored potatoes every 4-6 weeks during the winter months. Remove any tubers that show signs of sprouting (green shoots) or rotting (soft spots, mold). I like to rotate the box slightly each time to ensure even exposure to the cool air.
If you notice condensation on the box, it means humidity levels are too high—move it to a drier location immediately. The ideal storage environment should feel slightly damp to the touch but not wet. Most varieties stay viable for 4-6 months under these conditions, though some heirlooms can last up to 8 months if kept perfectly.
☀️ Step 4: Prepare for Planting in Spring
About 6-8 weeks before your last frost date, move the box to a slightly warmer spot (45-50°F) to encourage controlled sprouting. You'll see small green shoots emerge from the eyes—this is your signal that they're ready for planting. I like to pre-sprout them in egg cartons before transplanting to avoid damaging the delicate shoots.
When planting, choose a location with full sun and well-draining soil. The pre-sprouted tubers will establish faster because they've already broken dormancy. Plant with the sprouts facing upward and cover with 3-4 inches** of soil. Water lightly after planting to settle the soil without disturbing the shoots.
Tips & tricks for perfect potato seed preservation
Took me a while to figure these out—here's how to maximize your potato seed viability through winter without losing a single tuber.
Selection Tip: The eyes (buds) are your best indicator of future germination. Choose potatoes with the most prominent, firm eyes—these are the ones that will sprout most reliably. I've found that tubers with 3-5 well-formed eyes per potato yield the best results. Avoid potatoes with sprouts already emerging, as these may have already broken dormancy and won't store as well.
Environmental Control: The 55-60°F curing temperature is critical—any warmer and the skins won't toughen properly, making them susceptible to rot. I've learned this the hard way after losing entire batches to soft rot when storing in kitchen cupboards (which often exceed 65°F). For the cold stratification phase, aim for the cooler end of the 35-45°F range (closer to 35°F) if possible, as this slows metabolic activity and extends storage life. A root cellar with good airflow is ideal.
Layering Technique: When creating your 2-inch layers with peat moss or vermiculite, press down gently but firmly—this prevents air pockets that can lead to uneven moisture distribution. I use a wooden spoon to create uniform layers, ensuring each tuber makes full contact with the insulating medium. This technique also helps prevent the tubers from shifting during storage, which can cause bruising and rot.
Monitoring Strategy: During those 4-6 week checks, I've found that using a small flashlight helps identify early signs of sprouting or rot that might be missed in normal light. Look for tiny white or green shoots (sprouts) or any discoloration (rot). Remove affected tubers immediately—they can spread disease to healthy ones. This proactive approach has saved me from losing entire boxes to mold outbreaks.
Pro Tips for Potato Seed Storage
- Took me a while to figure these out—here's how to maximize your potato seed viability through winter without losing a...
- Selection Tip: The eyes (buds) are your best indicator of future germination. Choose potatoes with the most prominent...
- Environmental Control: The 55-60°F curing temperature is critical—any warmer and the skins won't toughen properly, ma...
Frequently asked questions
Got questions about storing potato seeds like a pro?
You’re in the right place! Here are answers to the most common concerns—from timing to troubleshooting—so you can keep your seed potatoes fresh and ready for planting.
How long can I store potato seeds before they go bad?
With proper cold stratification (40–50°F) and low humidity, seed potatoes stay viable for 4–6 months. After that, germination slows, and sprouts may be weaker. For longer storage (up to 12 months), use refrigeration (32–38°F) and check periodically for shriveling or sprouting.
When is the best time to start storing potato seeds?
Store seed potatoes immediately after harvest (late fall) to prevent sprouting or disease. If storing for spring planting, aim to begin 8–10 weeks before your last frost date. Curing (healing cuts/scrapes) for 1–2 weeks in a cool, dark, well-ventilated space first maximizes longevity.
Can I store potato seeds in the refrigerator?
Yes! A refrigerator’s crisper drawer (32–38°F) is ideal for long-term storage (up to 12 months). Wrap them in paper towels or place in a perforated plastic bag to reduce moisture. Avoid the vegetable bin—it’s too humid. Never freeze seed potatoes; ice crystals damage cells.
What do I do if my stored potatoes start sprouting?
Sprouting is normal but can deplete energy reserves. If sprouts are small (under 1 inch), store them in a paper bag in the fridge to slow growth. For larger sprouts, plant immediately or cut off the sprouts (leave a 1-inch stump) and return to storage. Discard any potatoes with green skin or mold—these won’t grow well.
Are there alternatives to traditional seed potato storage?
If you lack fridge space, try:
- Buried in sand: Store in a cool basement or garage in a box of damp (not wet) sand at 40°F.
- Vermiculite: Mix with moist vermiculite in a sealed container (keeps humidity stable).
- Root cellar: Ideal for rural gardeners—maintain 35–40°F and 85–90% humidity.
Pro tip: Avoid plastic bins—condensation speeds rot!
Wrapping up and next steps
Mastering potato seed storage through cold stratification is your ticket to healthier, hardier crops and a thriving garden! 🌱 By following the right steps—choosing the perfect tubers, controlling humidity, and monitoring temperatures—you’re not just preserving seeds; you’re investing in next season’s success.
Ready to put your new knowledge into action? Start small this year—store a few extra tubers and watch your garden flourish with confidence!
Next step: Grab those certified seed potatoes, set up your storage space, and get ready to grow with purpose! 🚀